ADP Workforce Now
Learn how to integrate your ADP Workforce Now account with GroWrk to improve your HR workflow.
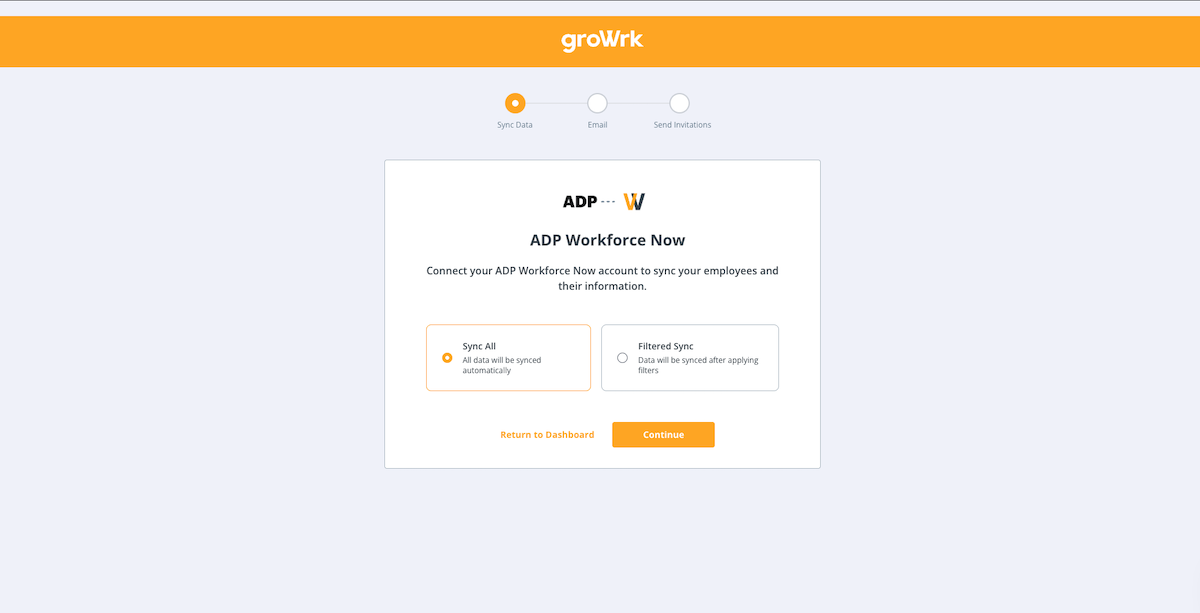
Connect your account
- Choose whether to sync all your data or use filters to curate the data that is synced to your GroWrk account.
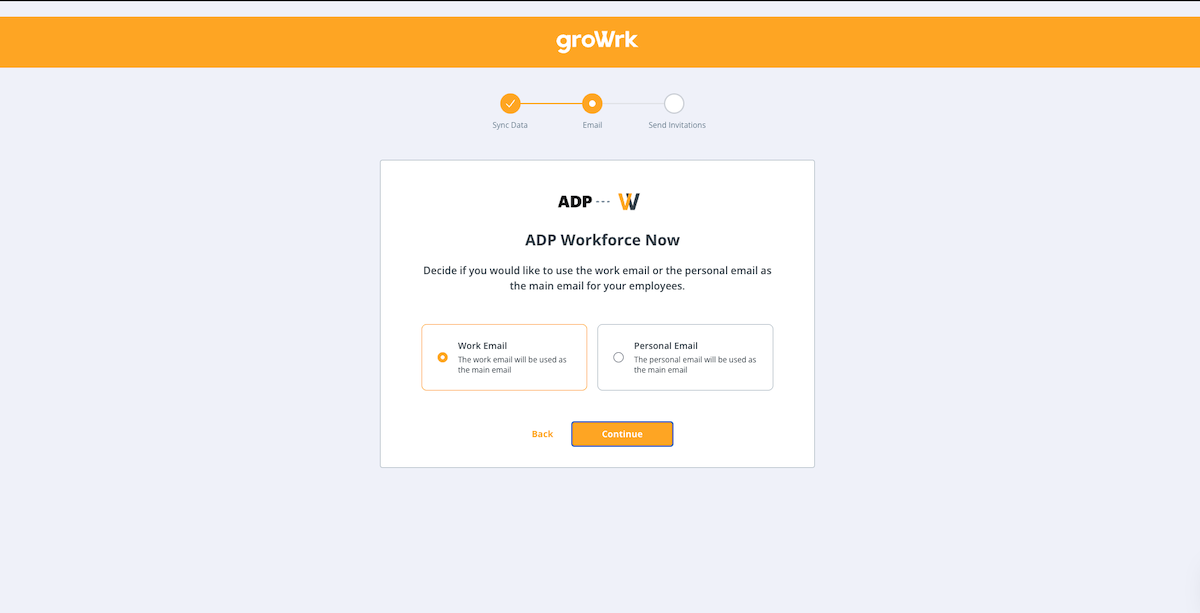
- Choose whether to use your employees’ work or personal emails as their main email. Select Continue.
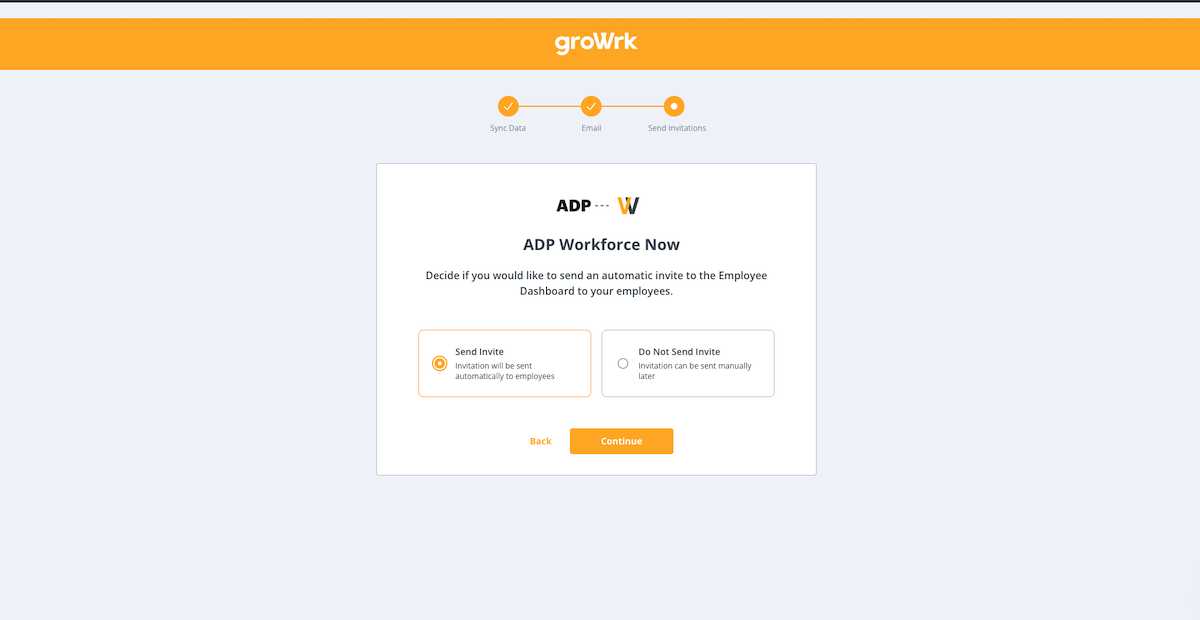
- Choose whether to send invitations to the Employee Dashboard for your employees to access product updates and confirm package deliveries.
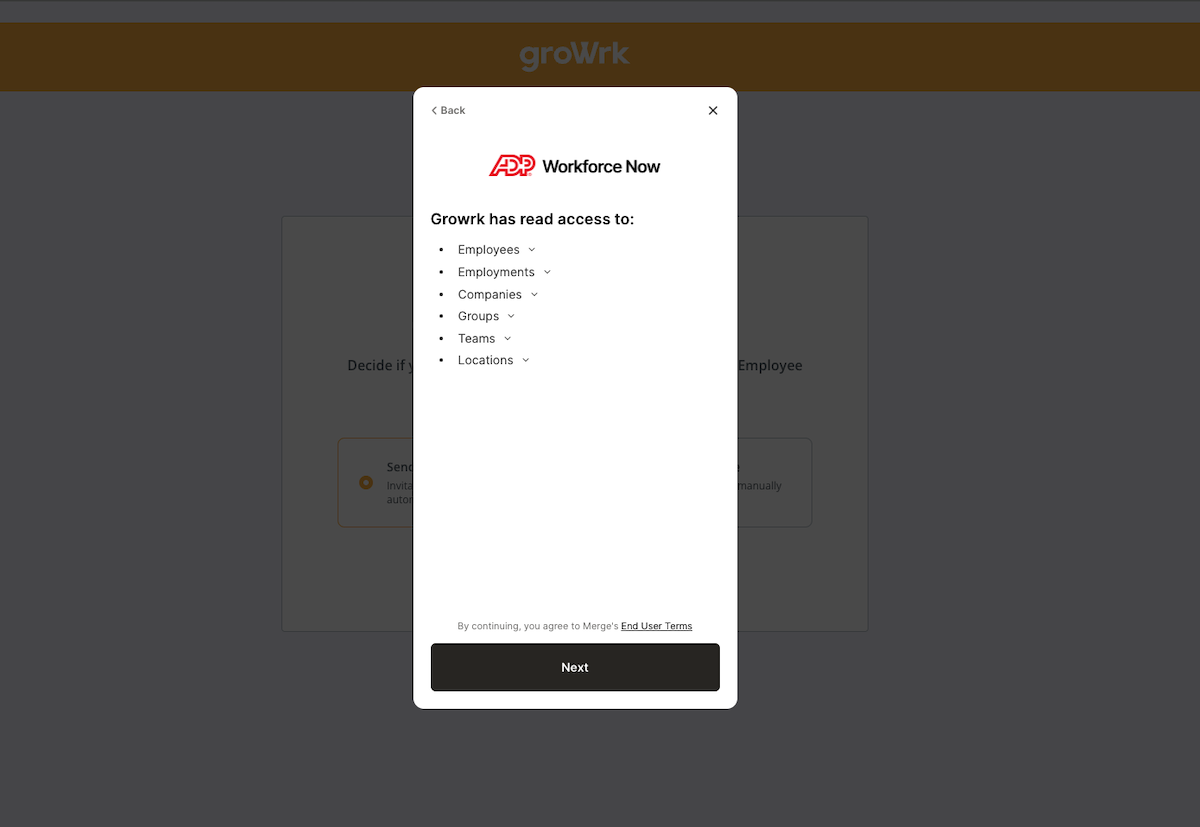
- An administrator role is required to continue. Select I am an admin.

- GroWrk will have access to the following information from your account. Select Next.
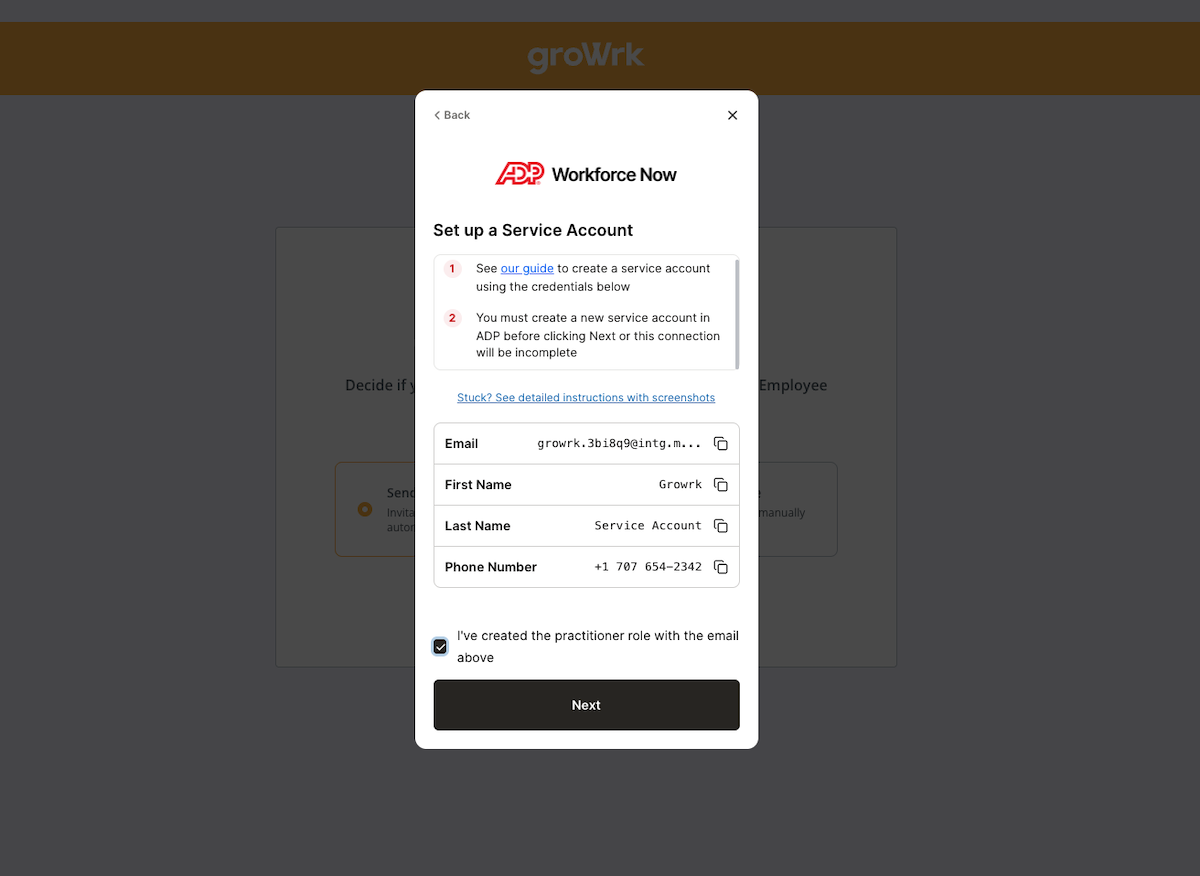
- You will need to set up an ADP service account. Follow the steps in the next section to set up your account through ADP Workforce Now.
Create an ADP Workforce practitioner role
To create a practitioner role and link your account:
- You must be an Administrator in your company's ADP instance, or someone has shared their access with you.
- You are not a user of ADP Workforce Now Canada.
Create a profile with access to reports
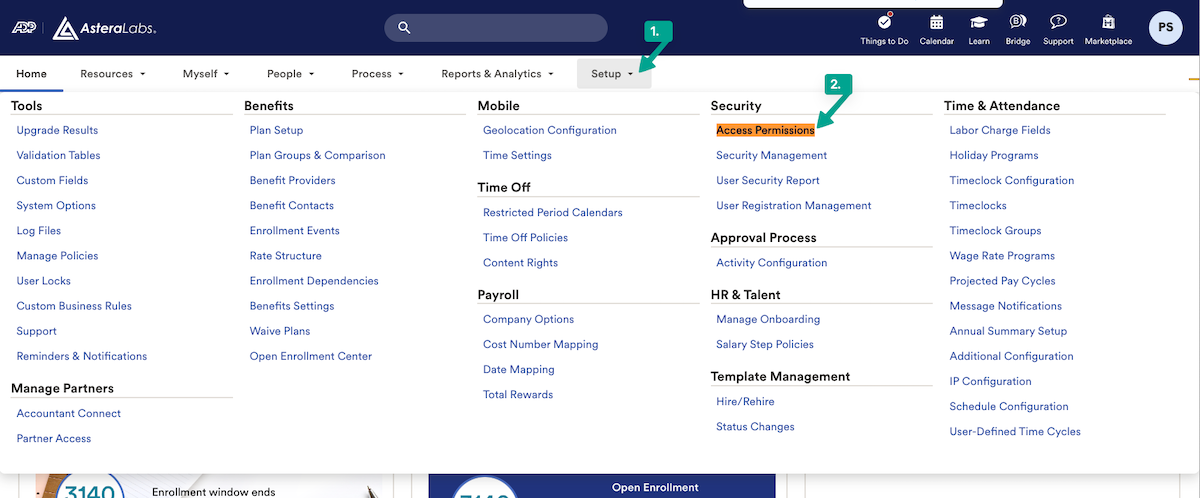
- In your ADP Workforce Now account, go to Setup and select Access Permissions.
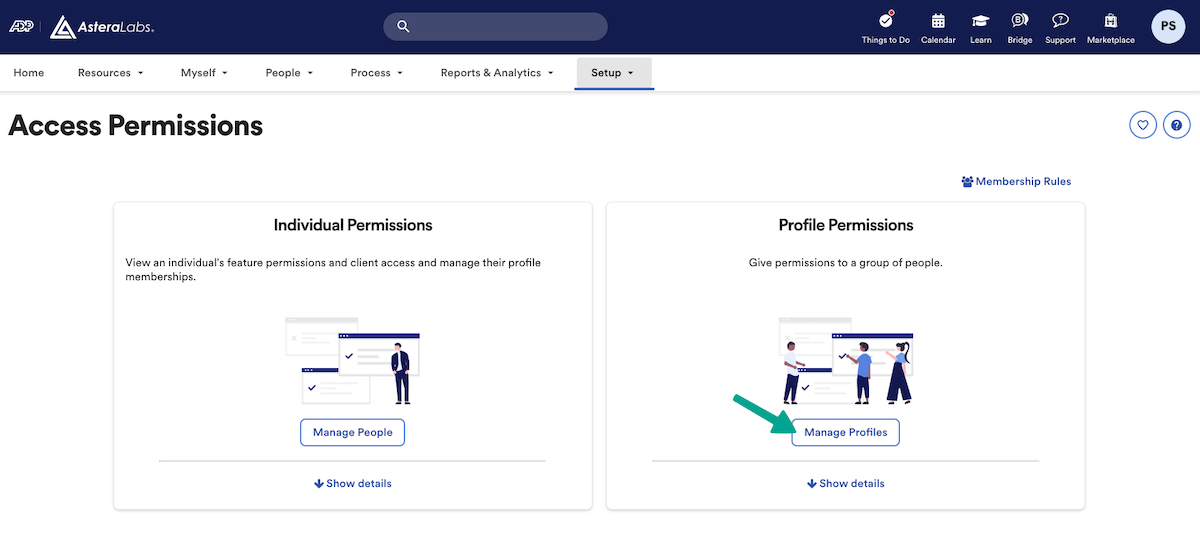
- Select Manage Profiles → Create Profile.
- Enter a profile name, then select Practitioner for the Role field.

Give your service account access to securely sync your data
- In the previous modal, select Create Profile. You’ll be navigated to a new page.
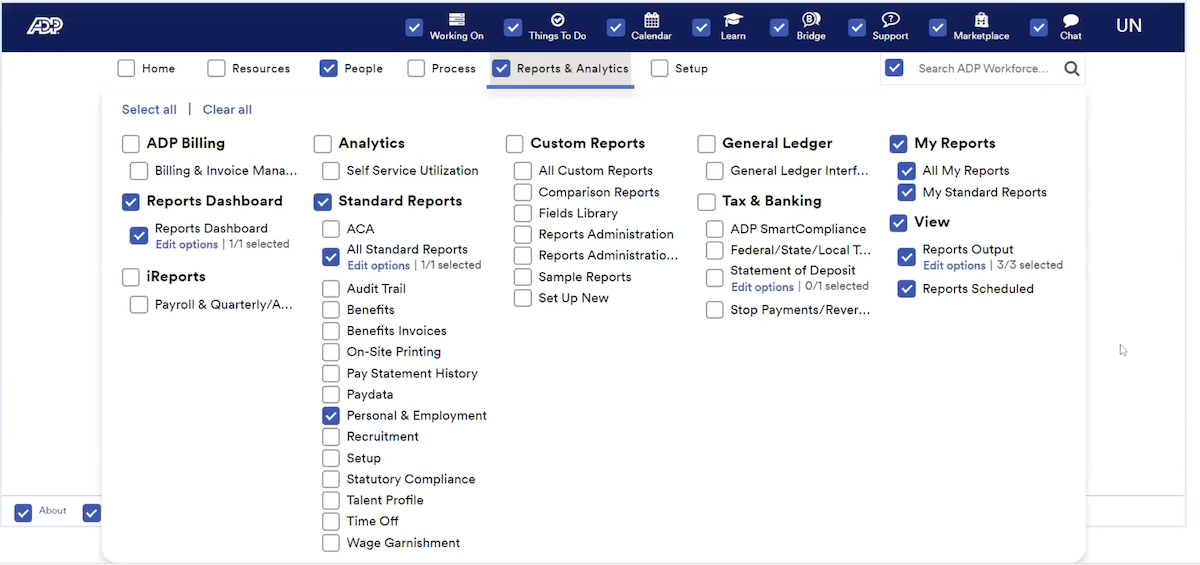
- In the Menus & Features page, go to Reports & Analytics to make sure the following boxes in are checked. These boxes are required:
- My Reports
- All Reports
- My Standard Reports
- View
- Reports Output
- Reports Scheduled
- Reports Dashboard
- Reports Dashboard
- Standard Reports
- All Reports (only grants access to report types that are otherwise checked)
- Personal & Employment
- My Reports
- If you need additional data for the integration, select the following under Standard Reports:
- Benefits for Benefits data (Optional)
- Pay Statement History for Pay data (Optional)
- Time Off for Time Off data (Optional)
- Go to People and make sure the following boxes are checked. These boxes are required:
- Employee Profile Report
- Employment Profile
- Personal Profile
- If you need Payroll data, select Pay at the top (Optional)
- If you need Time Off, Time and Attendance, Payroll, or Benefits data as part of this integration:
- Under People permissions, click SELECT ALL in the top left.
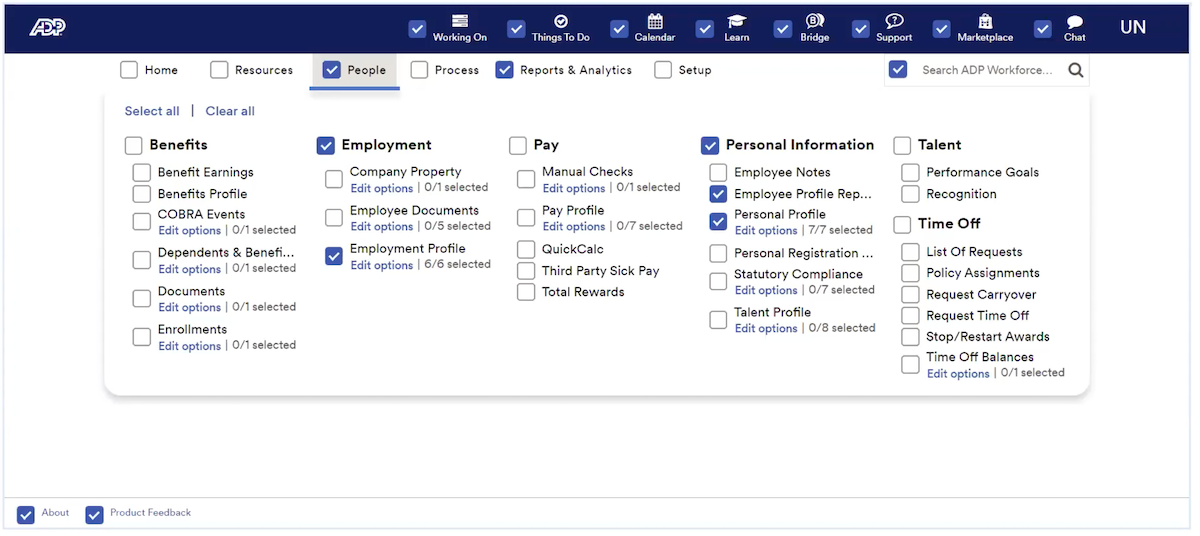
- Under People permissions, click SELECT ALL in the top left.
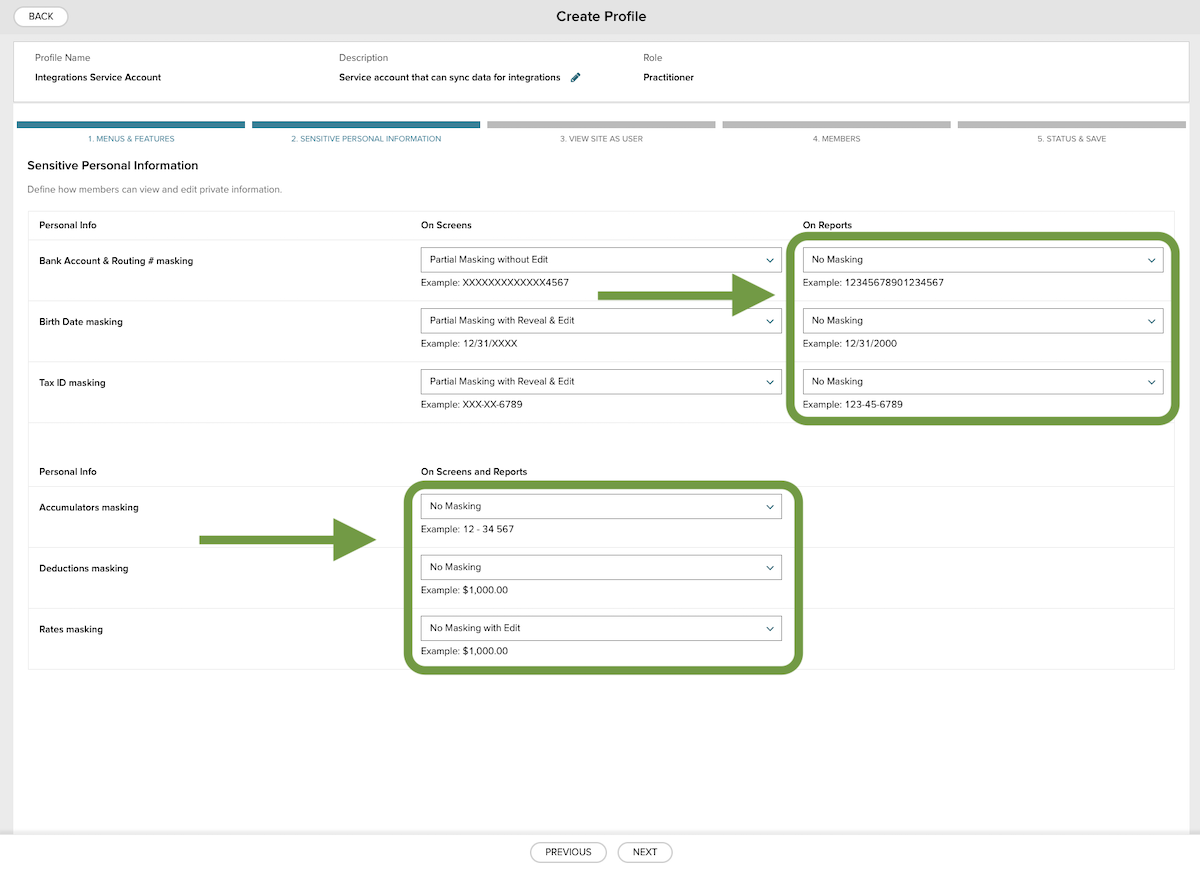
- In Sensitive Personal Information, go to On Screen & Reports and On Reports, and from the dropdown menu select No Masking, Partial Masking, or Masking. This will allow the service account to securely sync your complete data set. (Optional)
- If you do not want to sync over information such as birthdate, SSN, or bank information, you must mask this information.
- Rates masking will need to be set to No Masking for employment effective dates to sync.
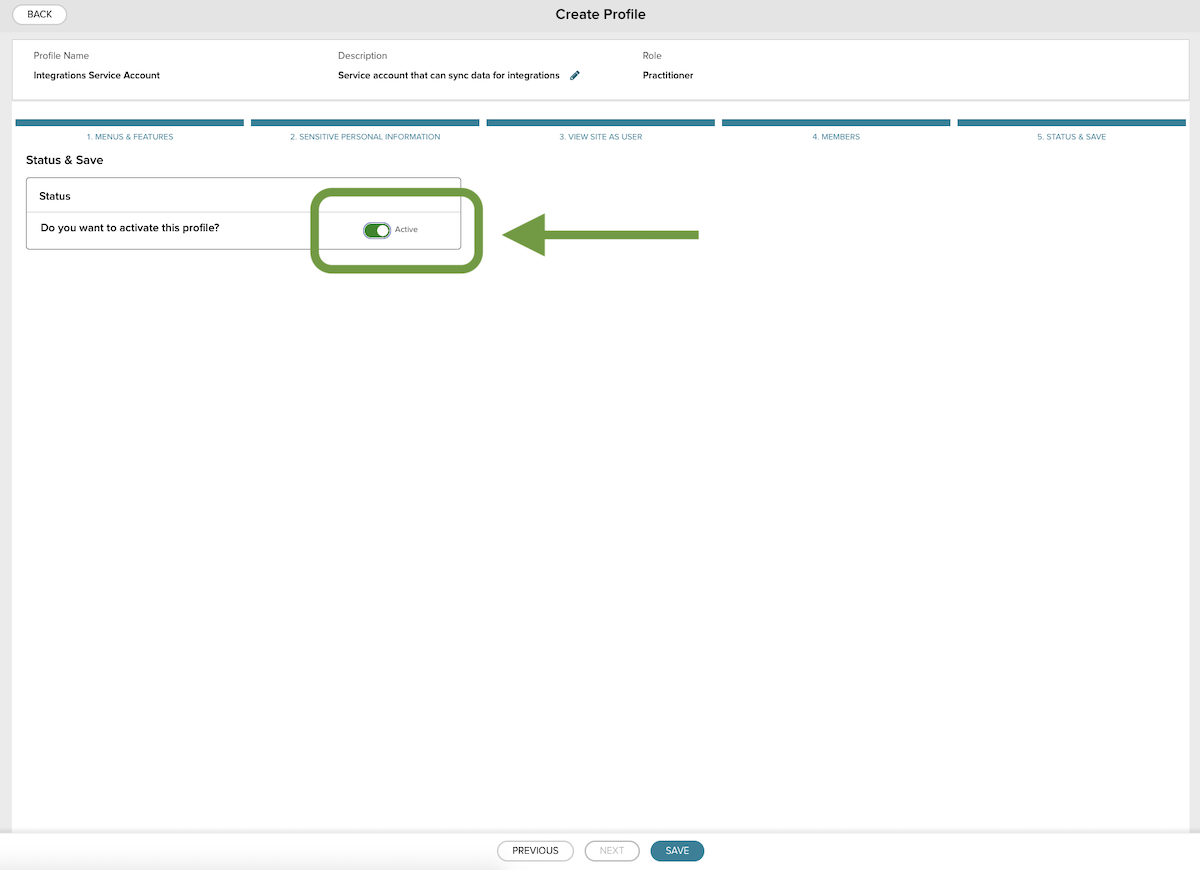
- On the last screen, Status & Save, activate the profile using the toggle, and then select Save below.
Create a new user and assign it to your Integrations Service Account profile
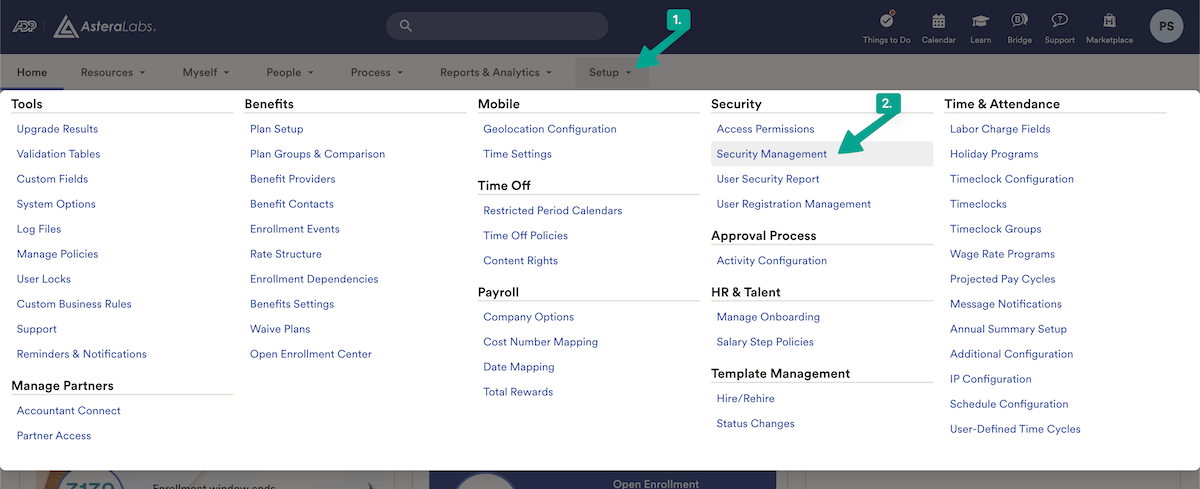
- From the Setup menu, select Security Management.
- In Security Management, select People, then Manage Users and + to add a user.
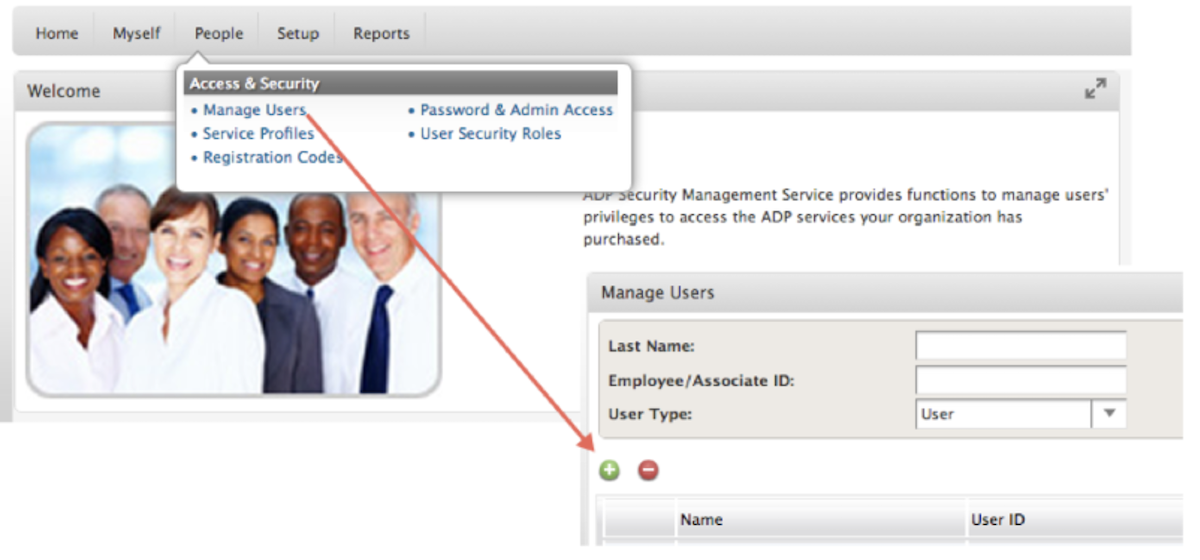
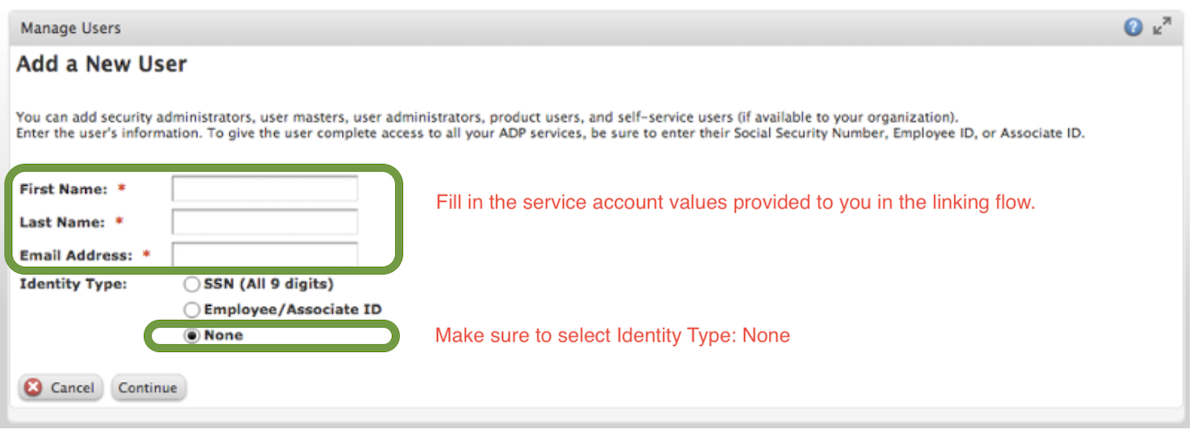
- Fill in the fields on the Add a New User page, using the fields displayed in your GroWrk flow. See an example below:

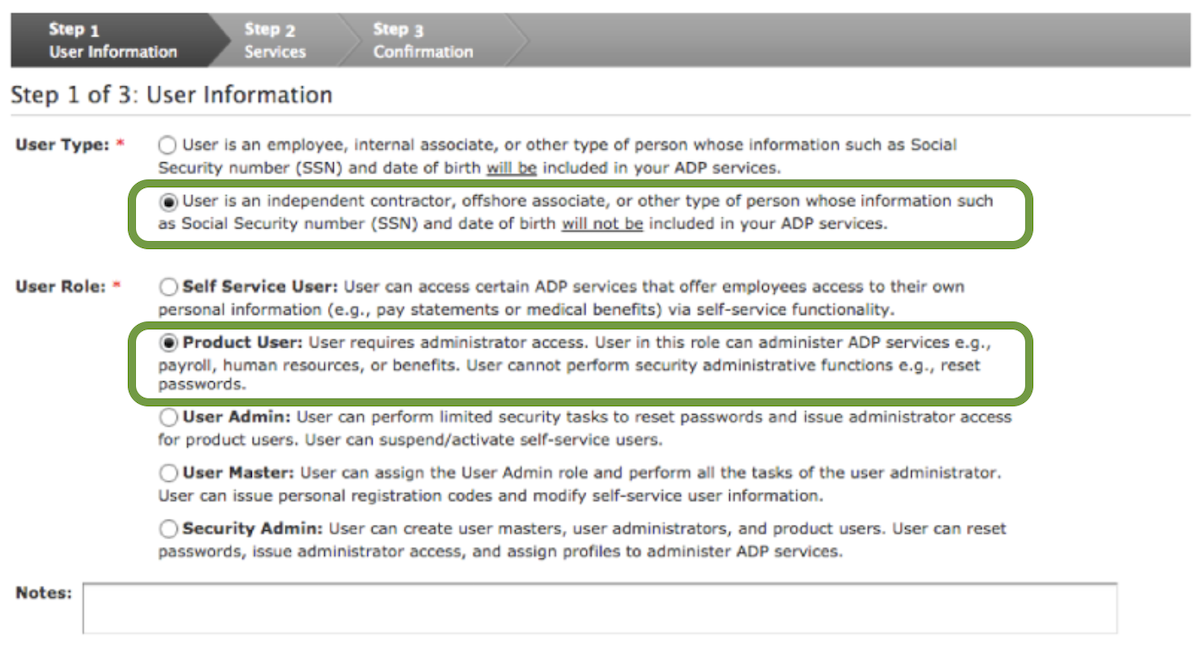
- In Step 1, set the User Type to the “User is an independent contractor...” option, and then set the User Role to “Product User”.
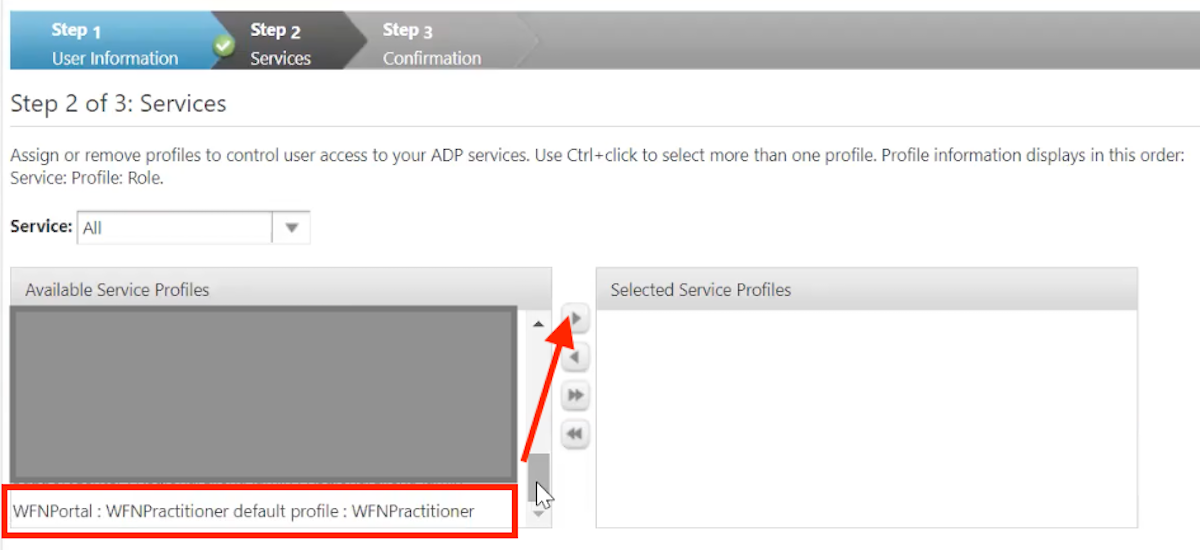
- In Step 2, assign the profile by selecting WFNPractitioner in the “Available Service Profiles” box and move it to “Selected Service Profiles”.
- Continue to Step 3, and confirm the new user. A username will be auto-generated for this user.
Connect the service account user to the service account profile
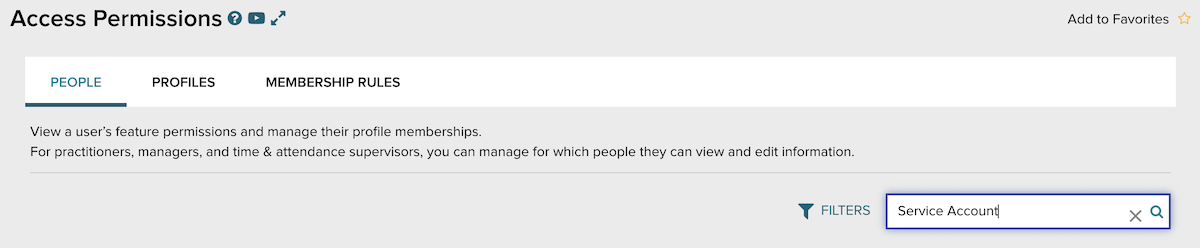
- Go back to your Workforce Now portal, and return to the Access Permissions page to find the Manage People page.
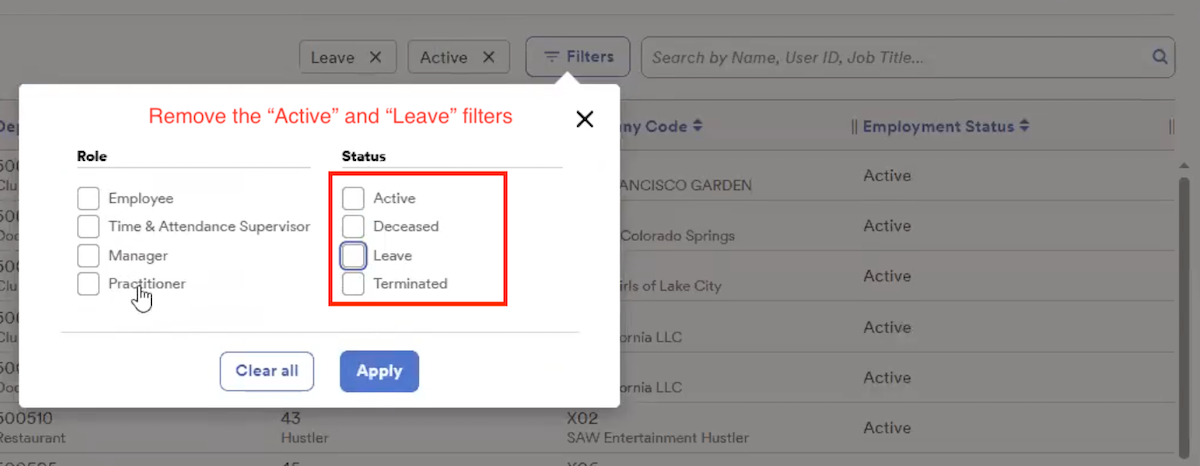
- Search for Service Account for the new user (which will display their last name). If the service account is not showing in the search, select the Filters button next to the search bar and uncheck any active filters (typically Active and Leave).
- Select the user to pull up User Access Permissions, and select Manage Profile Memberships. Add the Service Account Profile that you created to the user. Select Save.

- Now that the service user has the right profile associated, verify that the Menus & Features and Sensitive Personal Information for this user match what you set up in the profile earlier.
- Lastly, in People Access, under Service Account Currently Has, enable View Only Access to all People (if needed, change access to people by clicking Change Access highlighted below). Select View List of Selected People and make sure that list is not empty. This is needed to view employees (including those terminated).

Return to GroWrk and authenticate
Back to GroWrk, use the checkbox to confirm that you've create the practitioner role. Select Next.
Synced Fields
These fields are synced from ADP Workforce Now to GroWrk:
- Display Full Name
- Work email
- Personal email
- Employment status
- Employment type
- Start date
- Teams
- Location
Note: The Location filter in ADP Workforce Now syncs with Delivery Address in GroWrk.
Filters
If you chose to filter your sync, you’ll be redirected to the Integrations Setup page and there will be 4 different filters to apply to your data:
- “Countries” allows you to select countries you’d want to include or exclude in your synced data.
- “Teams” allows you to select the teams within your company that you’d want to include or exclude in your synced data.
- “Status” allows you to filter by active or inactive devices within your inventory.
- “Employment” allows you to filter by employment status (full-time, part-time, contractor, etc.).
These filters are designed to be cross-referenced. Whether you’re looking to import data of your employees on a specific team located in a certain region, or any other parameter, these new filters are designed to refine your company data to your preference.
Resync
The ADP Workforce Now integration automatically updates every hour. You may manually resync your data using the Update button found in the Set up tab on the integration page.