Workday
Learn how to connect your Workday account to your Dashboard and sync your company information to improve your HR workflow.
Connect your account
- Choose whether you’ll sync all your data or use filters to curate what data is synced to your GroWrk account. Select Continue.
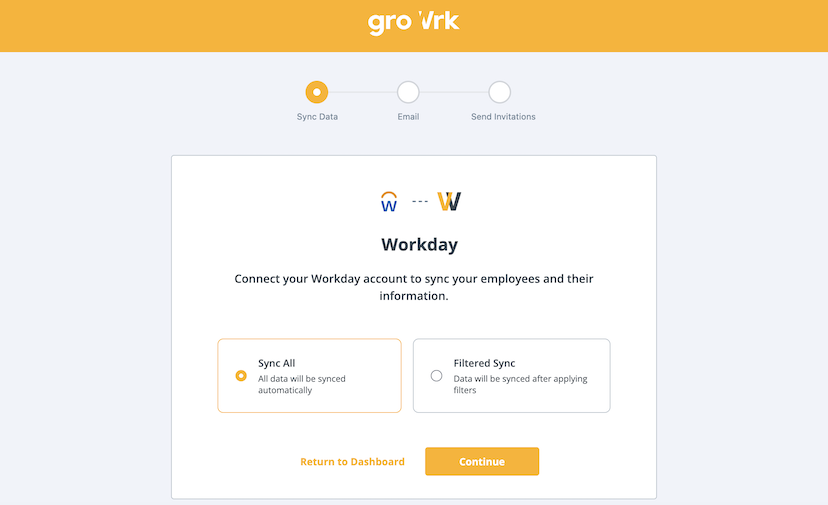
- Choose whether to use your employee’s work or personal email as the main email. Select Continue.
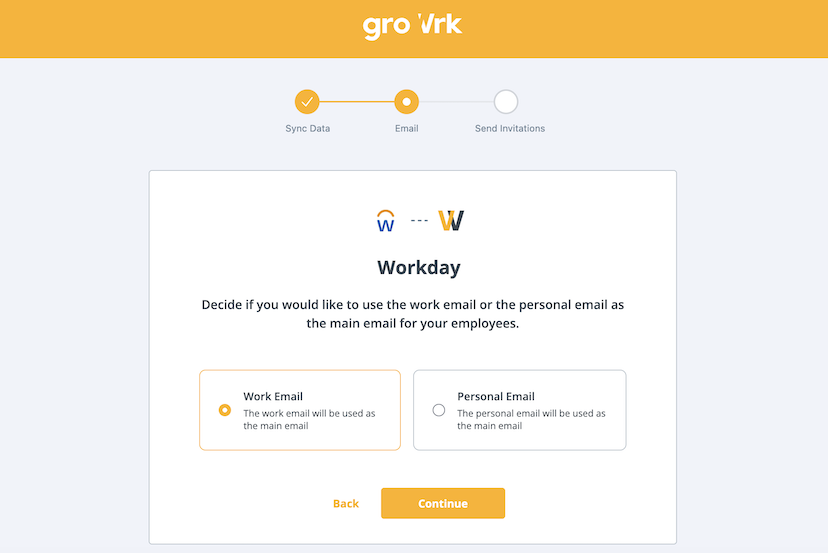
- Choose whether to automatically send invitations to the Employee Dashboard to your employees. Select Continue.
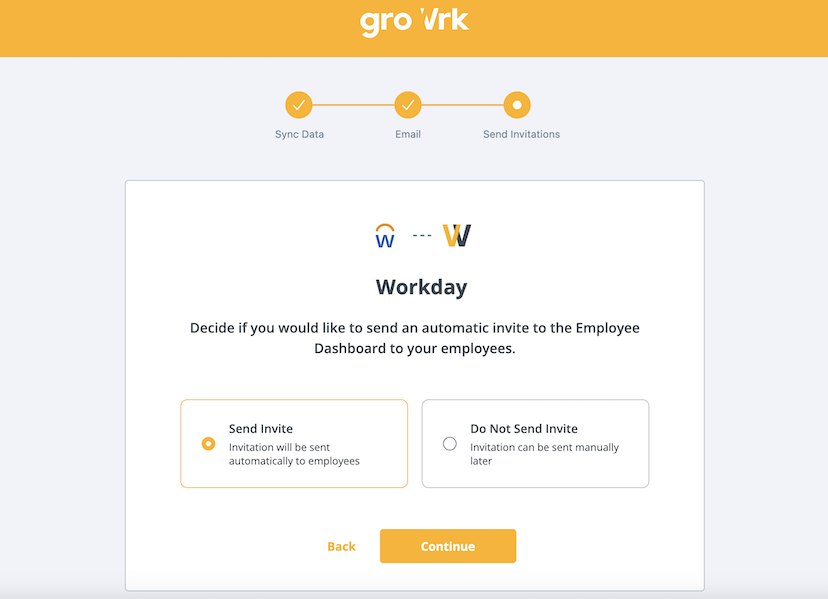
To complete the connection of your account, the following steps will cover setting the correct permissions within your Workday portal.
Create a Workday ISU
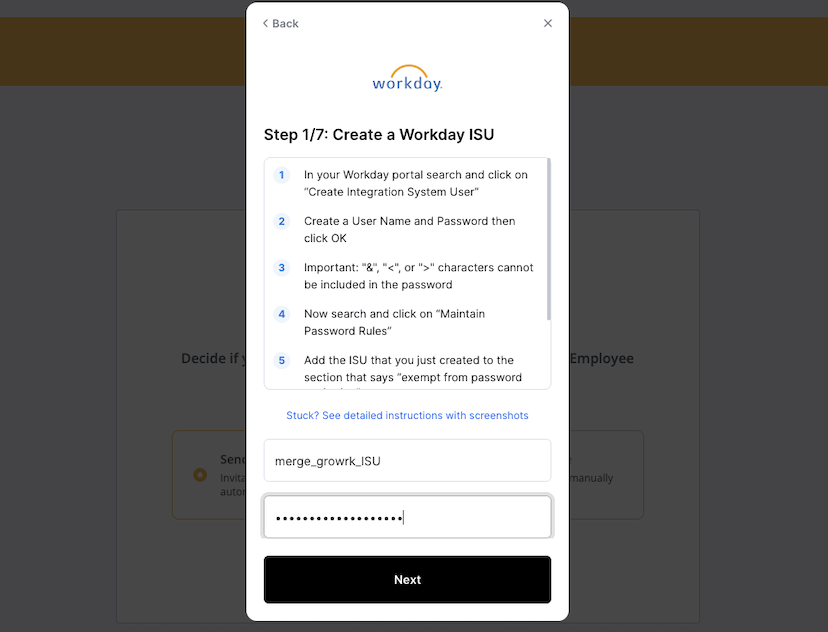
- Log in to your Workday portal.
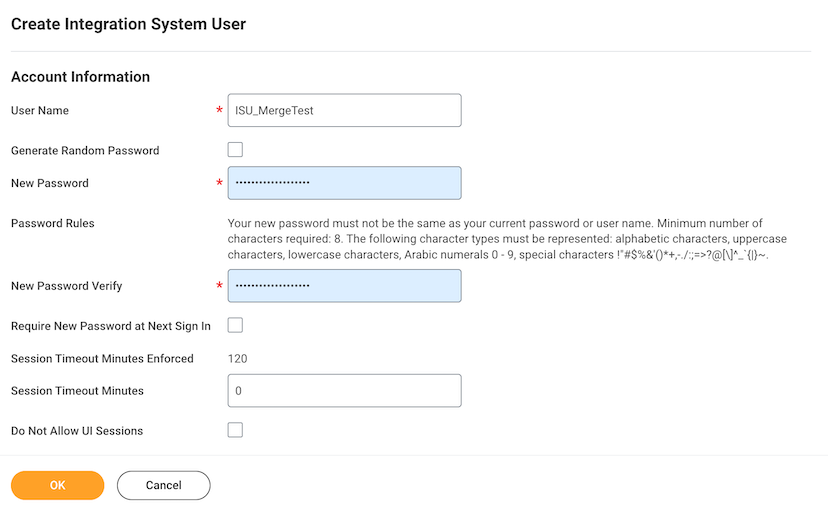
- In the Search field, enter Create Integration System User. Select the Create Integration System User task.

- In the Account Information section, enter a user name, then enter and confirm a password.
- Select OK.
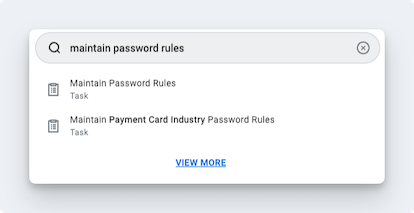
- Add this user to the system of new users to ensure the password doesn’t expire. In the search field, enter Maintain Password Rules and select the task.
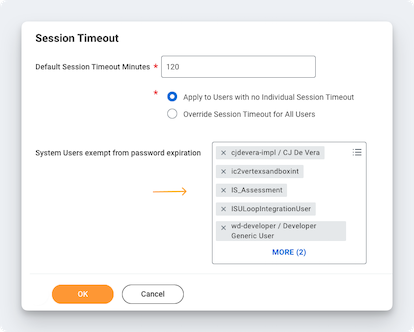
- In the System Users exempt from password expiration field, add the ISU.
- Navigate back to GroWrk. Enter the ISU and password, and select Next.
Create a security group
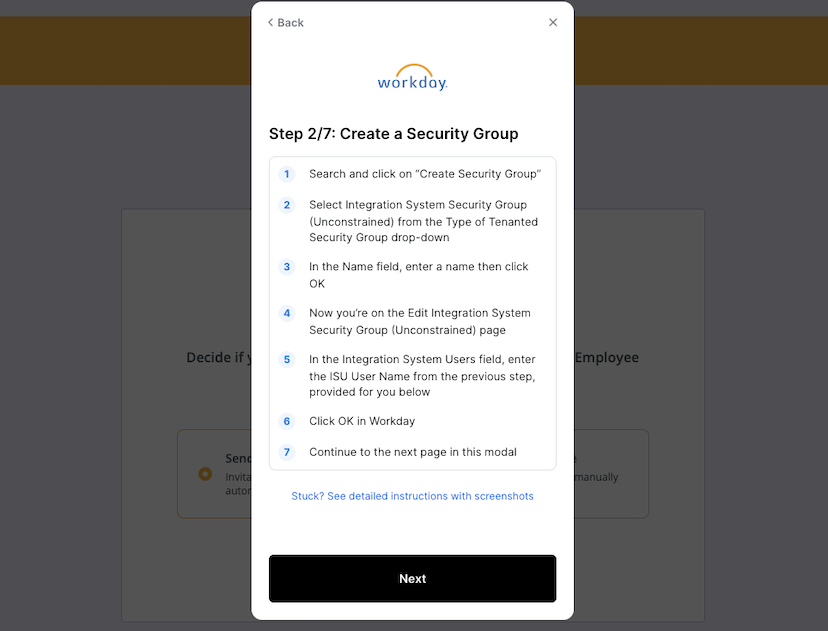
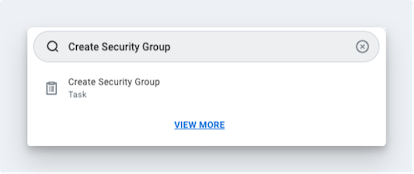
- In the Search field, enter Create Security Group and select the task.
- Select Integration System Security Group (Unconstrained) from the Type of Tenanted Security Group drop-down.
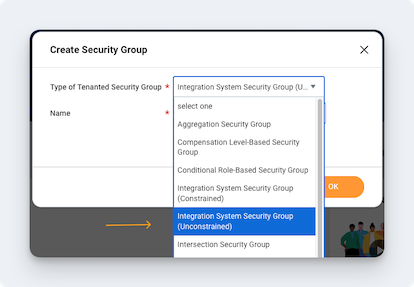
- In the Name field, enter a name.
- Select OK.
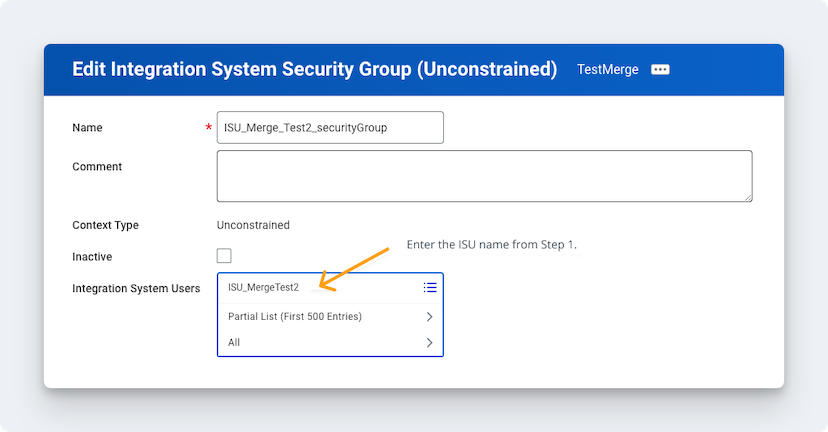
- On the Edit Integration System Security Group (Unconstrained) page, in the Integration System Users field, enter the same name you entered when creating the ISU.
- Select OK.
- Navigate back to GroWrk and select Next.
Configure your permissions
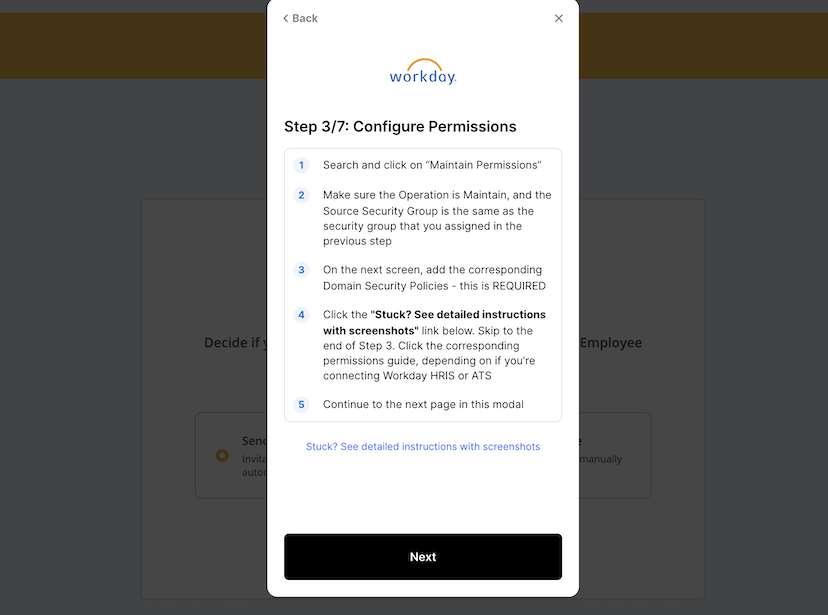
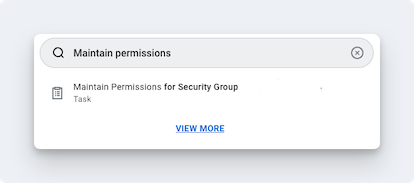
- In the Search field, enter Manage Permissions for Security Group and select the task.
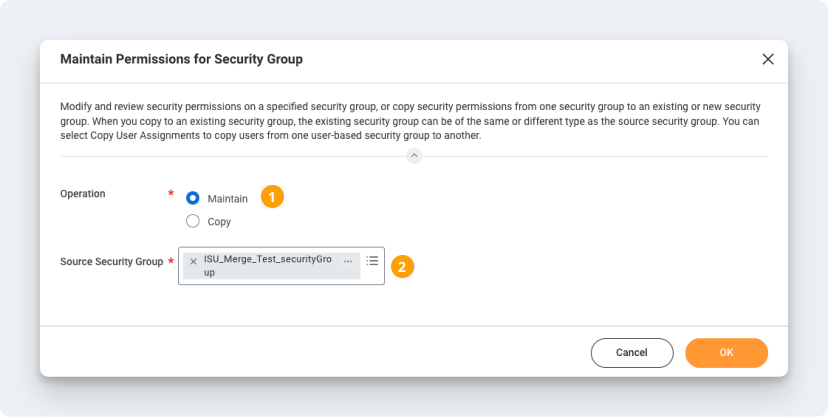
- Set the Operation to Maintain, and the Source Security Group as the same as the security group that was assigned in the previous step.
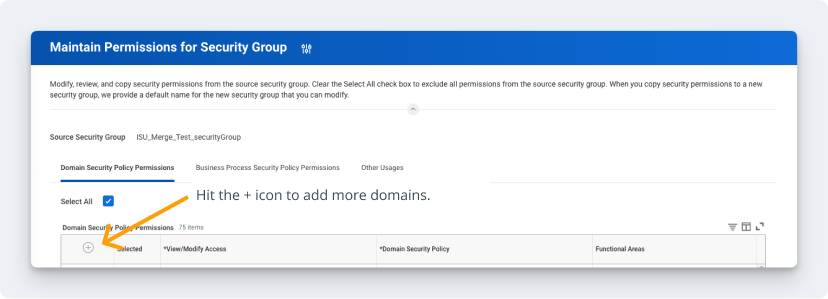
- Add the corresponding Domain Security Policies depending on your use case. If you are connecting Workday HRIS, add HRIS Permissions. If you are connecting Workday ATS (Recruiting), add ATS (Recruiting) Permissions.
- Navigate back to GroWrk and select Next.
Activate the security policy changes
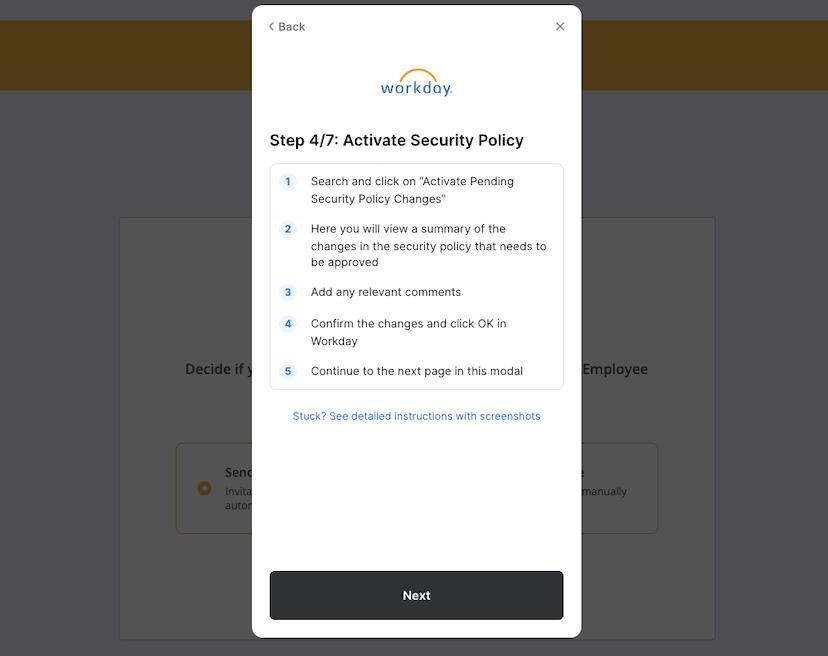
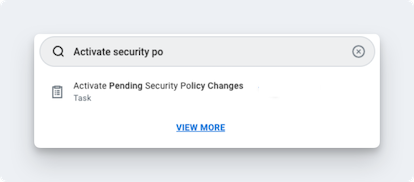
- In the Search field, enter Activate Pending Security Policy Changes and select the task.
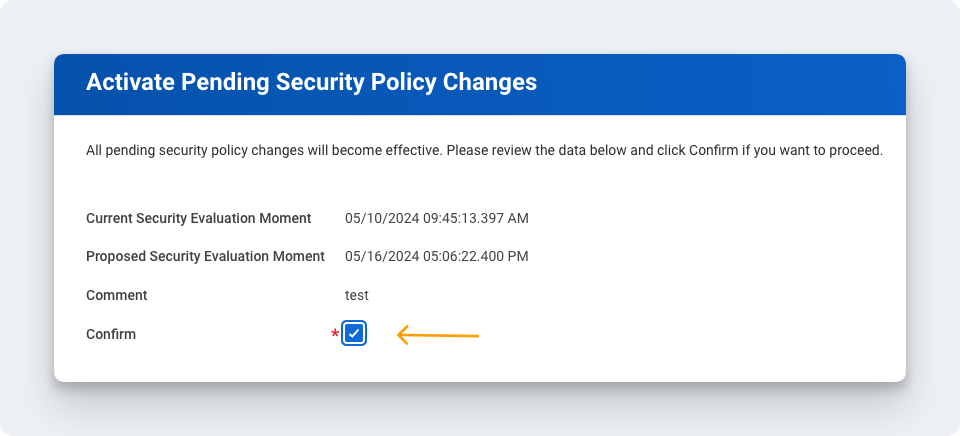
- Add any relevant comments on the popup window.
- Select the Confirm checkbox to accept the changes that are being made. Select OK.
- Navigate back to GroWrk and select Next.
Validate the authentication policy
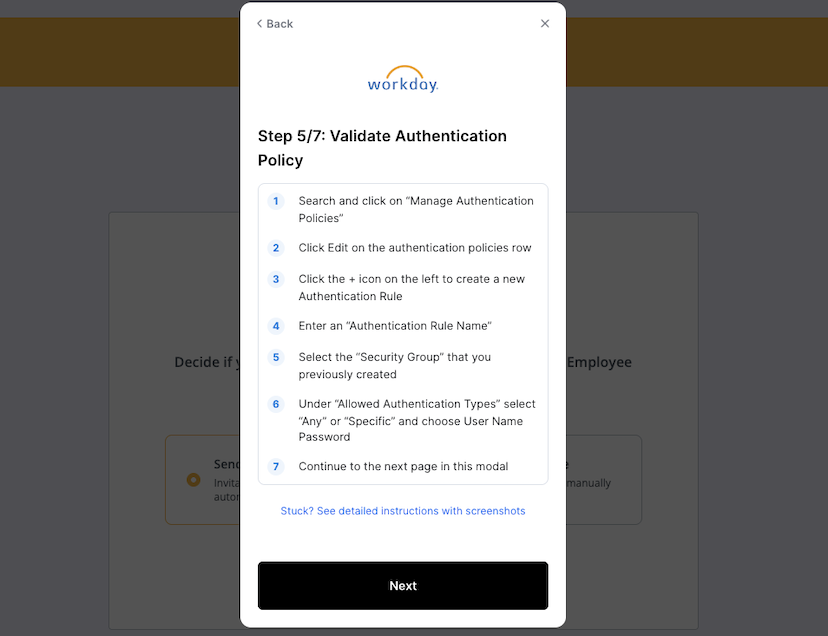
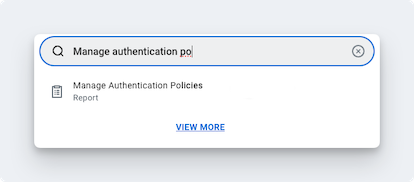
- In the Search field, enter Manage Authentication Policies and select the task.
- Select the Edit button.
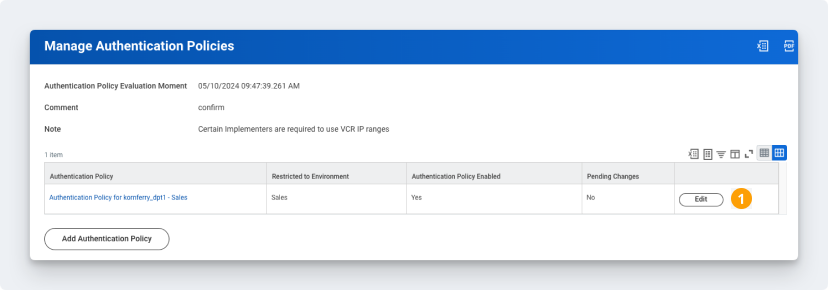
- Create an Authentication Rule by selecting the + icon.
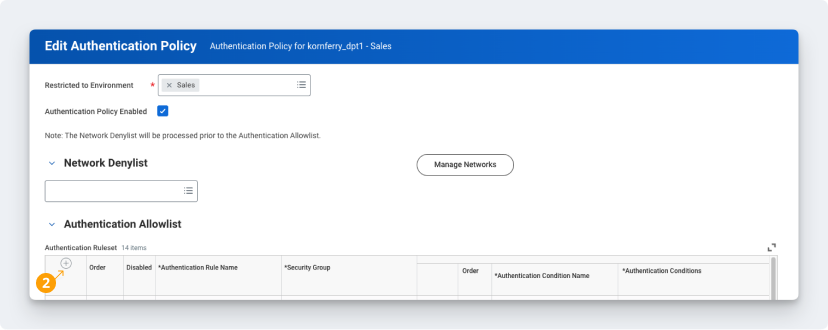
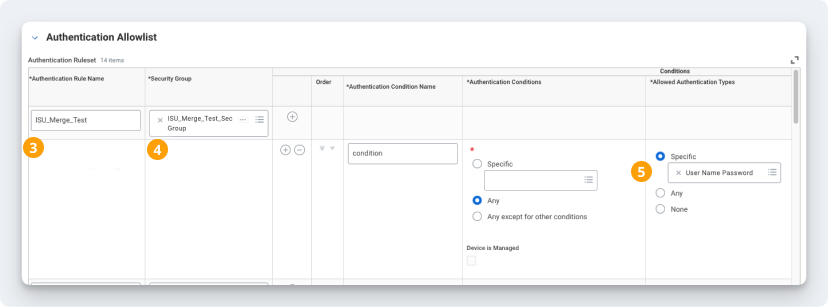
- Enter a name, add the Security Group, and set Allowed Authentication Type to “Specific User Name Password” or “Any”.
- Navigate back to GroWrk and select Next.
Note: You will need to create a new rule if SAML is the only Authentication Rule in the Allowed Authentication Types section. You do not need to create a new Authentication Rule if you already have an existing one set to User Name Password or Any. Add the newly created ISU to the rule instead.
Activate pending authentication policy changes
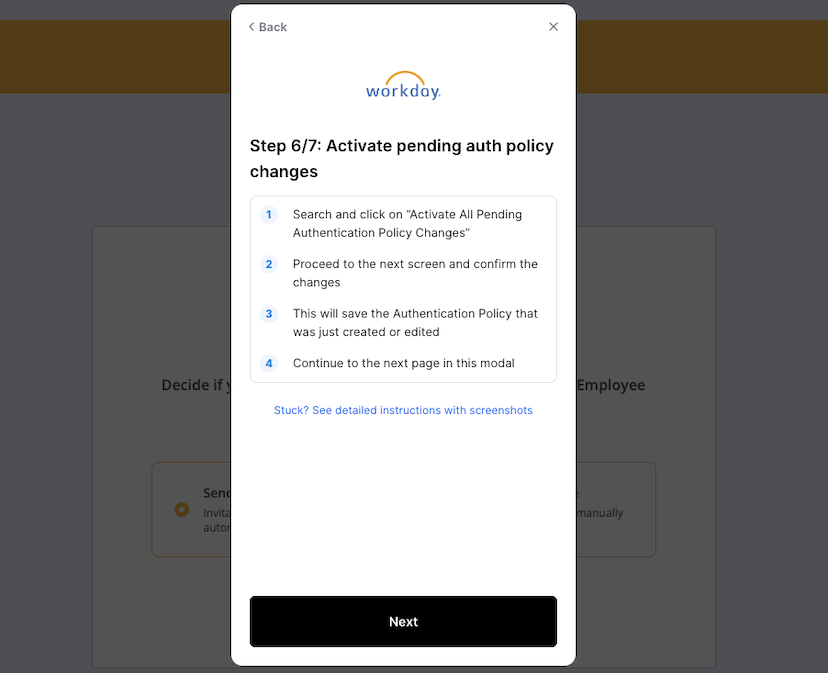
- In the Search field, enter Activate All Pending Authentication Policy Changes and select the task.
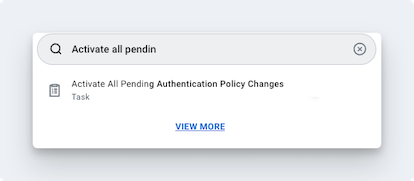
- In next screen, confirm the changes. This will save the Authentication Policy that was created in the previous step.
- Navigate back to GroWrk and select Next.
Obtain the web services endpoint for Workday tenant
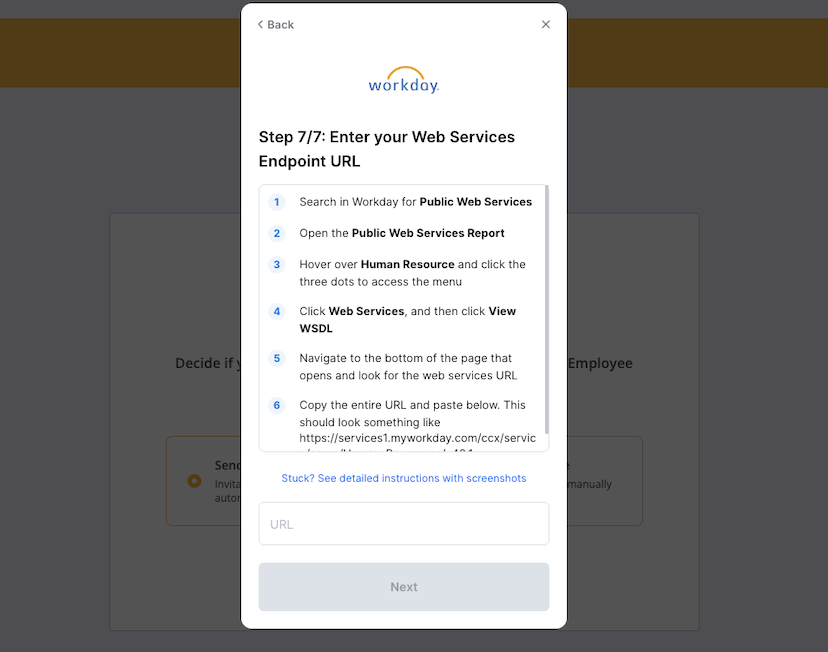
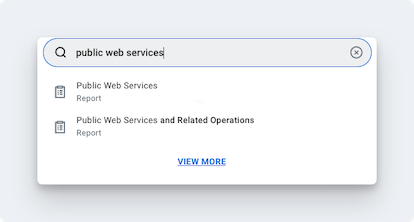
- In the Search field, enter Public Web Services. Select Public Web Services Report.
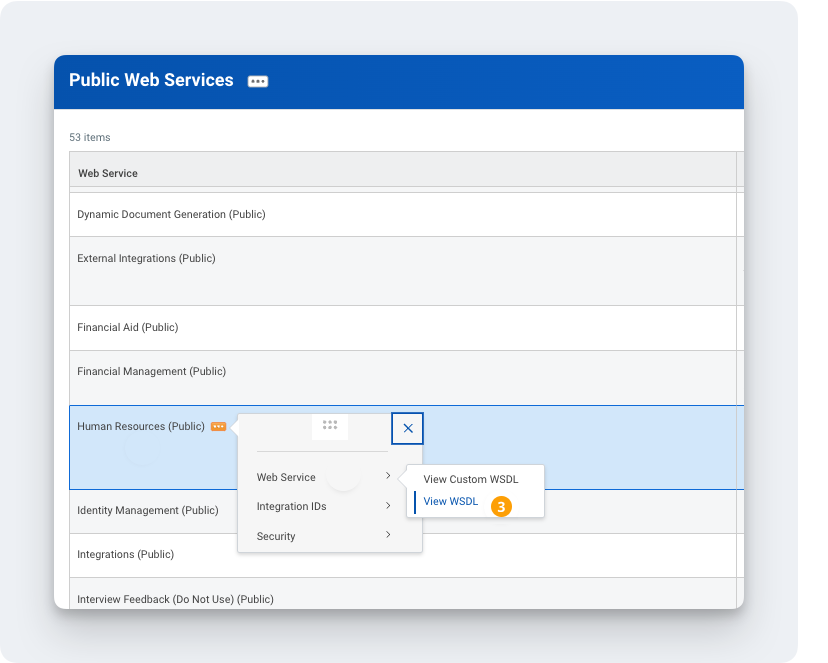
- If you are connecting Workday HRIS, look for Human Resources (Public). If you are connecting Workday ATS, look for Recruiting.
- Hover over the Human Resources or Recruiting section and select the three-dot icon.
- In the menu, select Web Services, then View WSDL.
- A new page will open. Scroll down to the bottom of the page.
- Copy the URL under Human_ResourcesService or RecruitingService. This URL will be used to connect your Workday account with GroWrk.
- Navigate back to GroWrk, paste the URL, and select Next to finish connecting your account.
Synced Fields
These fields are synced from Workday to GroWrk:
- First Name
- Last Name
- Email (Work Email)
- Address
- Employment Status (available on filter)
- Hire Date
- Job Title
- Mobile Phone Number
- Manager
- Department
Notes:
- The Email field syncs as Work Email, and will replace the personal email (if applicable).
- The Department field in Workday syncs with Teams in GroWrk.
Filters
If you chose to filter your sync, you’ll be redirected to the Integrations Setup page and there will be 4 different filters to apply to your data:
- “Countries” allows you to select countries you’d want to include or exclude in your synced data.
- “Teams” allows you to select the teams within your company that you’d want to include or exclude in your synced data.
- “Status” allows you to filter by active or inactive devices within your inventory.
- “Employment” allows you to filter by employment status (full-time, part-time, contractor, etc.).
These filters are designed to be cross-referenced. Whether you’re looking to import data of your employees on a specific team located in a certain region, or any other parameter, these new filters are designed to refine your company data to your preference.
Resync
The Workday integration automatically updates every hour. You may manually resync your data using the Update button found in the Set up tab on the integration page.