UKG Pro
Learn how to connect your UKG Pro account to your Dashboard and sync your company information to improve your HR workflow.
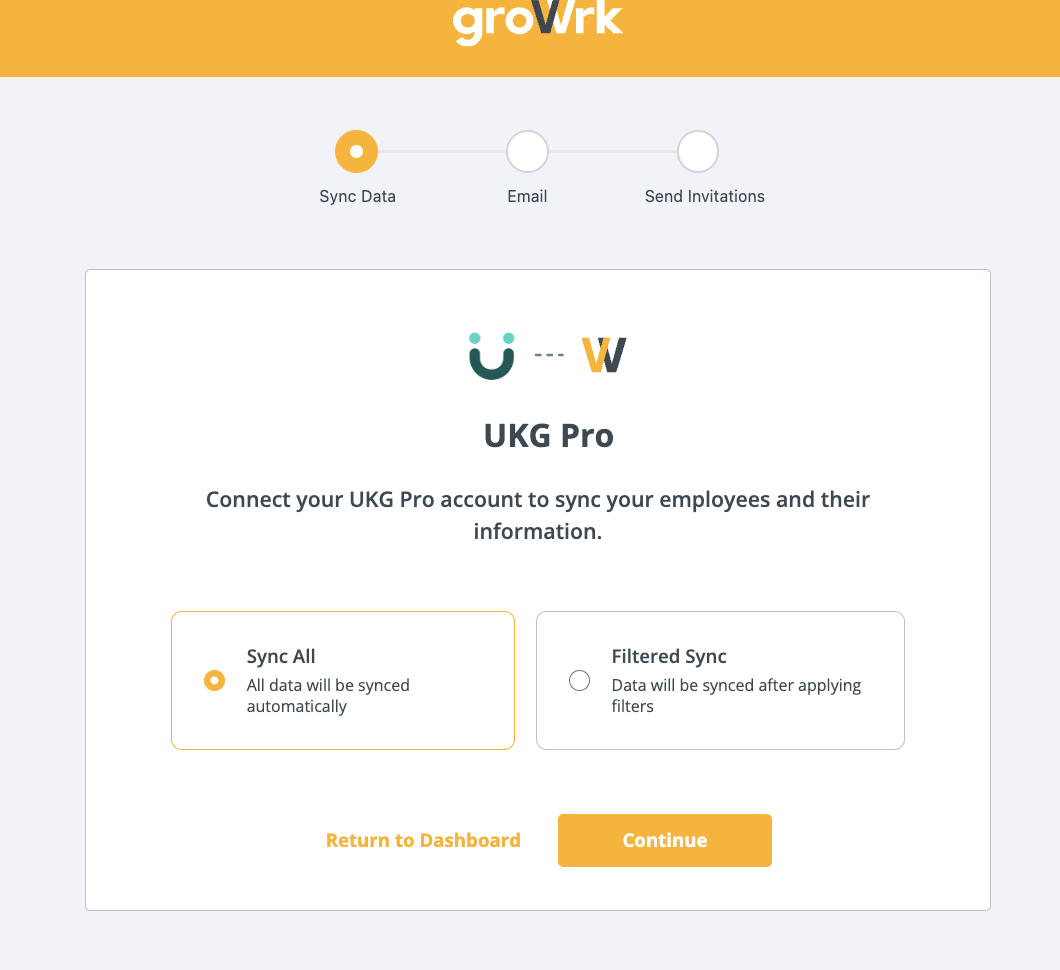
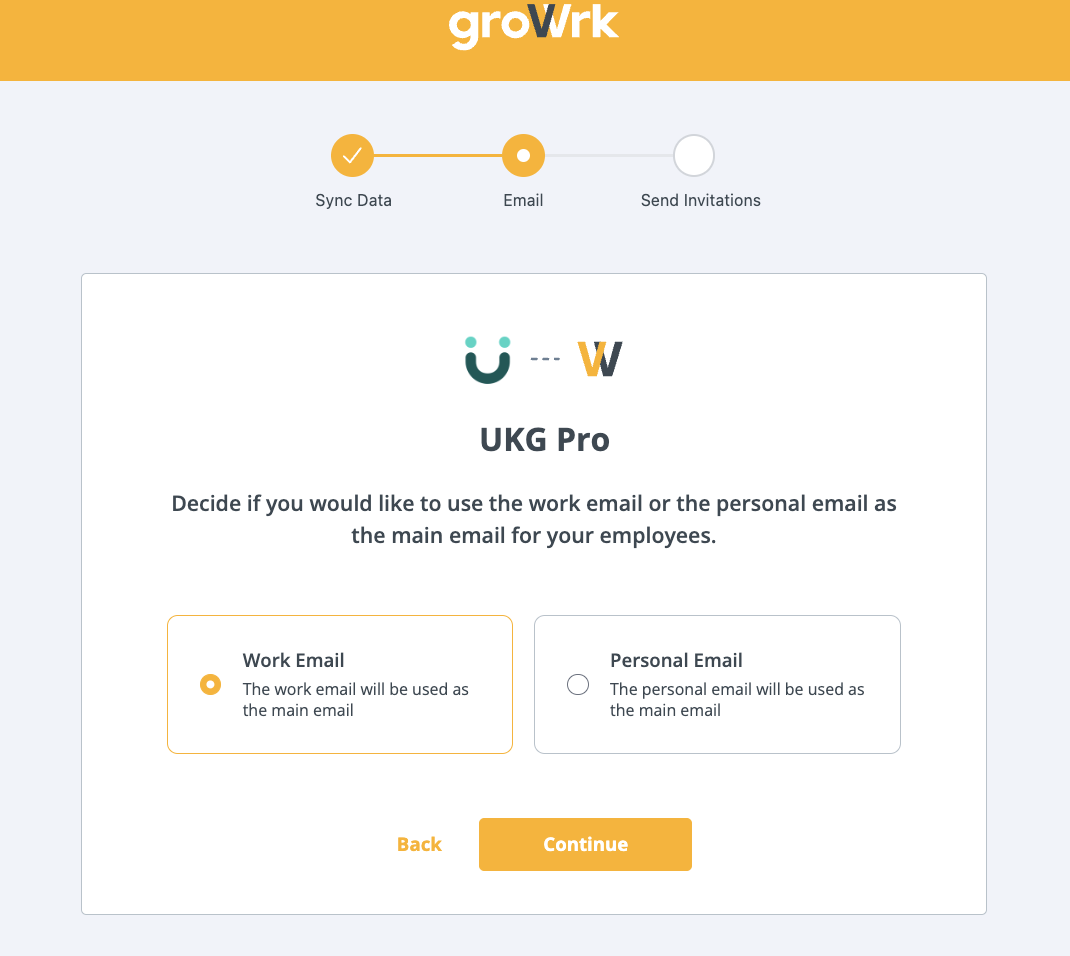
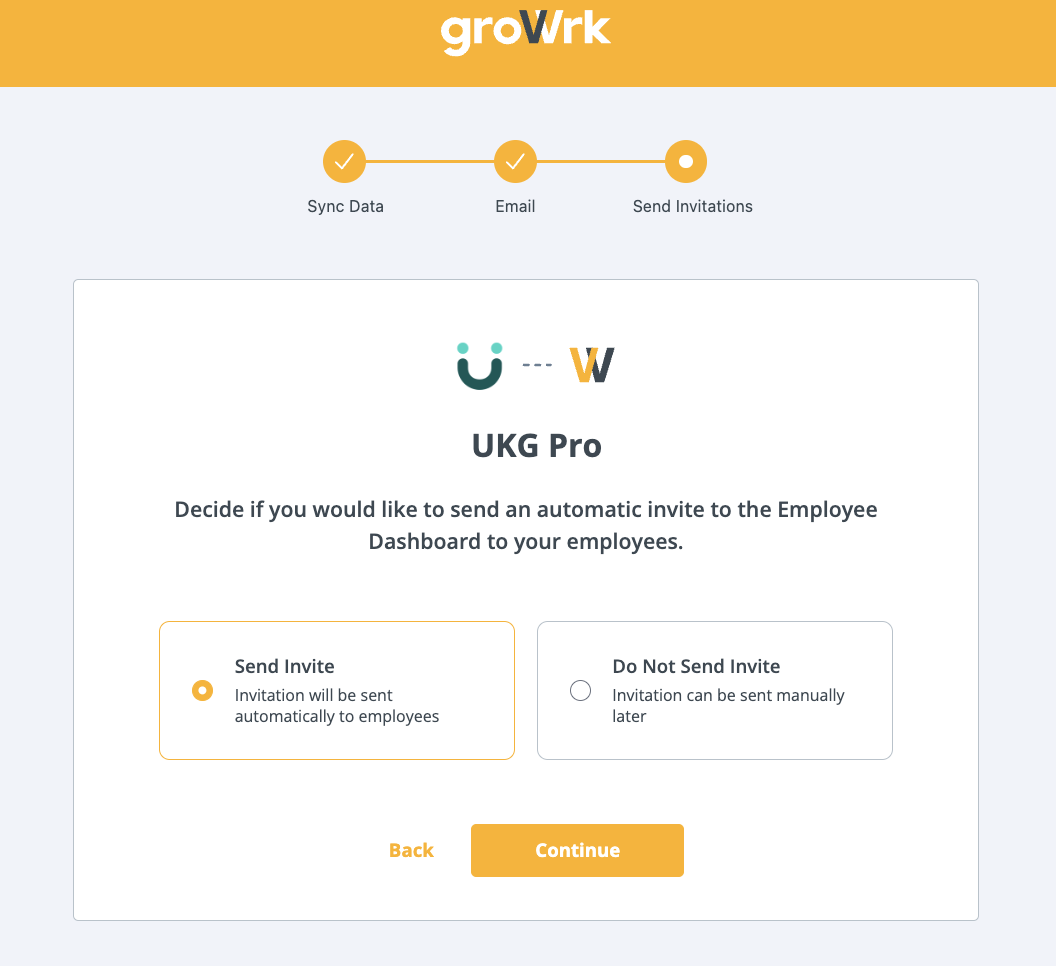
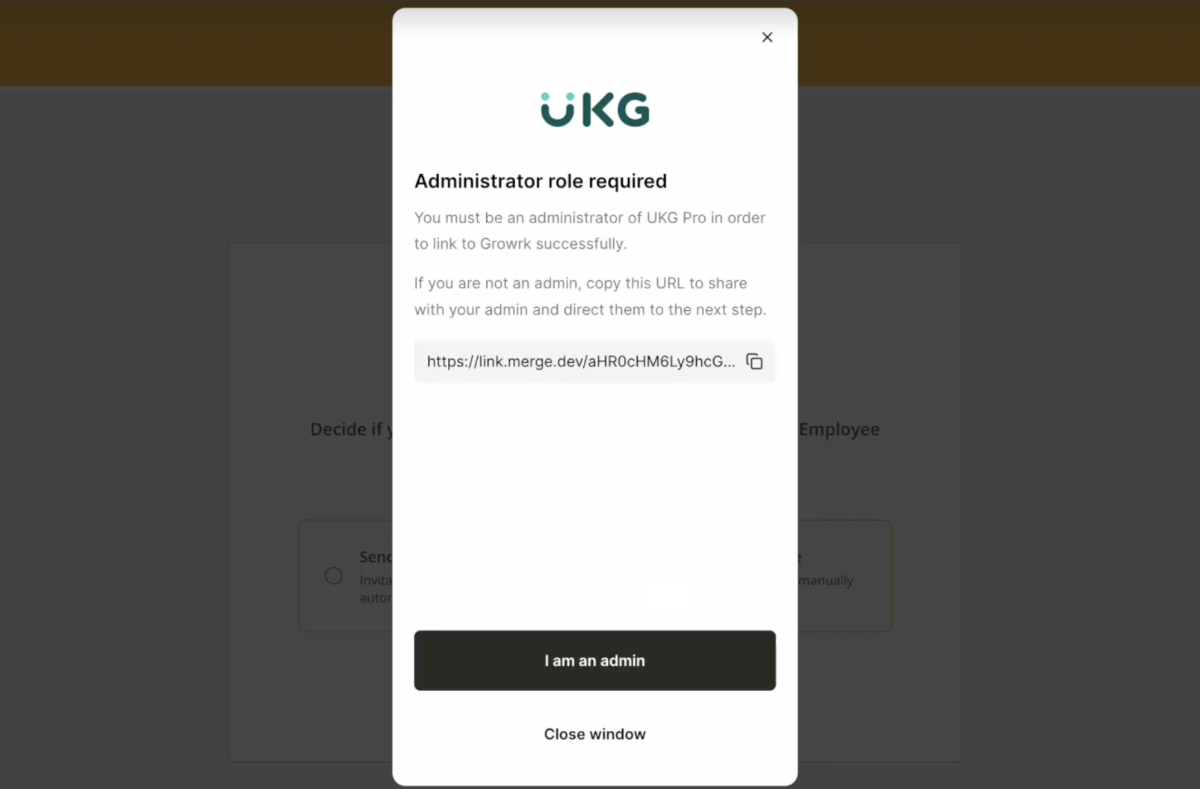
Connect your account
- Choose whether you’ll sync all your data or use our updated filters to curate what data is synced to your GroWrk account.
- Choose whether to use your work or personal email to connect. Select Continue to move forward to begin the authentication process.
- Choose whether to send invitations to the Employee Dashboard for your employees to have access to product updates and confirm package deliveries.
- You’ll be notified that an administrator role is required to link the UKG account. Select I am an admin.
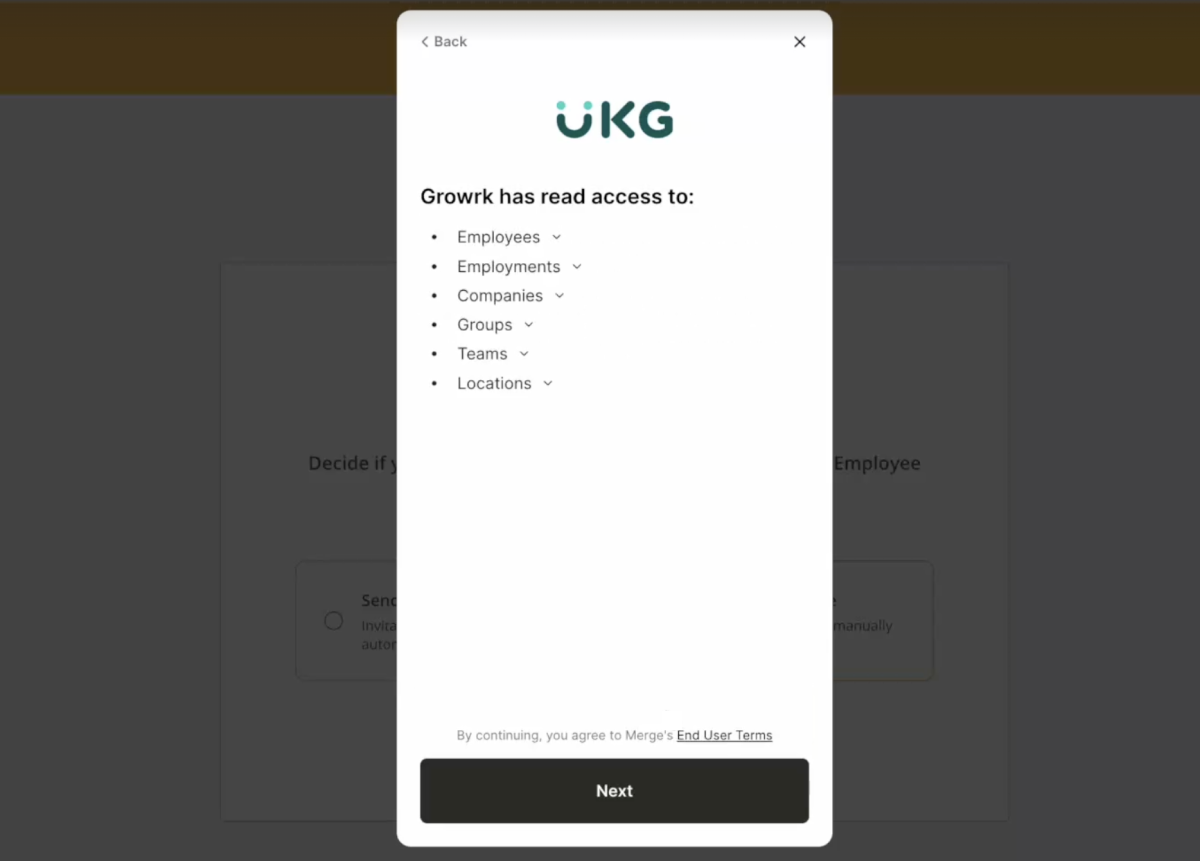
- GroWrk will have access to the following data points in your account. Select Next.
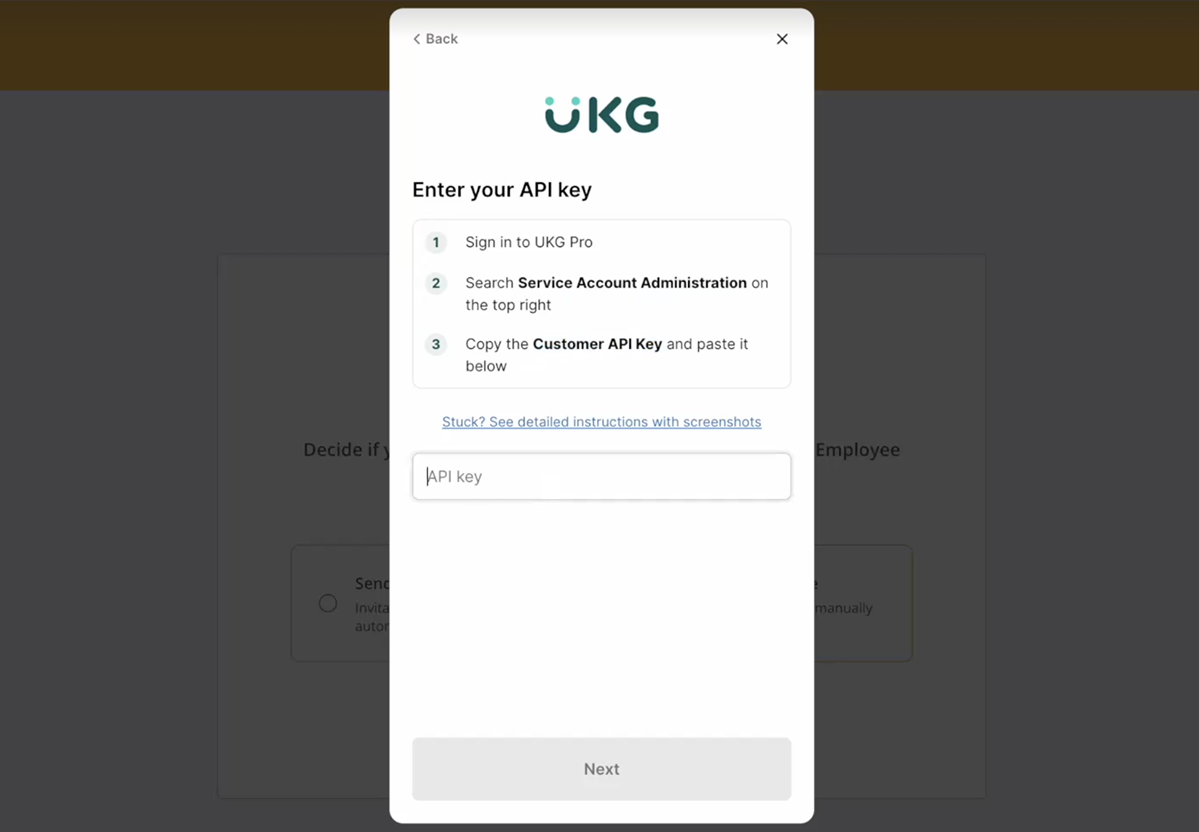
- Enter your API key. See instructions below to find your API key. Select Next.
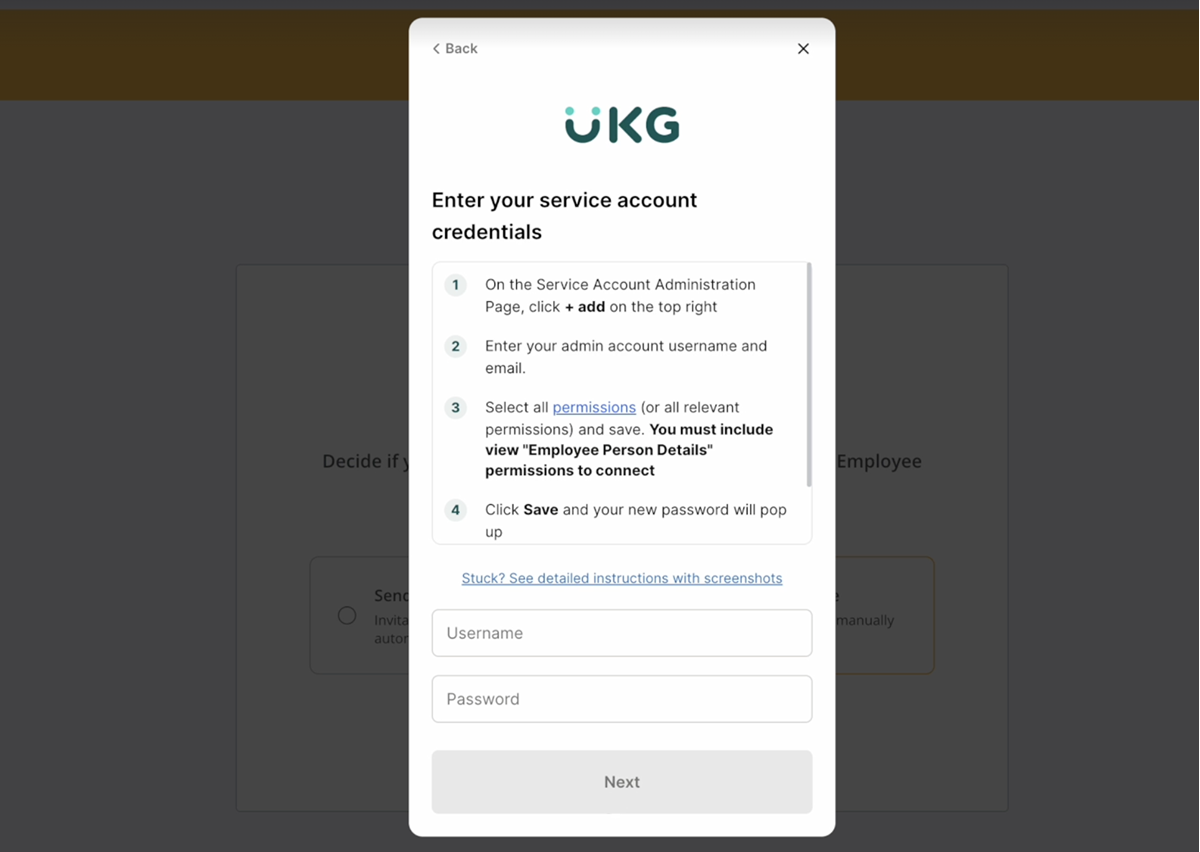
- Enter your UKG credentials. See the instructions below to find your service account credentials. Select Next.
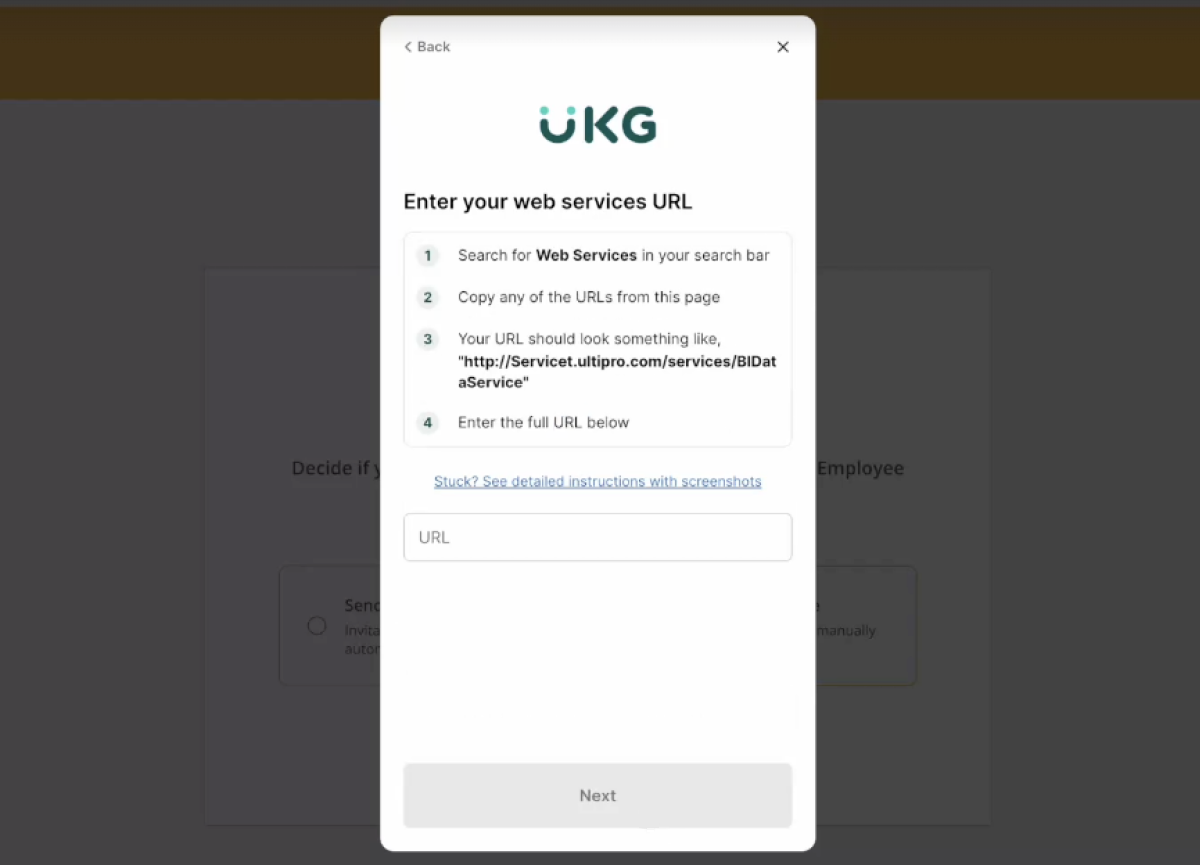
- Enter your web services URL. See instructions below to find the URL. Select Next.
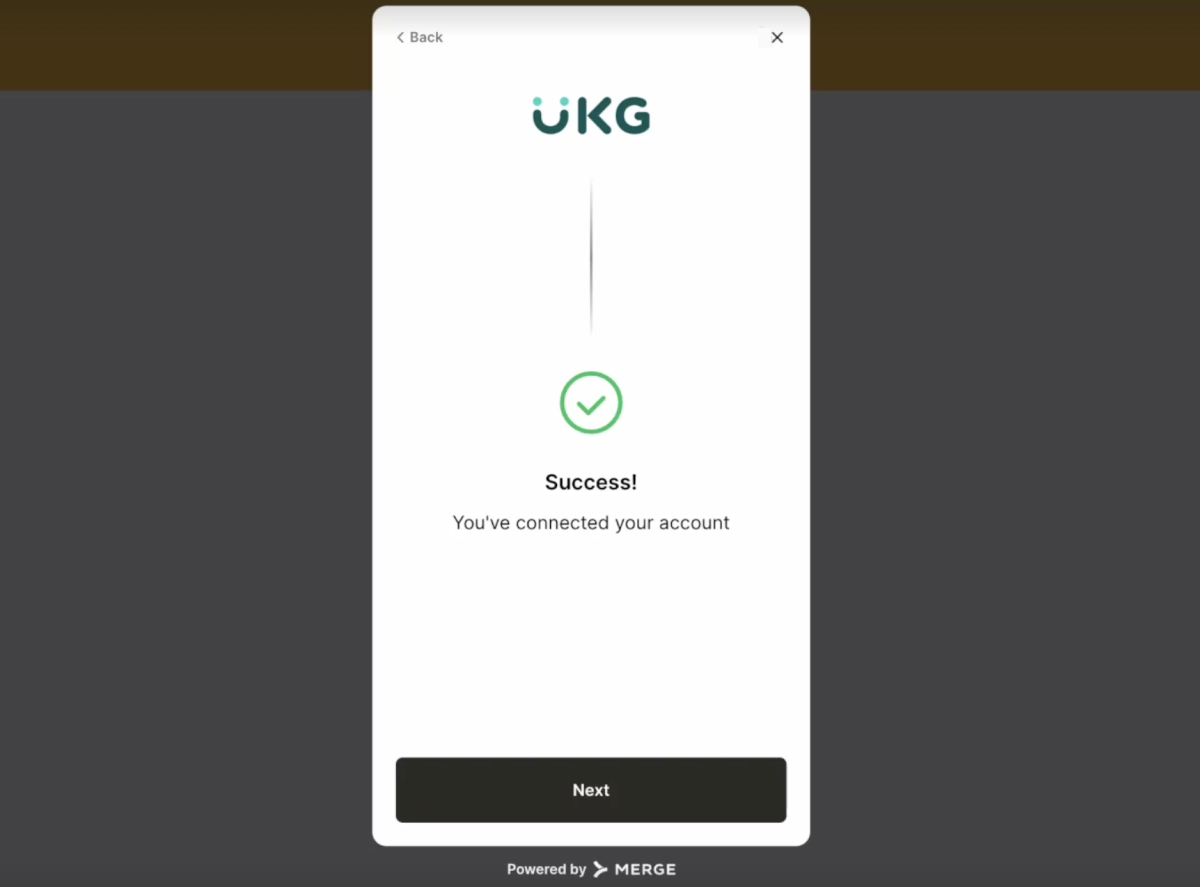
- Your account will be successfully connected.
Find your UKG Pro Customer API Key.
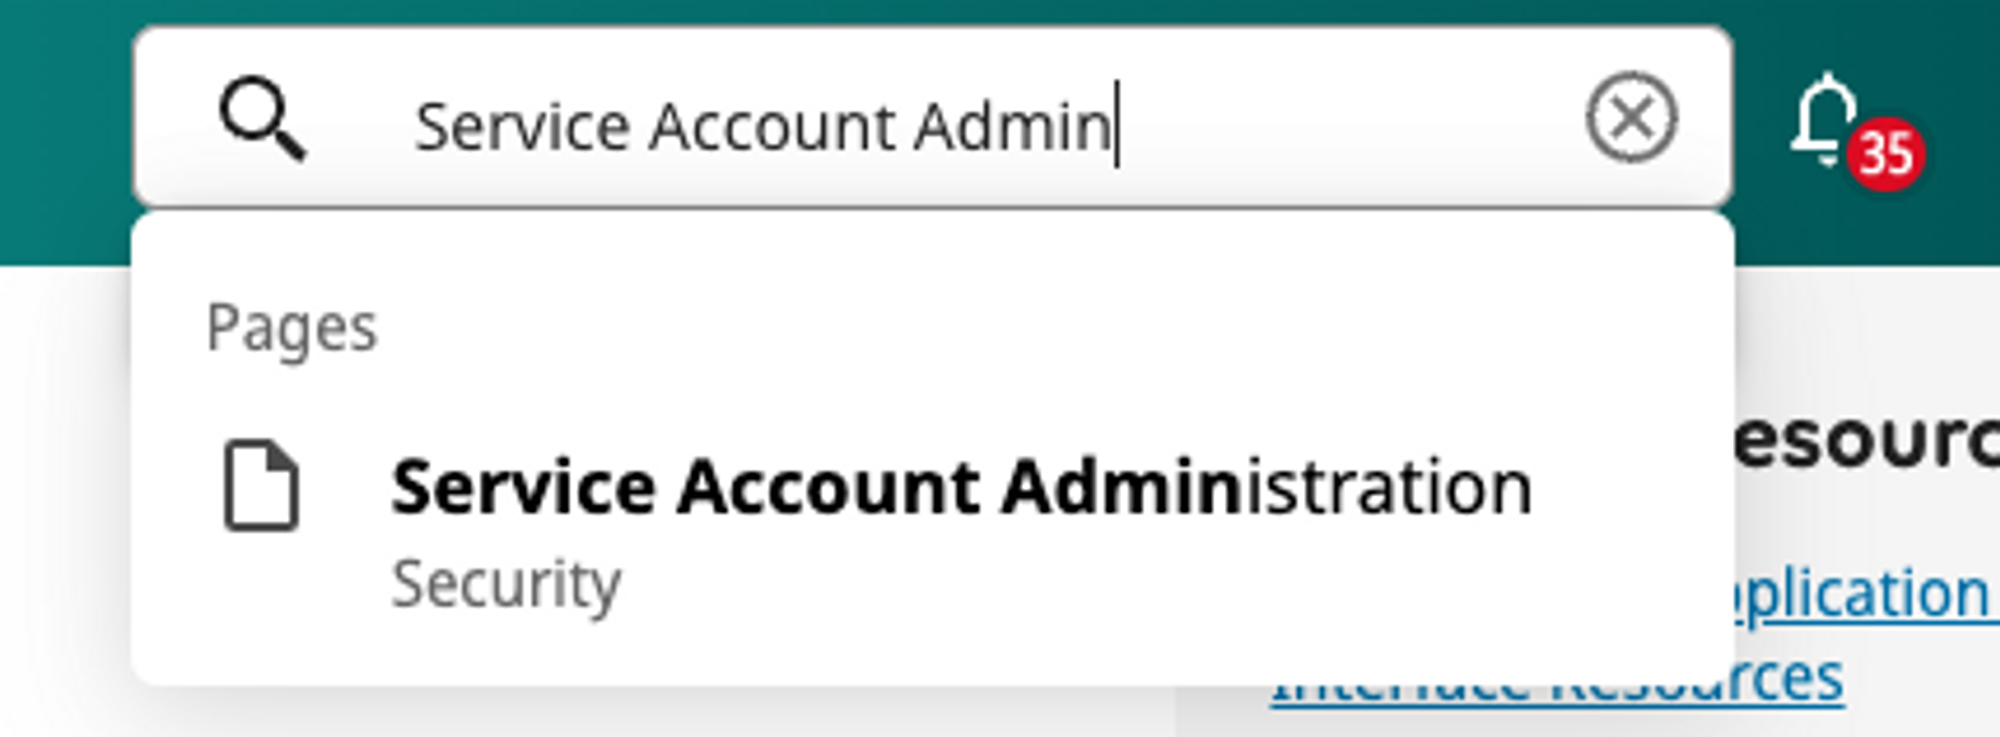
- Log in to your UKG Pro account and search Service Account Administration in your search bar on the top right.
- Copy the API Key from under the header.
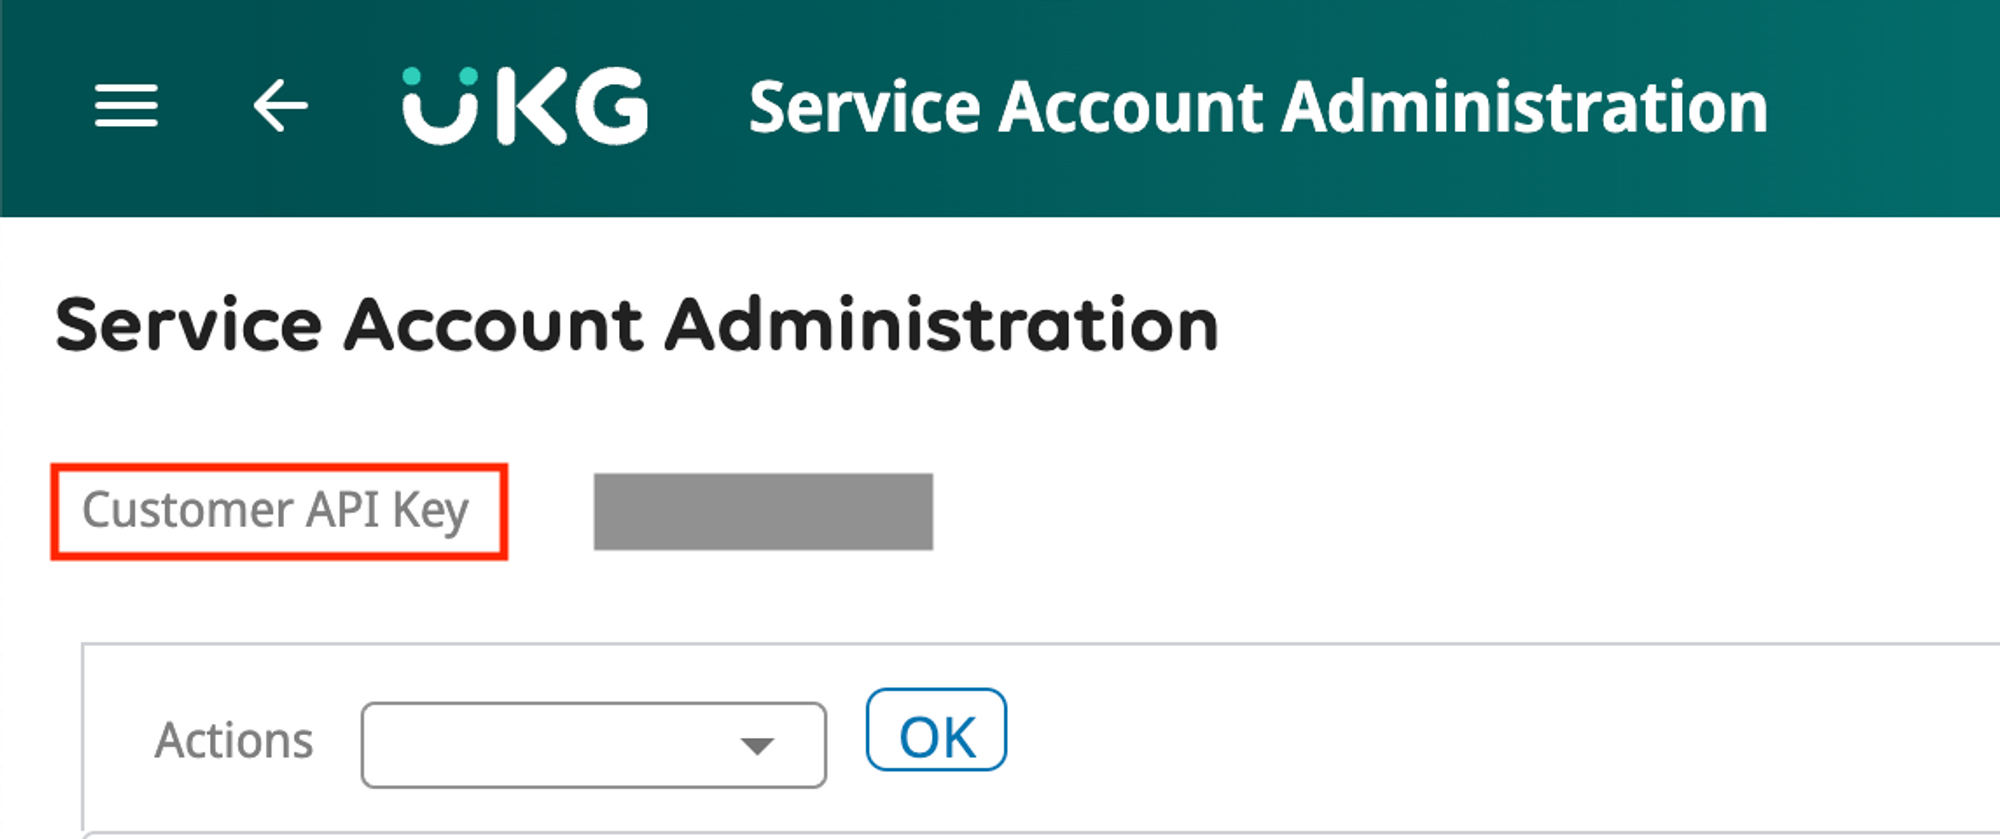
- Paste the API Key in the field. (Step 6 of Connect your account)
Create your service account
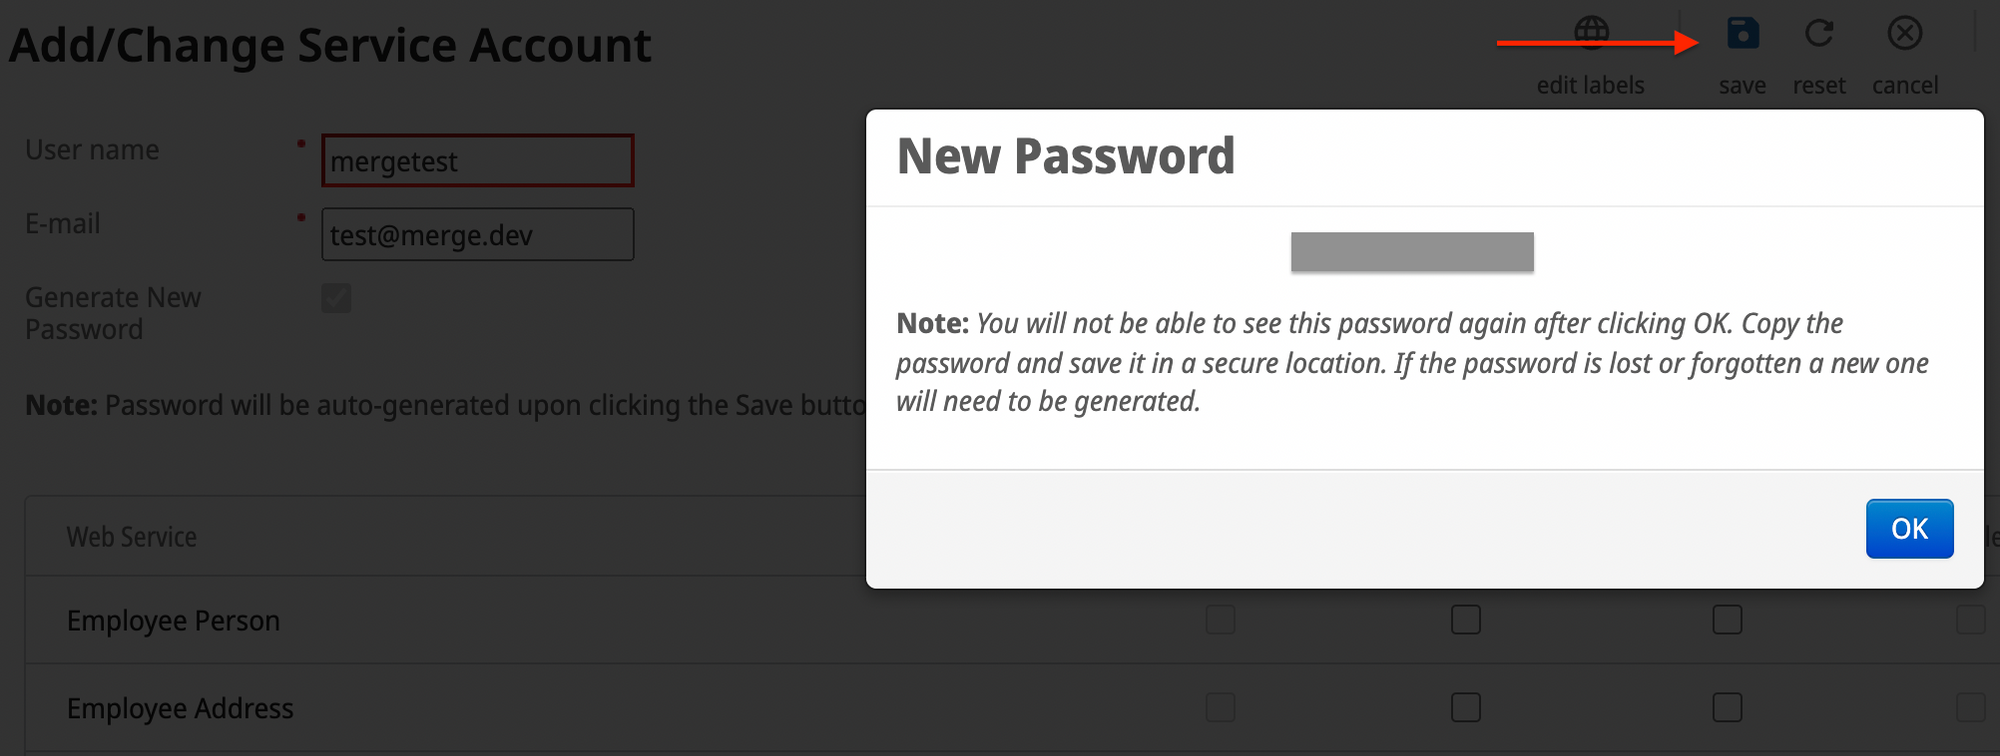
- On the UKG Pro Service Account Administration Page, select "+ add" in the upper right side.

- Enter the admin of your UKG Pro account's username and email.
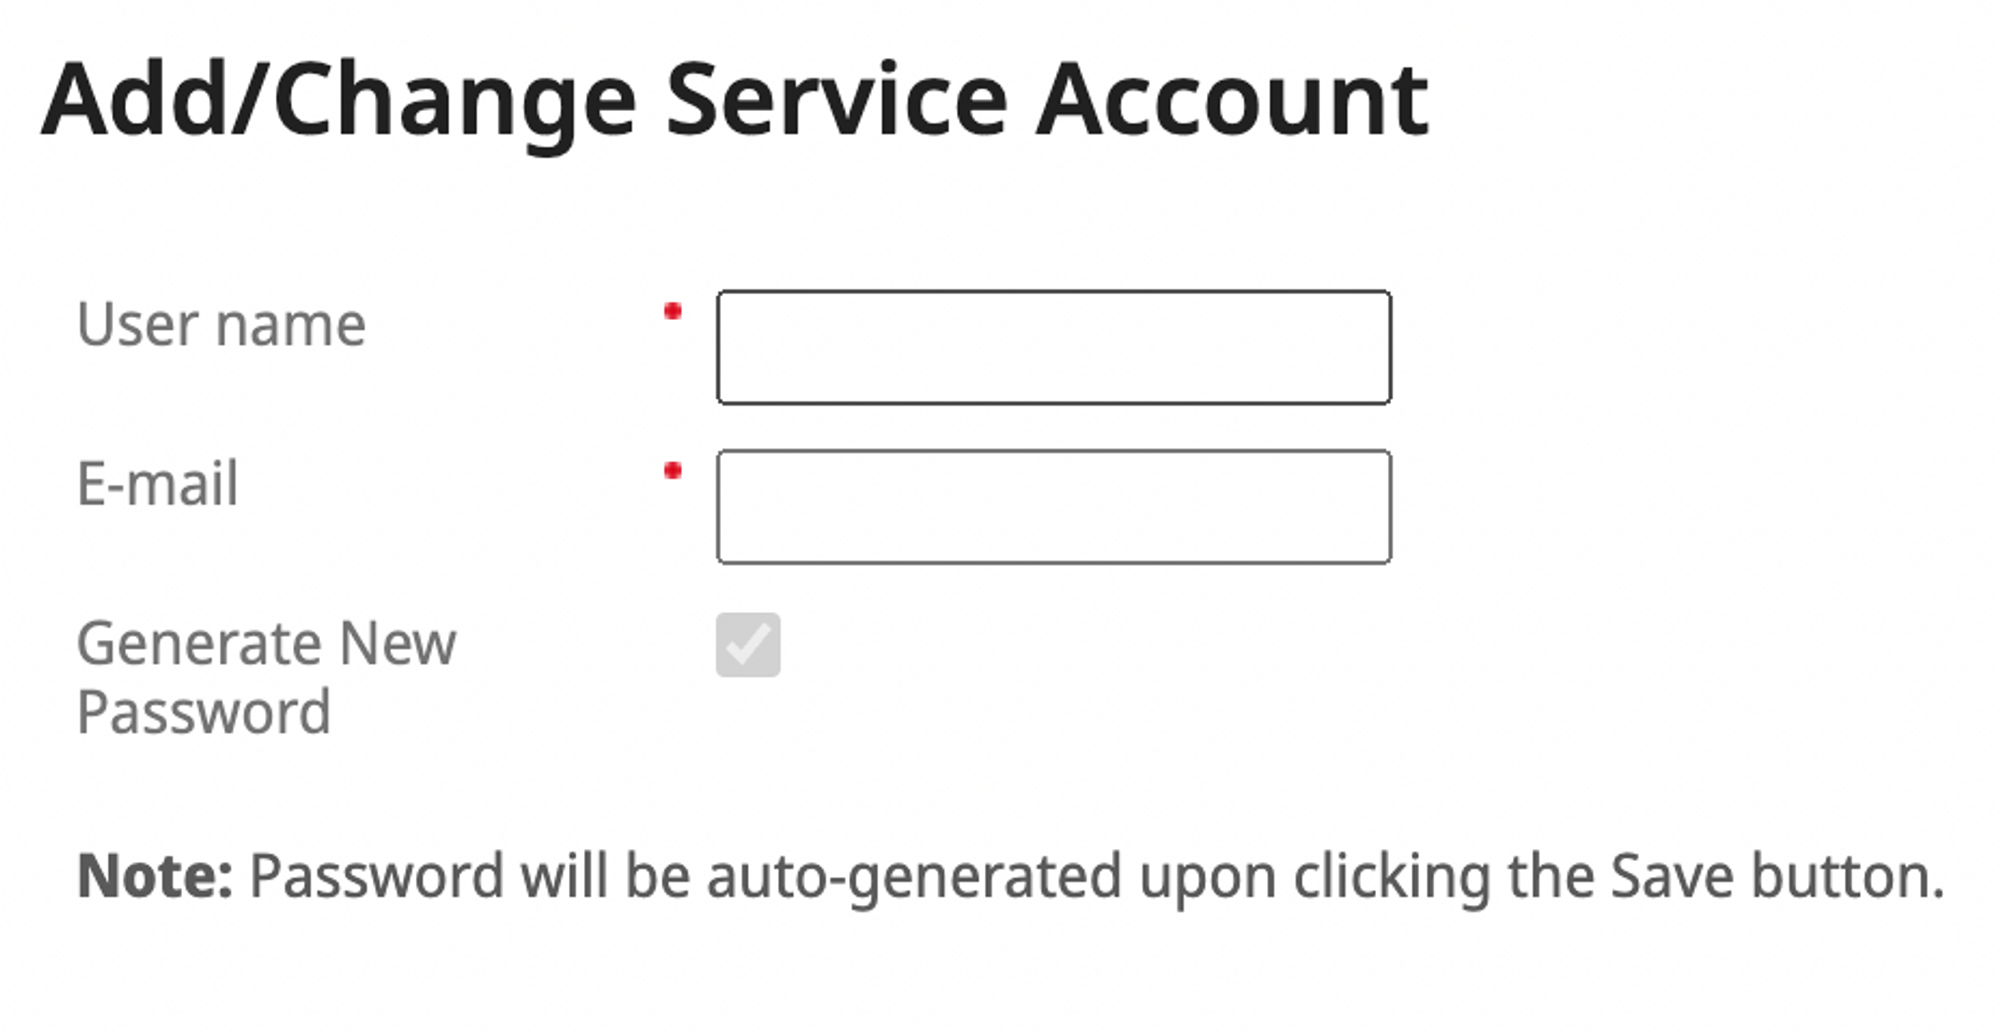
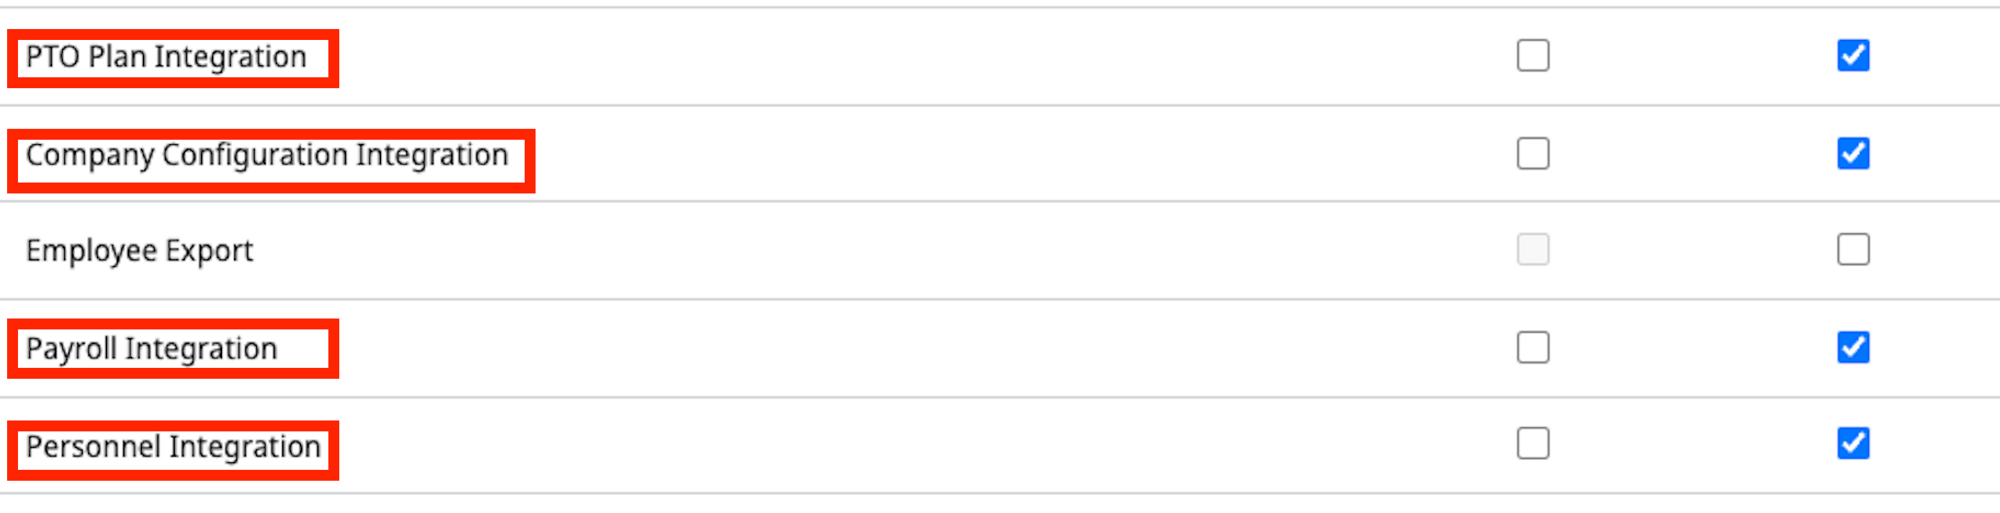
- Select all relevant permissions and save.
View Employee Pay Statement, PTO Plan Integration, Company Configuration Integration, Payroll Integration, Personnel Integration, Employee Job History Details, Employee Person Details, and Employee Compensation Details are other relevant permissions.


- Select Save. You’ll receive a new password. Save the password in a secure location.
- Enter your UKG Pro service account credentials and select Next. (Step 7 of Connect your account)
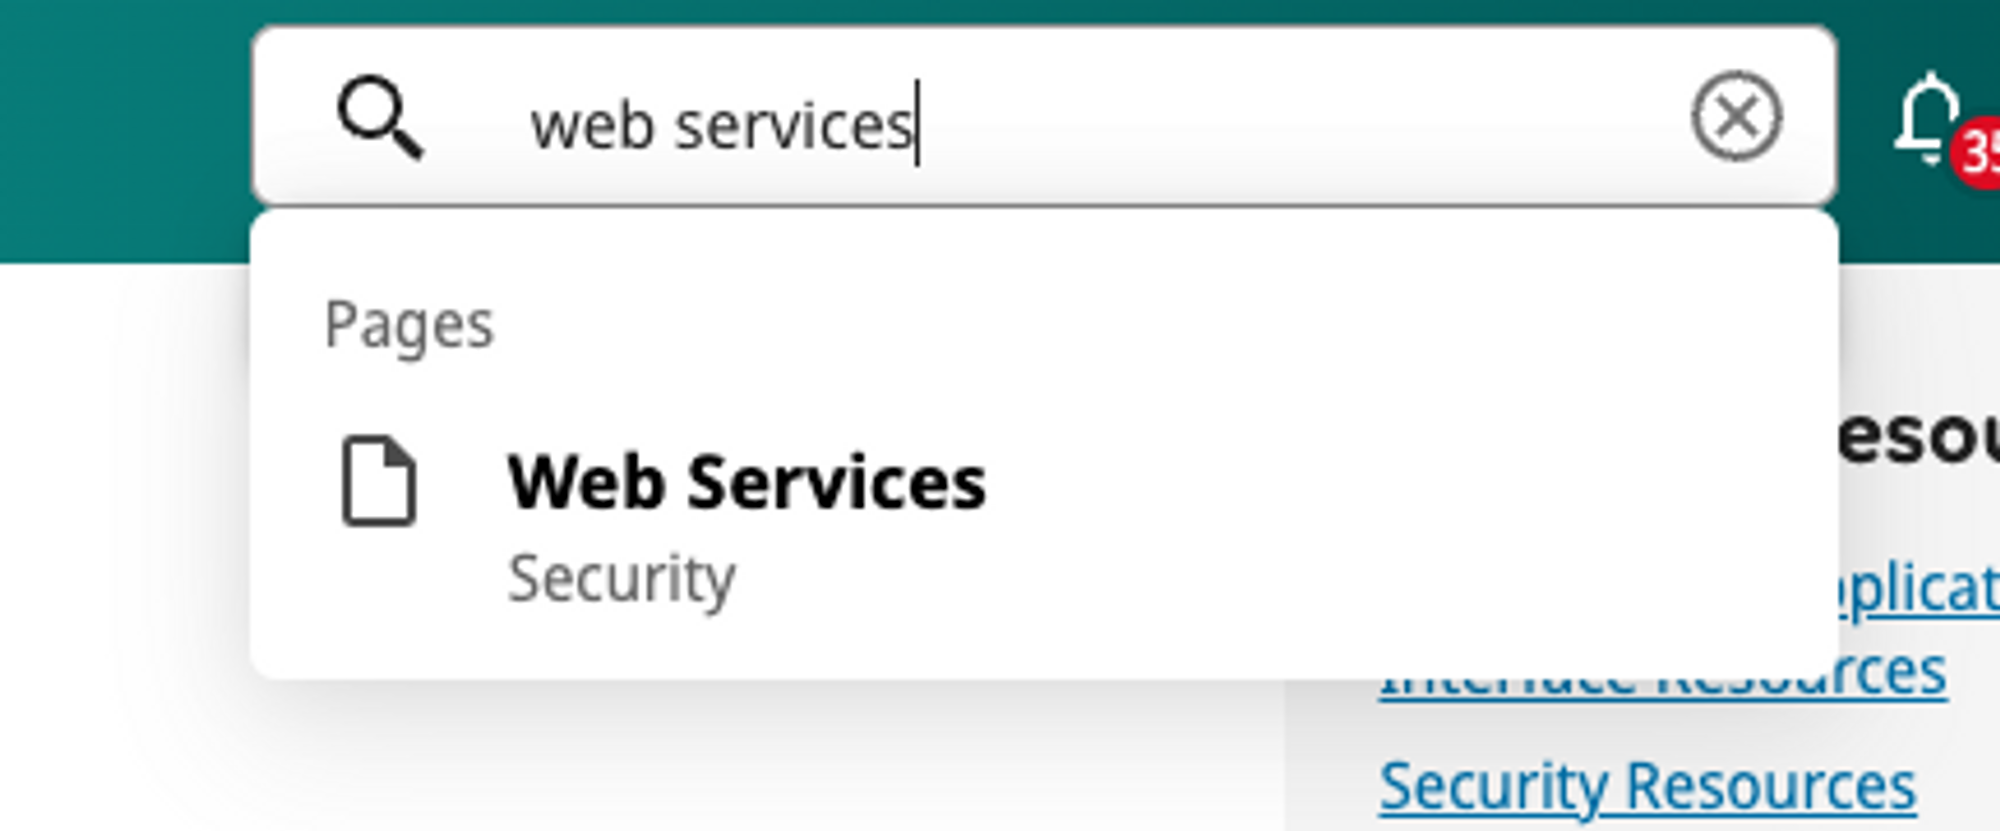
Find your UKG Web Service URL
- In the search bar, search for Web Services.
- Copy any of the URLs displayed on the page. The URL should look something like this: https://Servicet.ultipro.com/services/BIDataService.
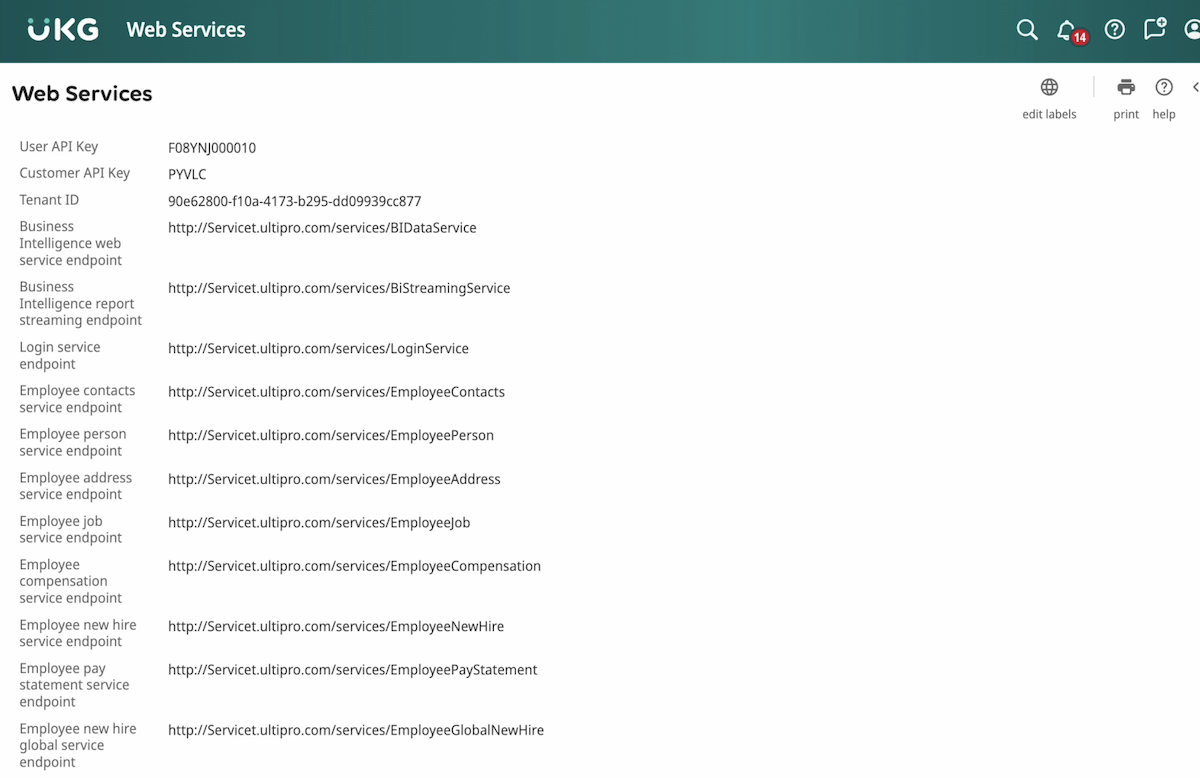
- Back in your Dashboard, enter the URL. (Step 8 of Connect your account)
Filters
If you chose to filter your sync, you’ll be redirected to the Integrations Setup page and there will be 4 different filters to apply to your data:
- “Countries” allows you to select countries you’d want to include or exclude in your synced data.
- “Teams” allows you to select the teams within your company that you’d want to include or exclude in your synced data.
- “Status” allows you to filter by active or inactive devices within your inventory.
- “Employment” allows you to filter by employment status (full-time, part-time, contractor, etc.).
These filters are designed to be cross-referenced. Whether you’re looking to import data of your employees on a specific team located in a certain region, or any other parameter, these new filters are designed to refine your company data to your preference.
Synced Fields
These fields are synced from UKG Pro to GroWrk:
- Team name
- Employee display name
- Date of birth
- Address line 1
- Address line 2
- Country
- State
- City
- Zip code
Note: The Email field syncs as the work email. However, if a personal email is entered, it will still sync as the work email.
Resync
The UKG Pro integration automatically updates every hour. You may manually resync your data using the Update button found in the Set up tab on the UKG Pro integration page.