Device Management
Overview
GroWrk offers device management capabilities such as remote Lock, Restart, and Wipe of distributed devices. After confirming your purchase of the feature, GroWrk staff will activate the feature for device management capabilities to be accessed through your Dashboard.
Enrollment
First-time MDM setup
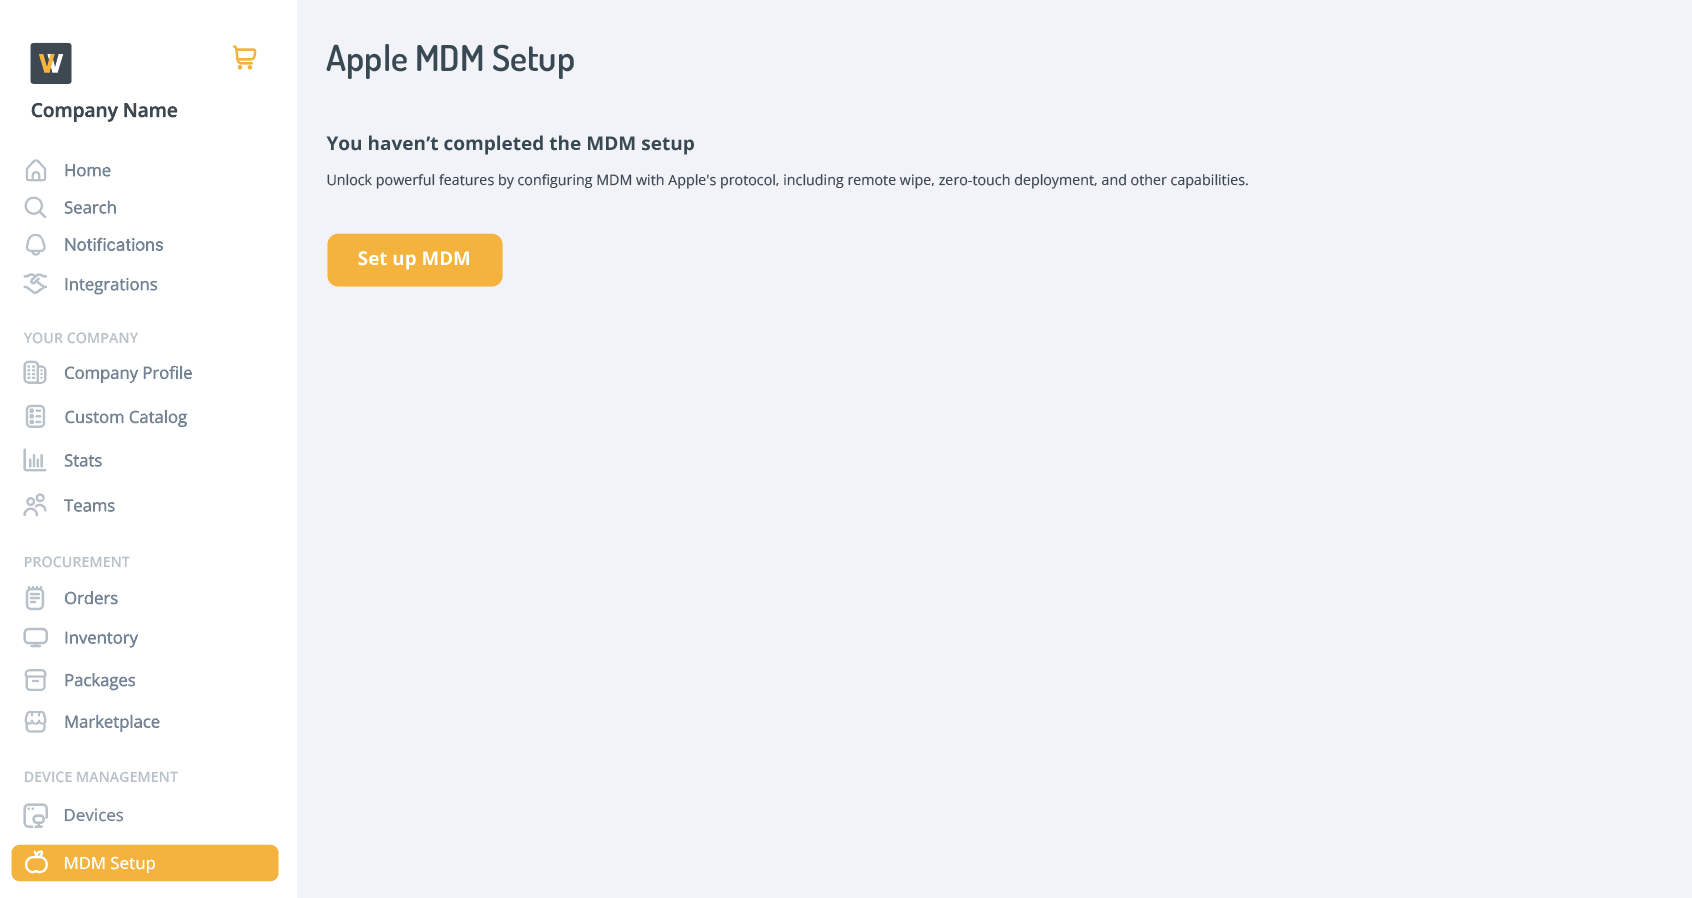
On the MDM setup page, select Set up MDM button to begin the process.
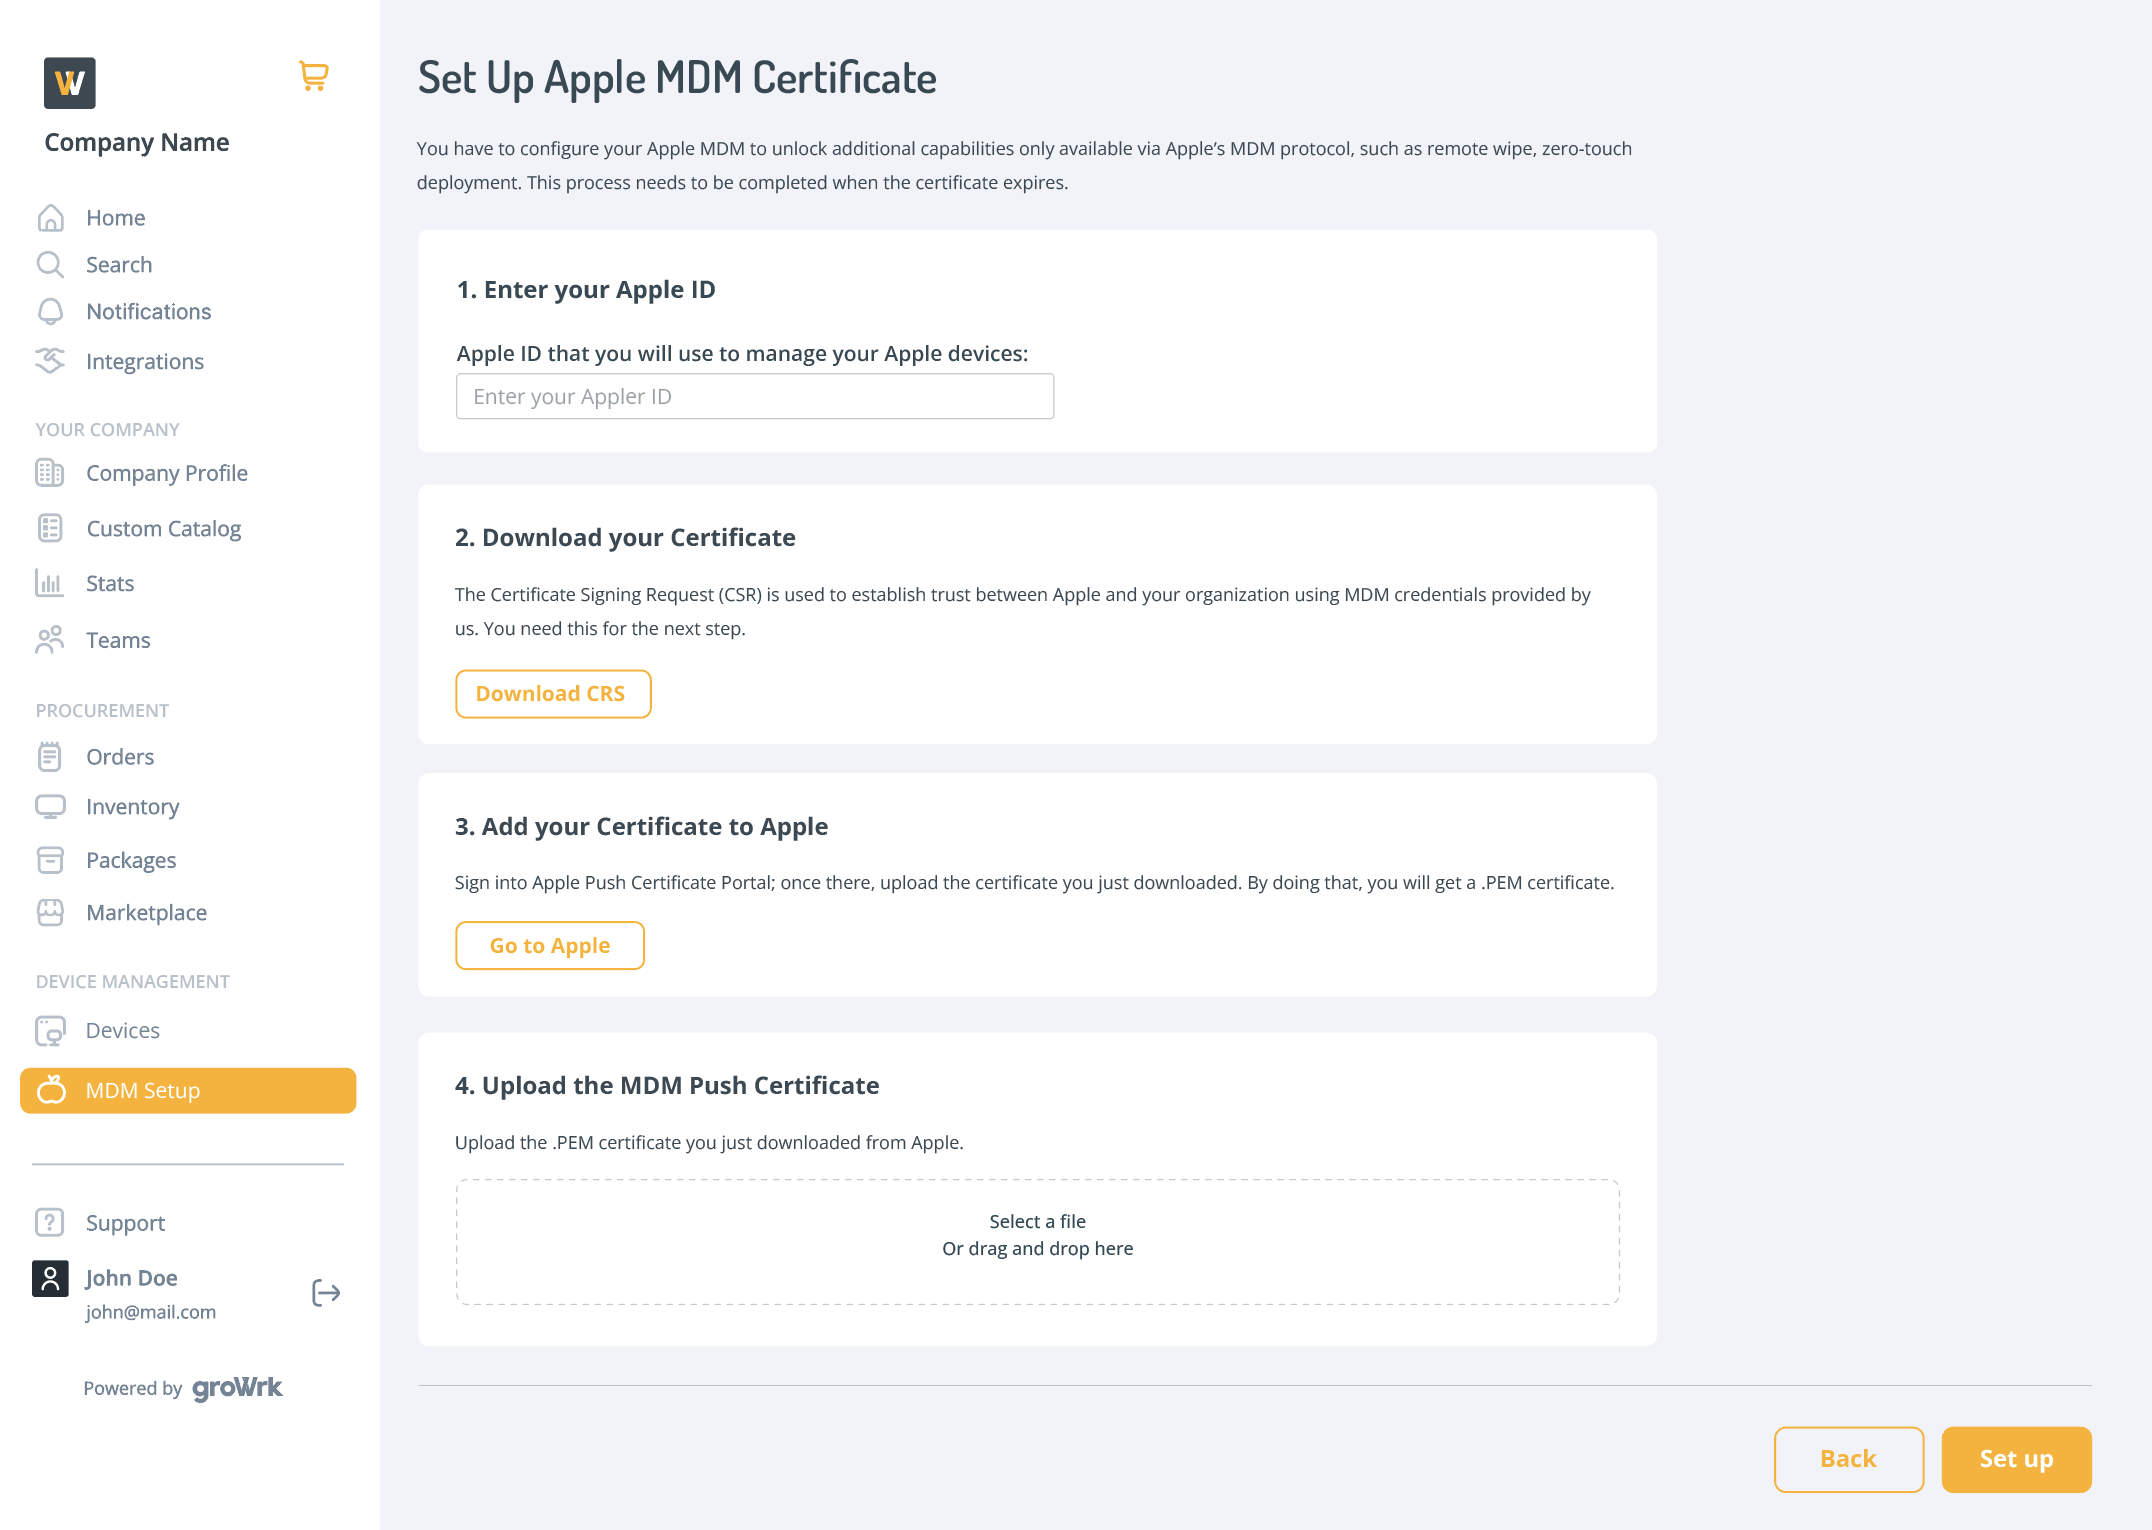
Follow these steps:
| Step | Notes |
|---|---|
| 1. Enter your Apple ID. | |
| The Apple ID that you will use to manage your Apple devices. | - |
| 2. Download your certificate. | |
| The Certificate Signing Request (CSR) is used to establish trust between Apple and your organization. It’s a set of MDM credentials provided by us and you need it for the next step. | The download will be a .CSR file. Direct download to the user system. |
| 3. Add your certificate to Apple. | |
| Sign in to the Apple Push Certificate Portal and upload the certificate. You will then download a .PEM certificate. | The button is a link to: https://identity.apple.com/pushcert/ |
| 4. Upload the MDM Push certificate. | |
| Upload the .PEM certificate you just downloaded from Apple. | Only .PEM files are allowed. |
Once clicking Set up, the credentials will be validated and you’ll be notified if the configuration was successful or not.
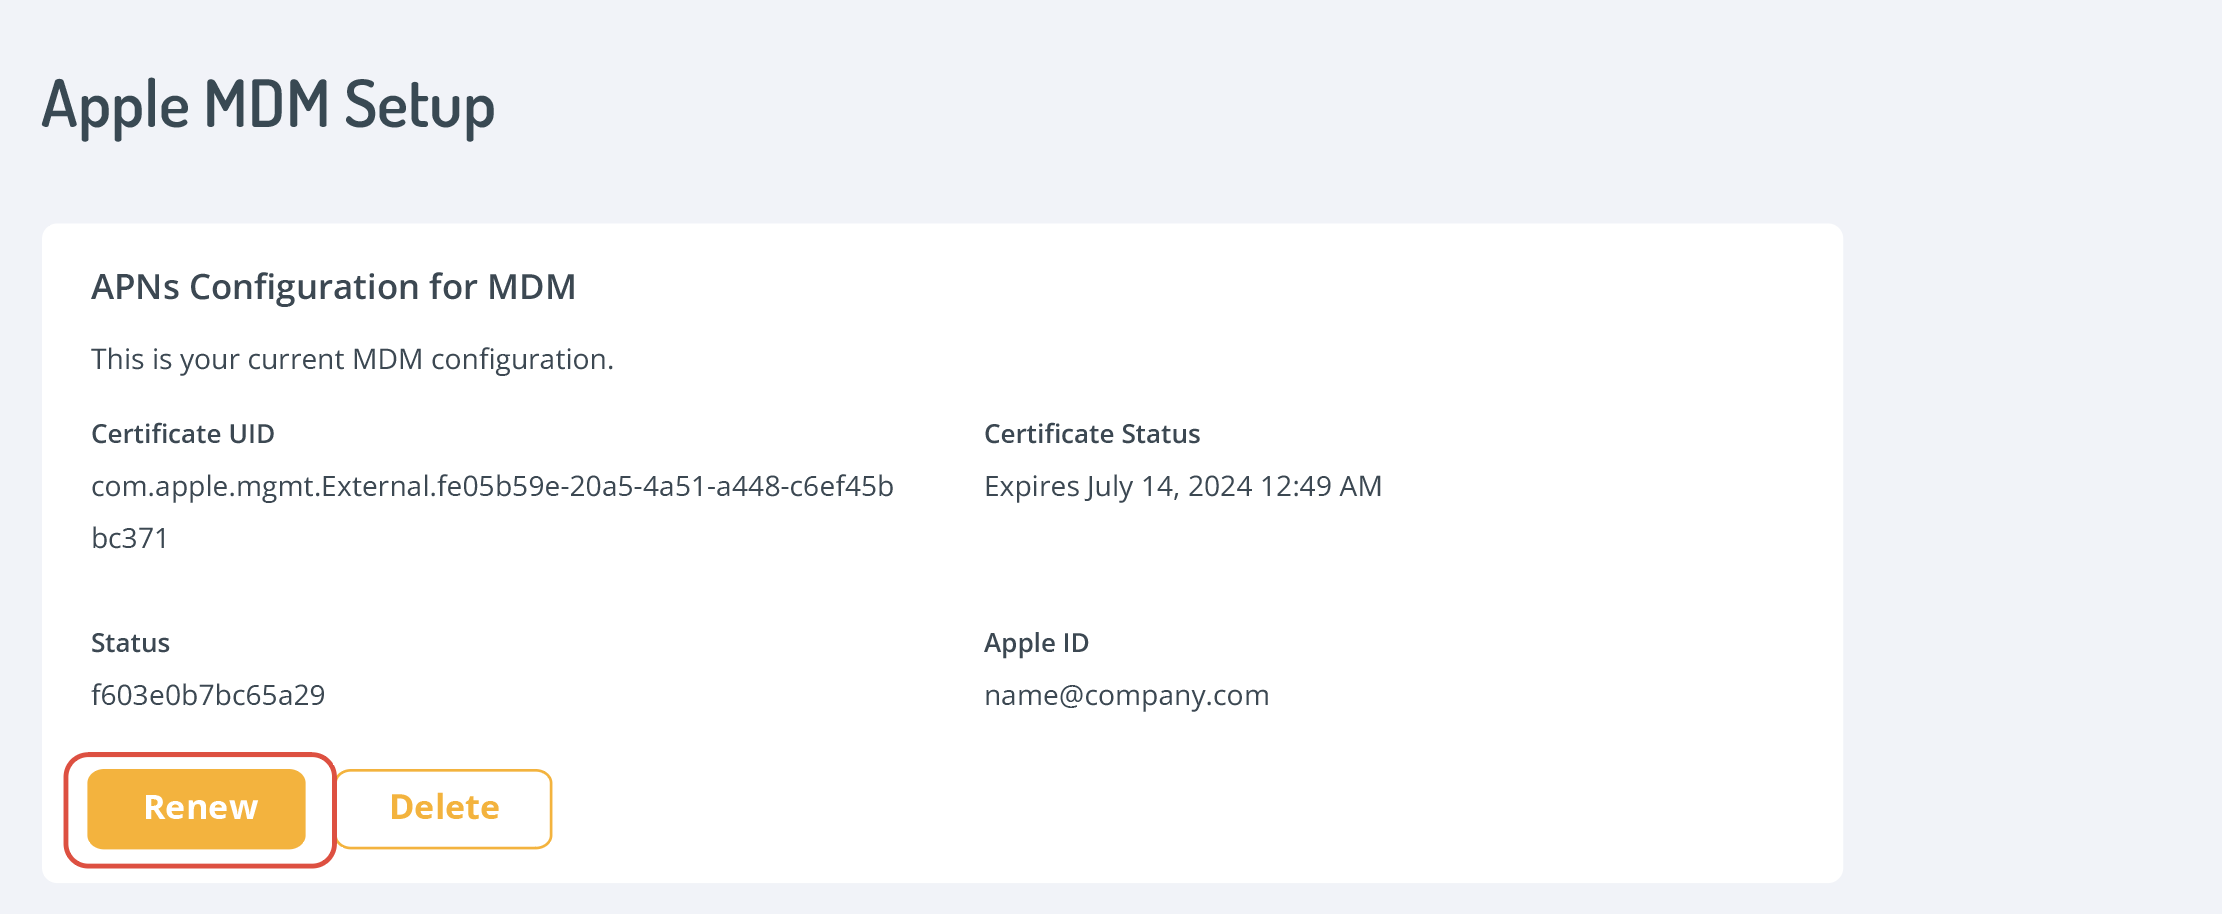
If successful, you’ll be redirected to the MDM Setup page with the details displayed.
Renew setup
View the MDM setup and select the Renew button. The Set Up Apple MDM Certificate page will open. At this point, the process to renew is the same as the original configuration process.
In the case of a soon-to-be-expired setup, the certificate status will display a countdown from 10 days before expiration.
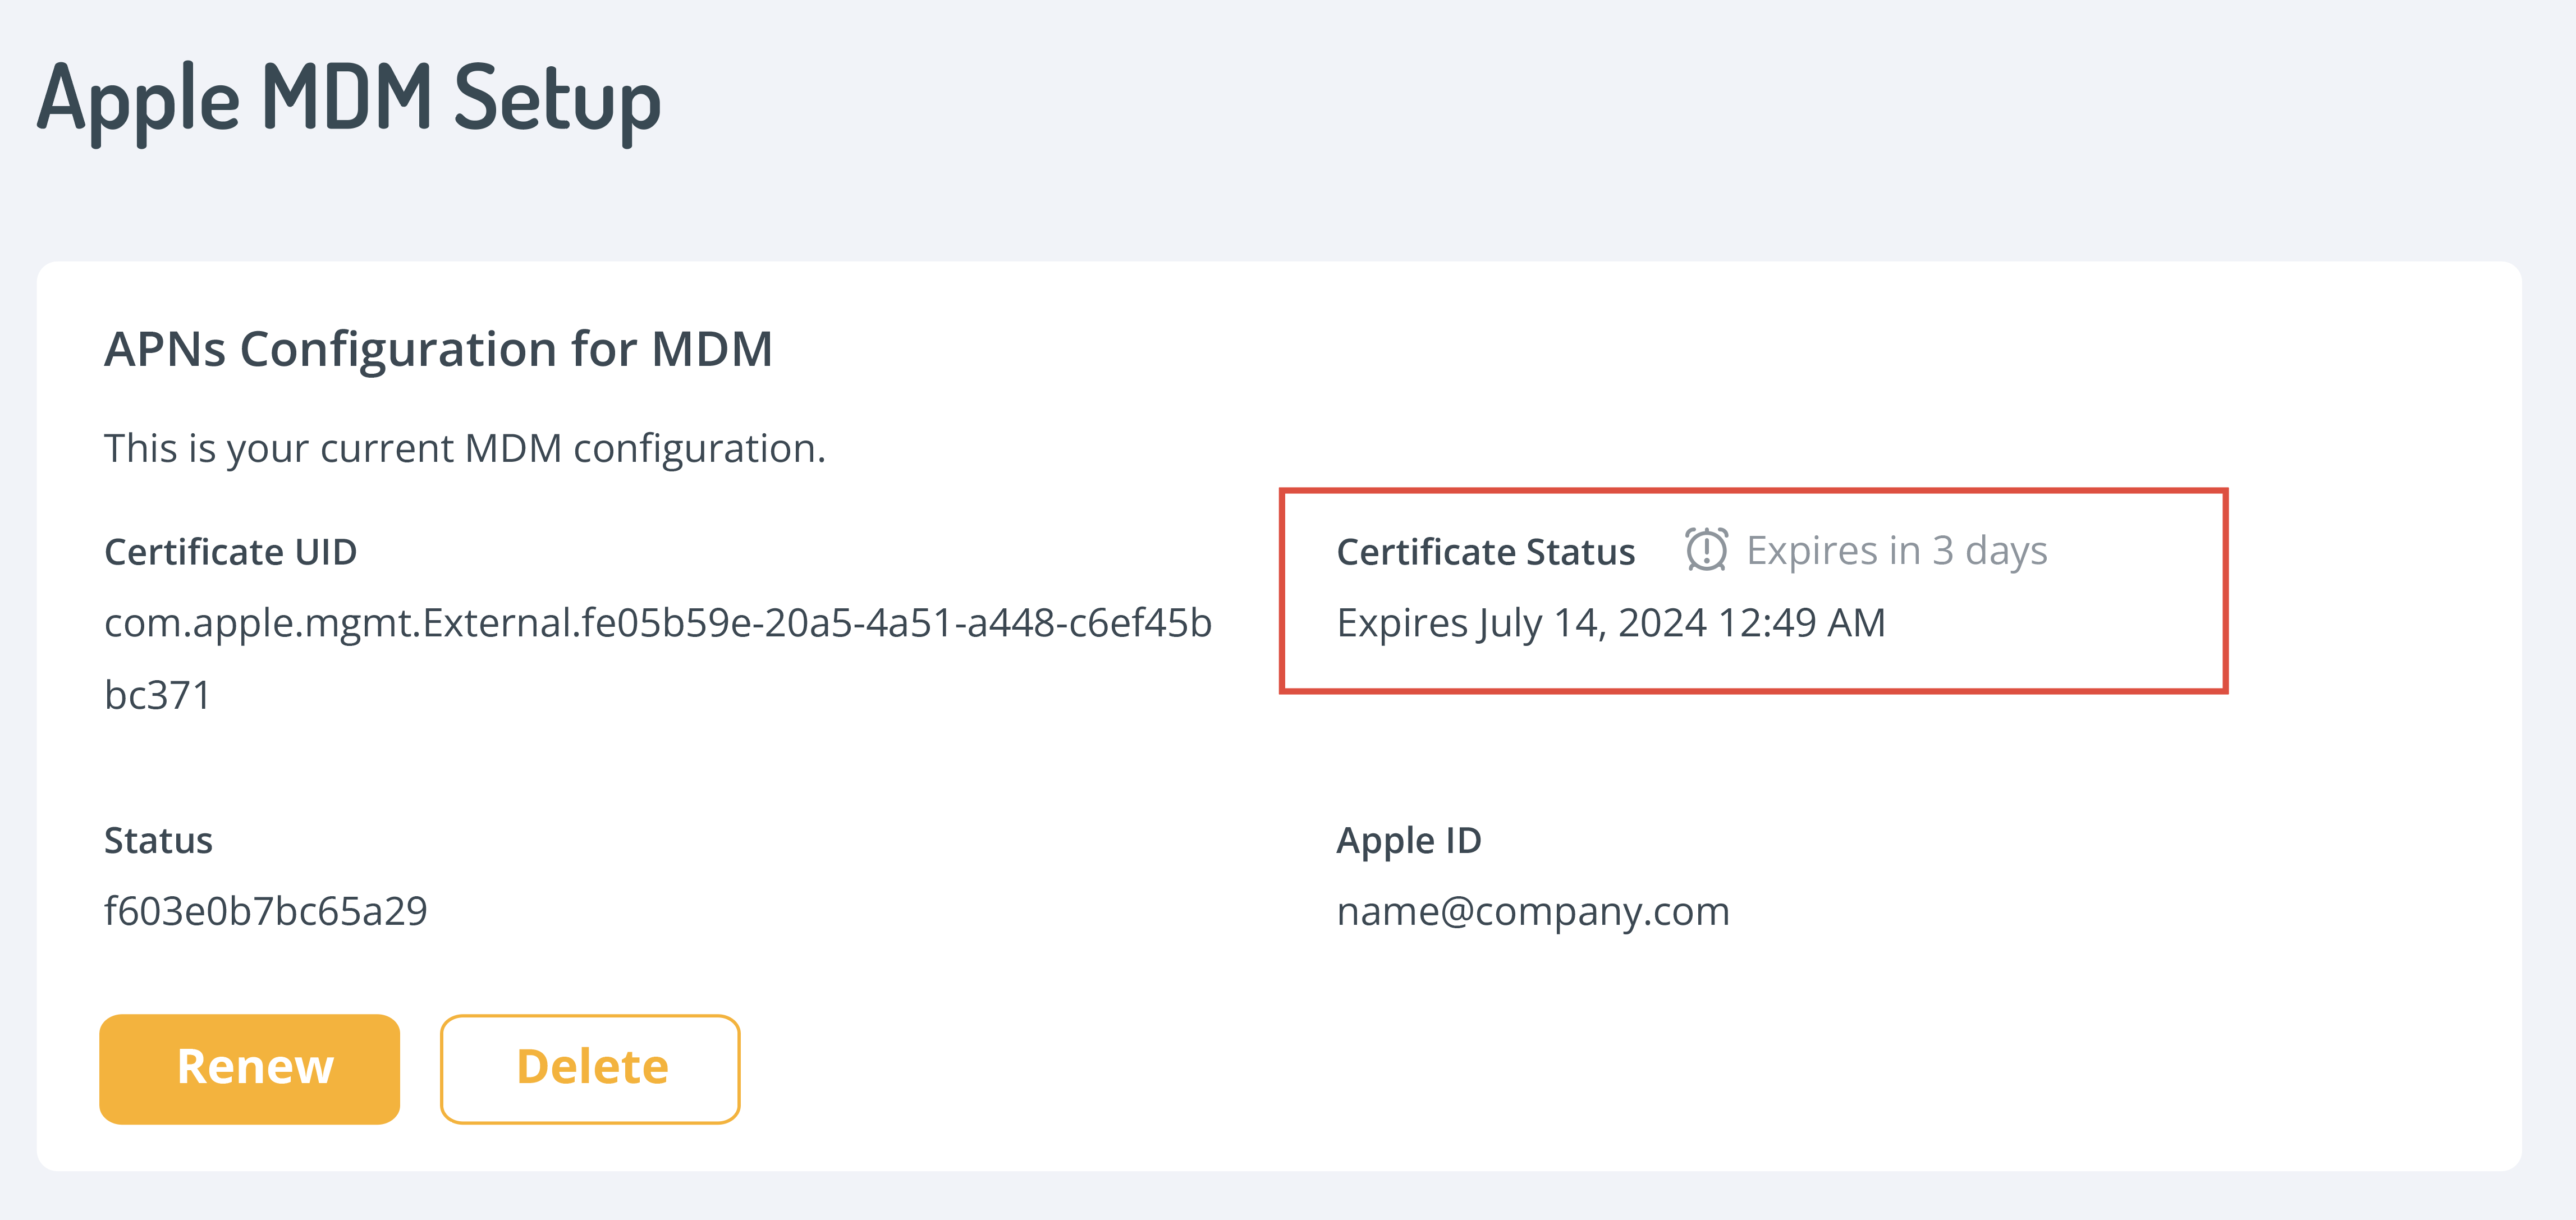
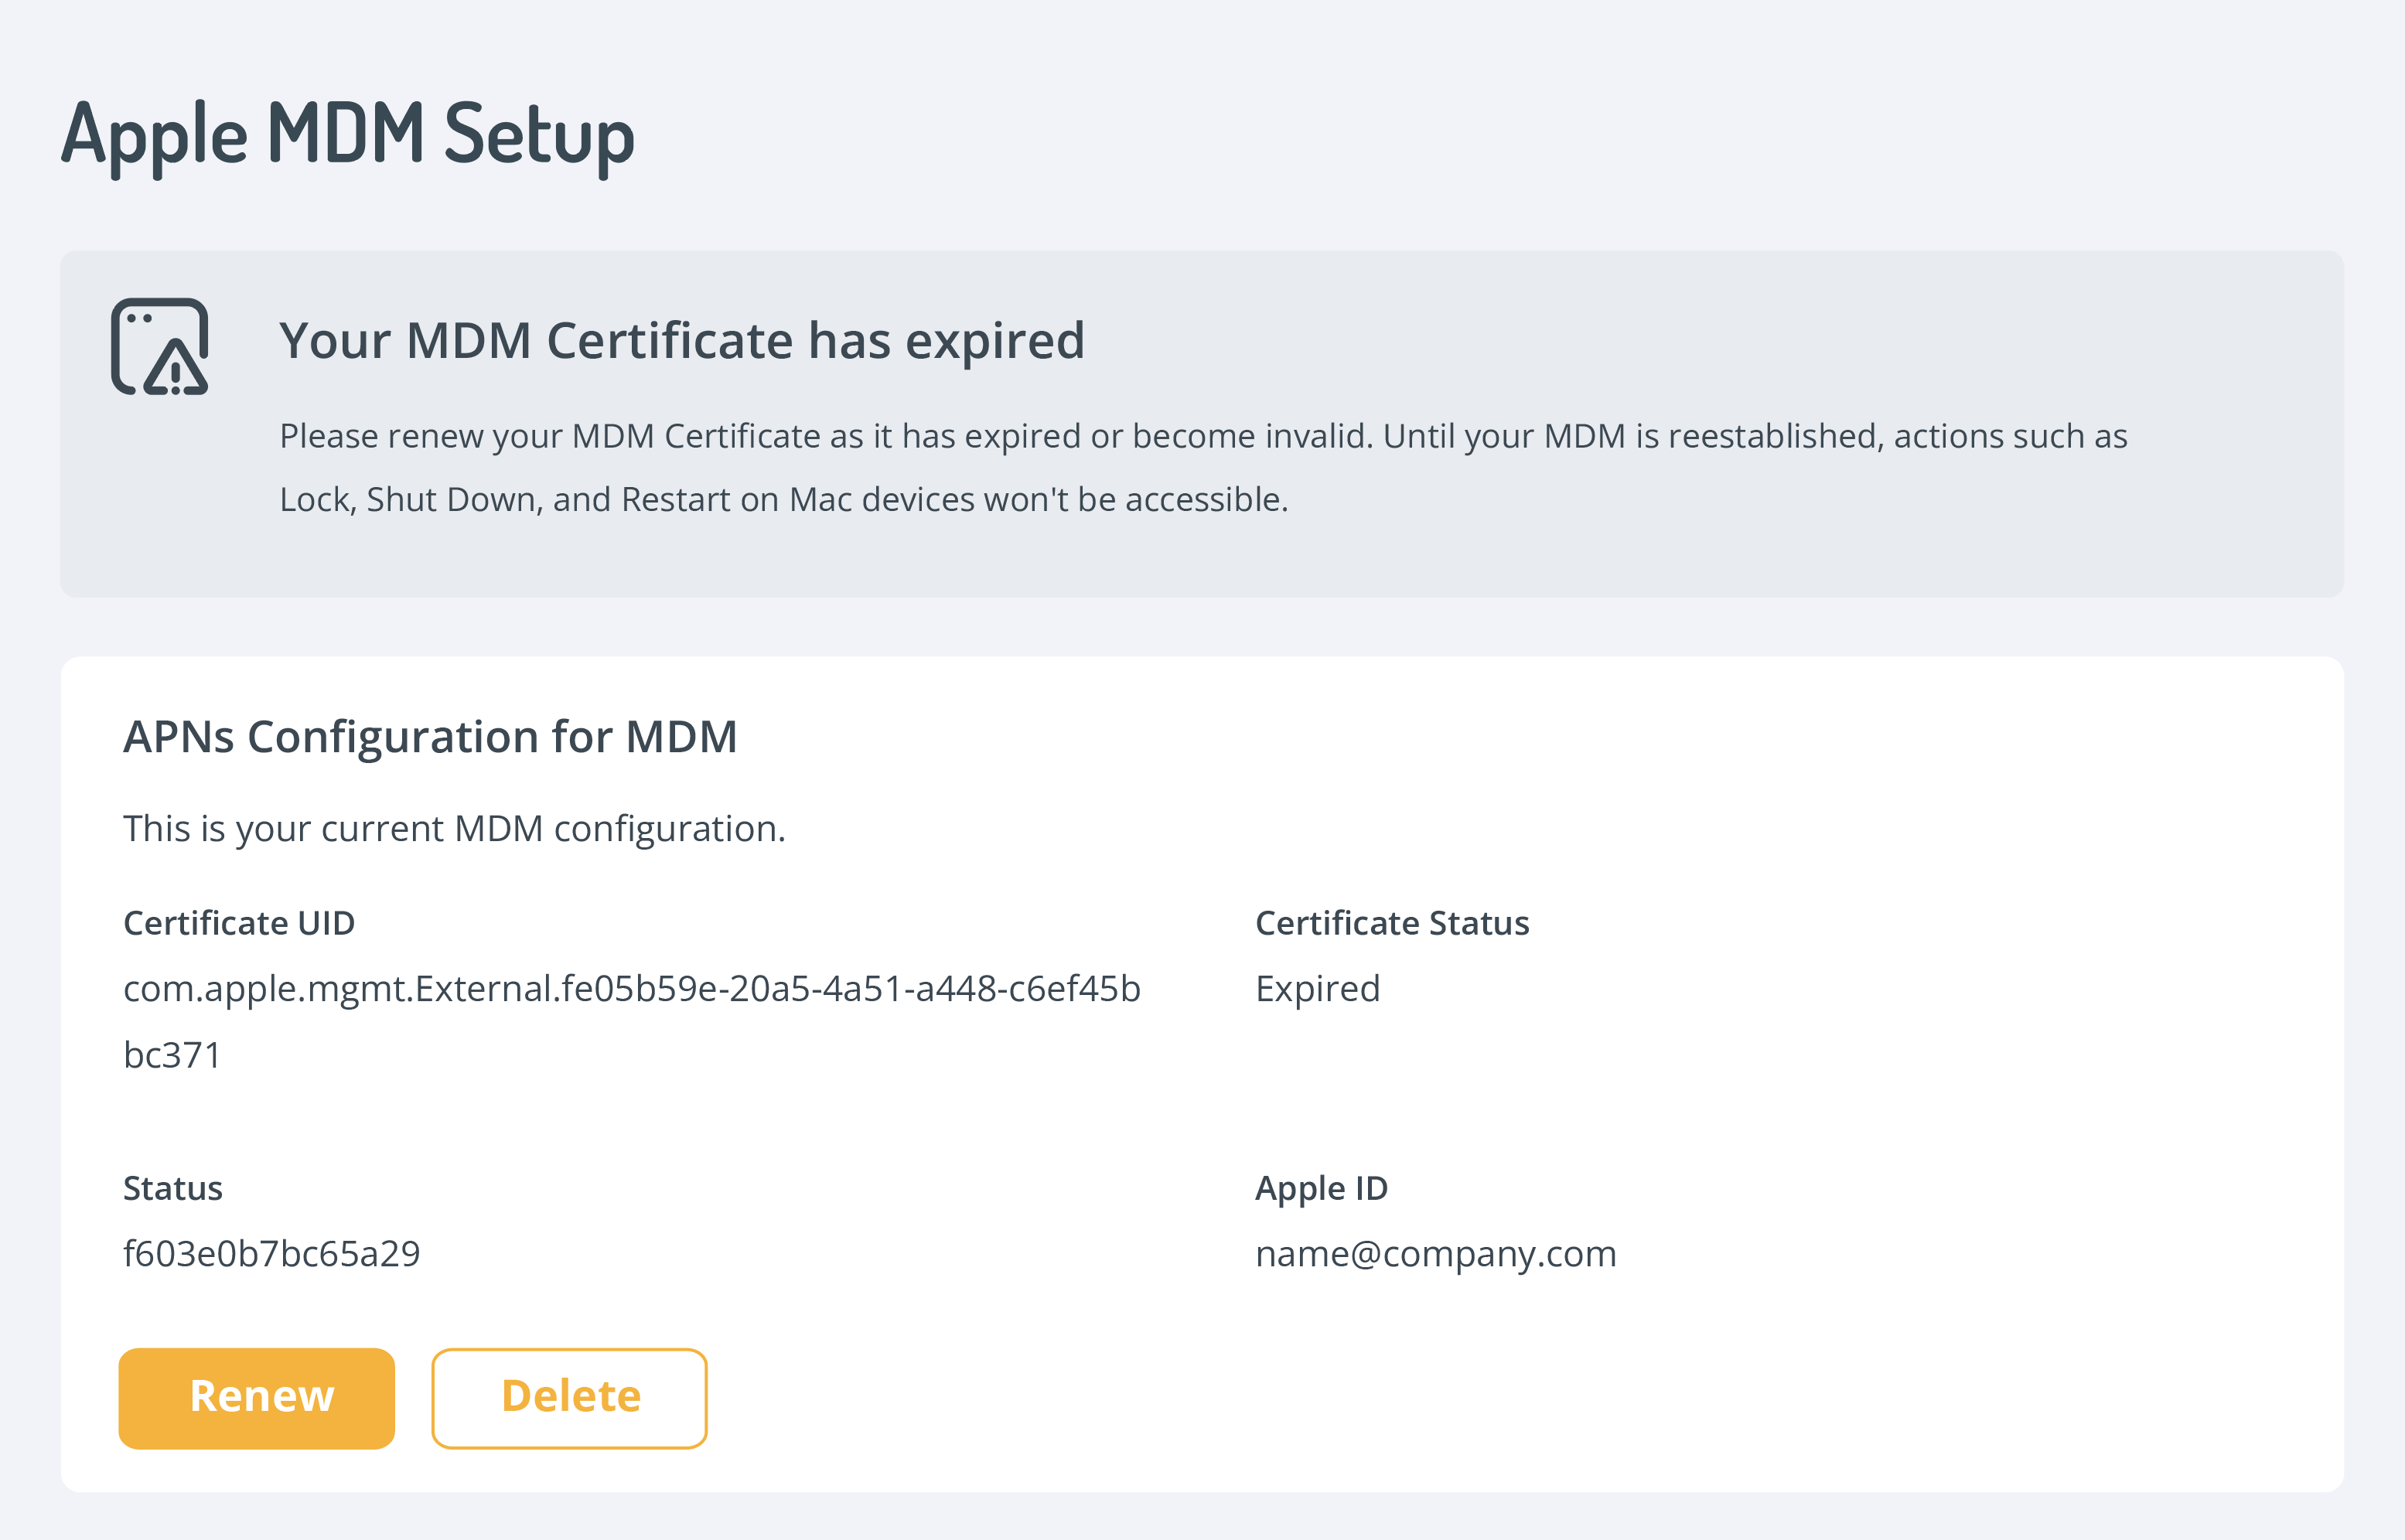
For already-expired certificates, a notice will be displayed on the page, stating that actions (Lock, Shut Down, Restart, etc.) will not be accessible until the certificate is renewed.
Delete
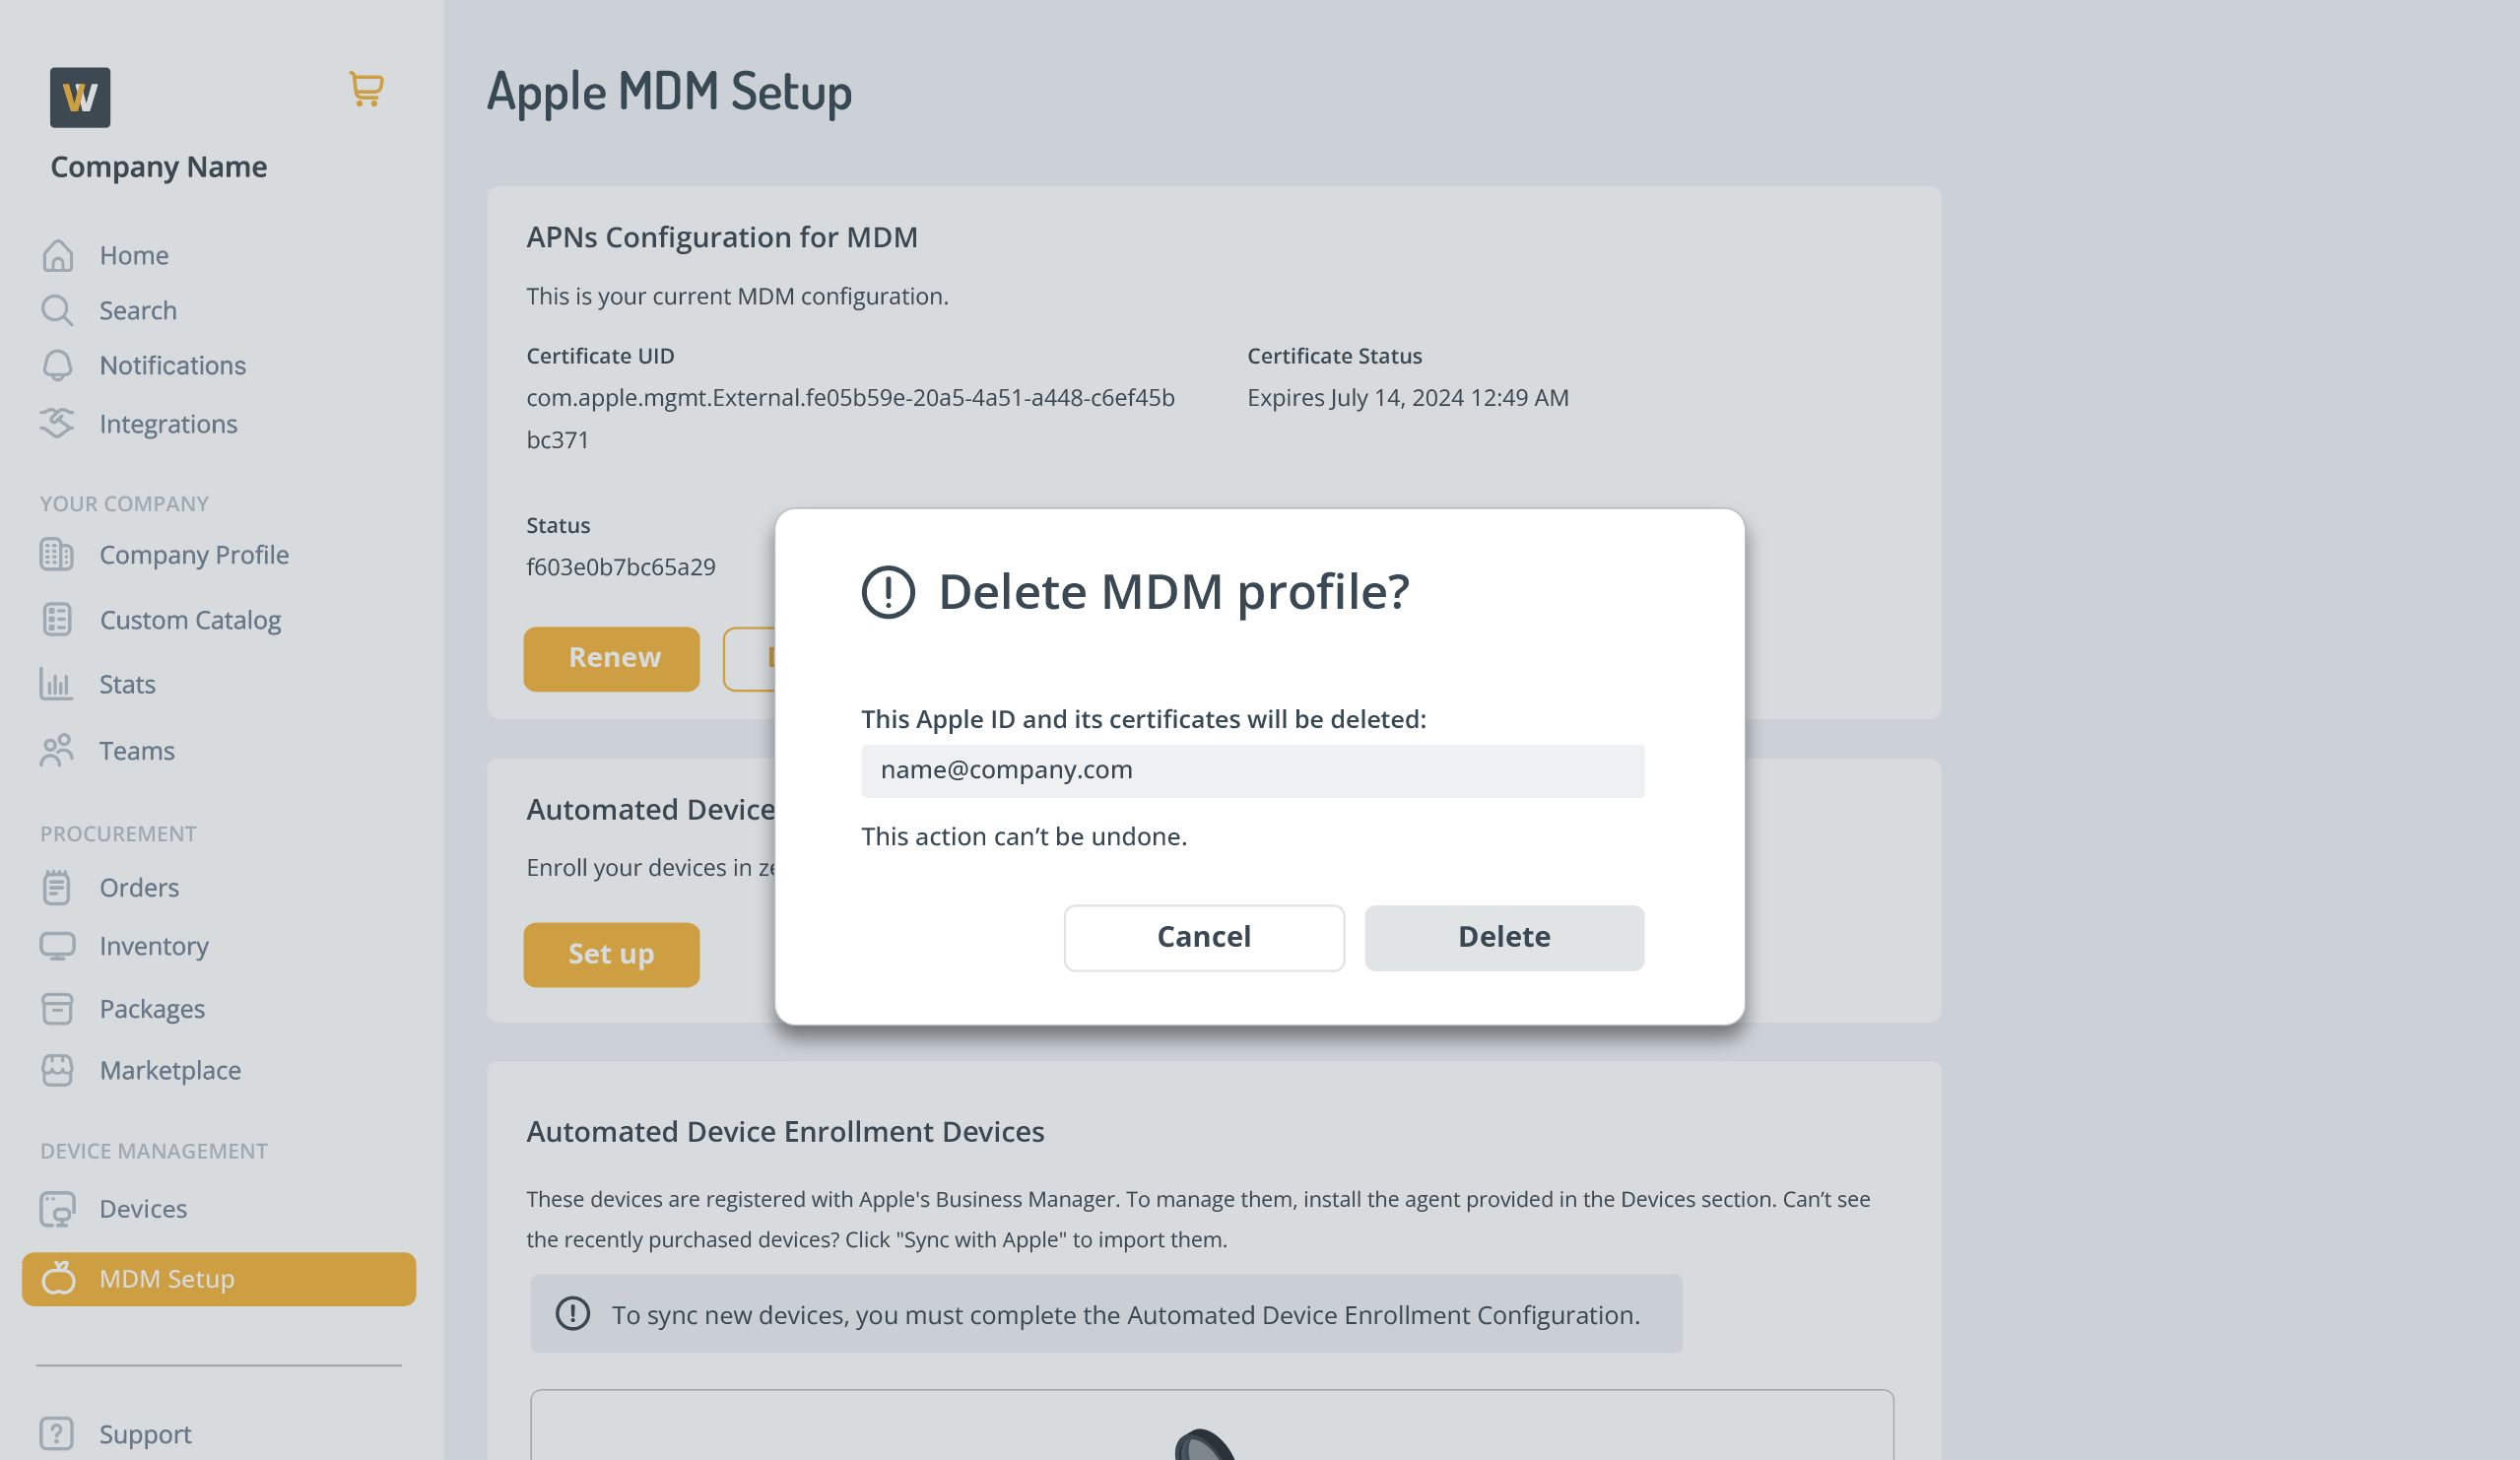
View the MDM setup and select the Delete button. A modal will pop up to confirm that the setup will be deleted and cannot be undone.
Automated device enrollment
Set up Automated Device Enrollment (ADE) configuration
Once the MDM is enrolled, set up the Automated Device Enrollment Configuration. By selecting Set up, you’ll be navigated to this page:
Follow these steps:
| Steps | Notes |
|---|---|
| 1. Sign in to Apple | |
| Sign into Apple Business Manager. Once there, navigate to your MDM servers. | The button is a link to: https://business.apple.com/ |
| 2. Upload Automated Device Enrollment Token | |
| Upload the .PEM certificate you just downloaded from Apple. | Only .PEM files are allowed. |
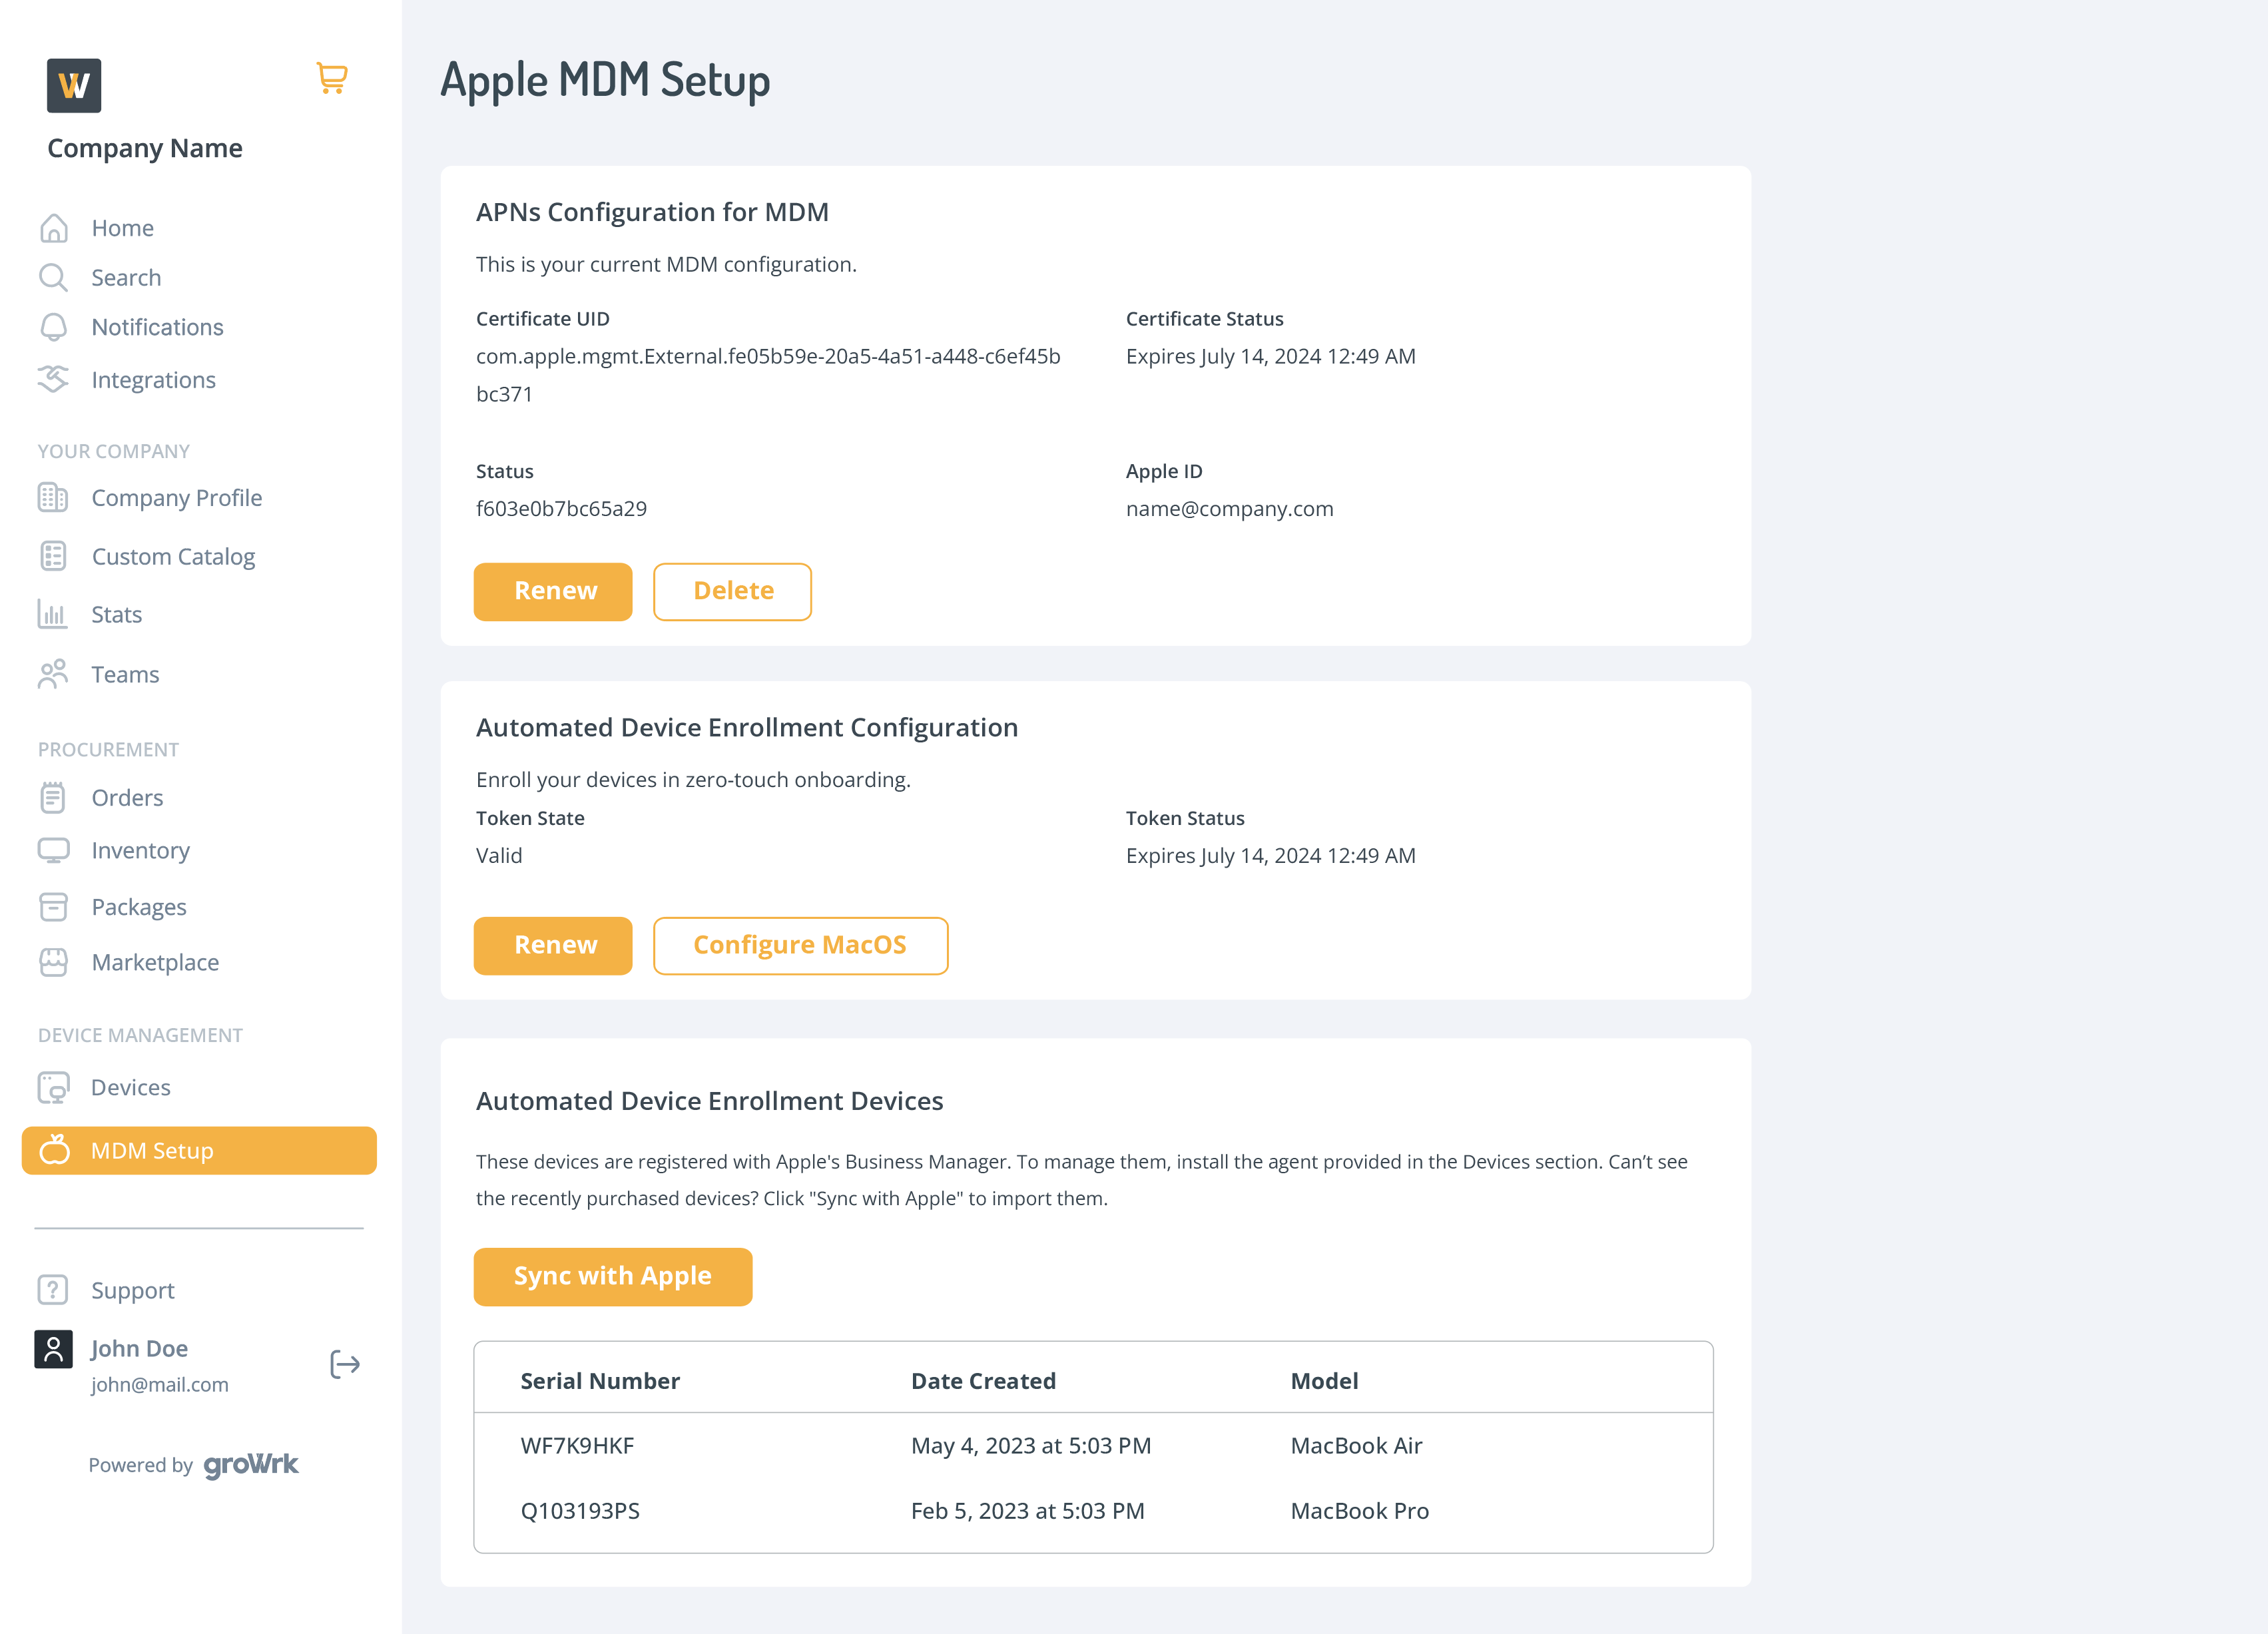
After selecting Set Up*, if the configuration is successful, you’ll be redirected to the Apple MDM Setup page with new information displayed.
Renew ADE Configuration
Select Renew to renew the token, and the Set Up Apple’s Automated Device Enrollment page will open. Go through the same steps as the first-time setup process.

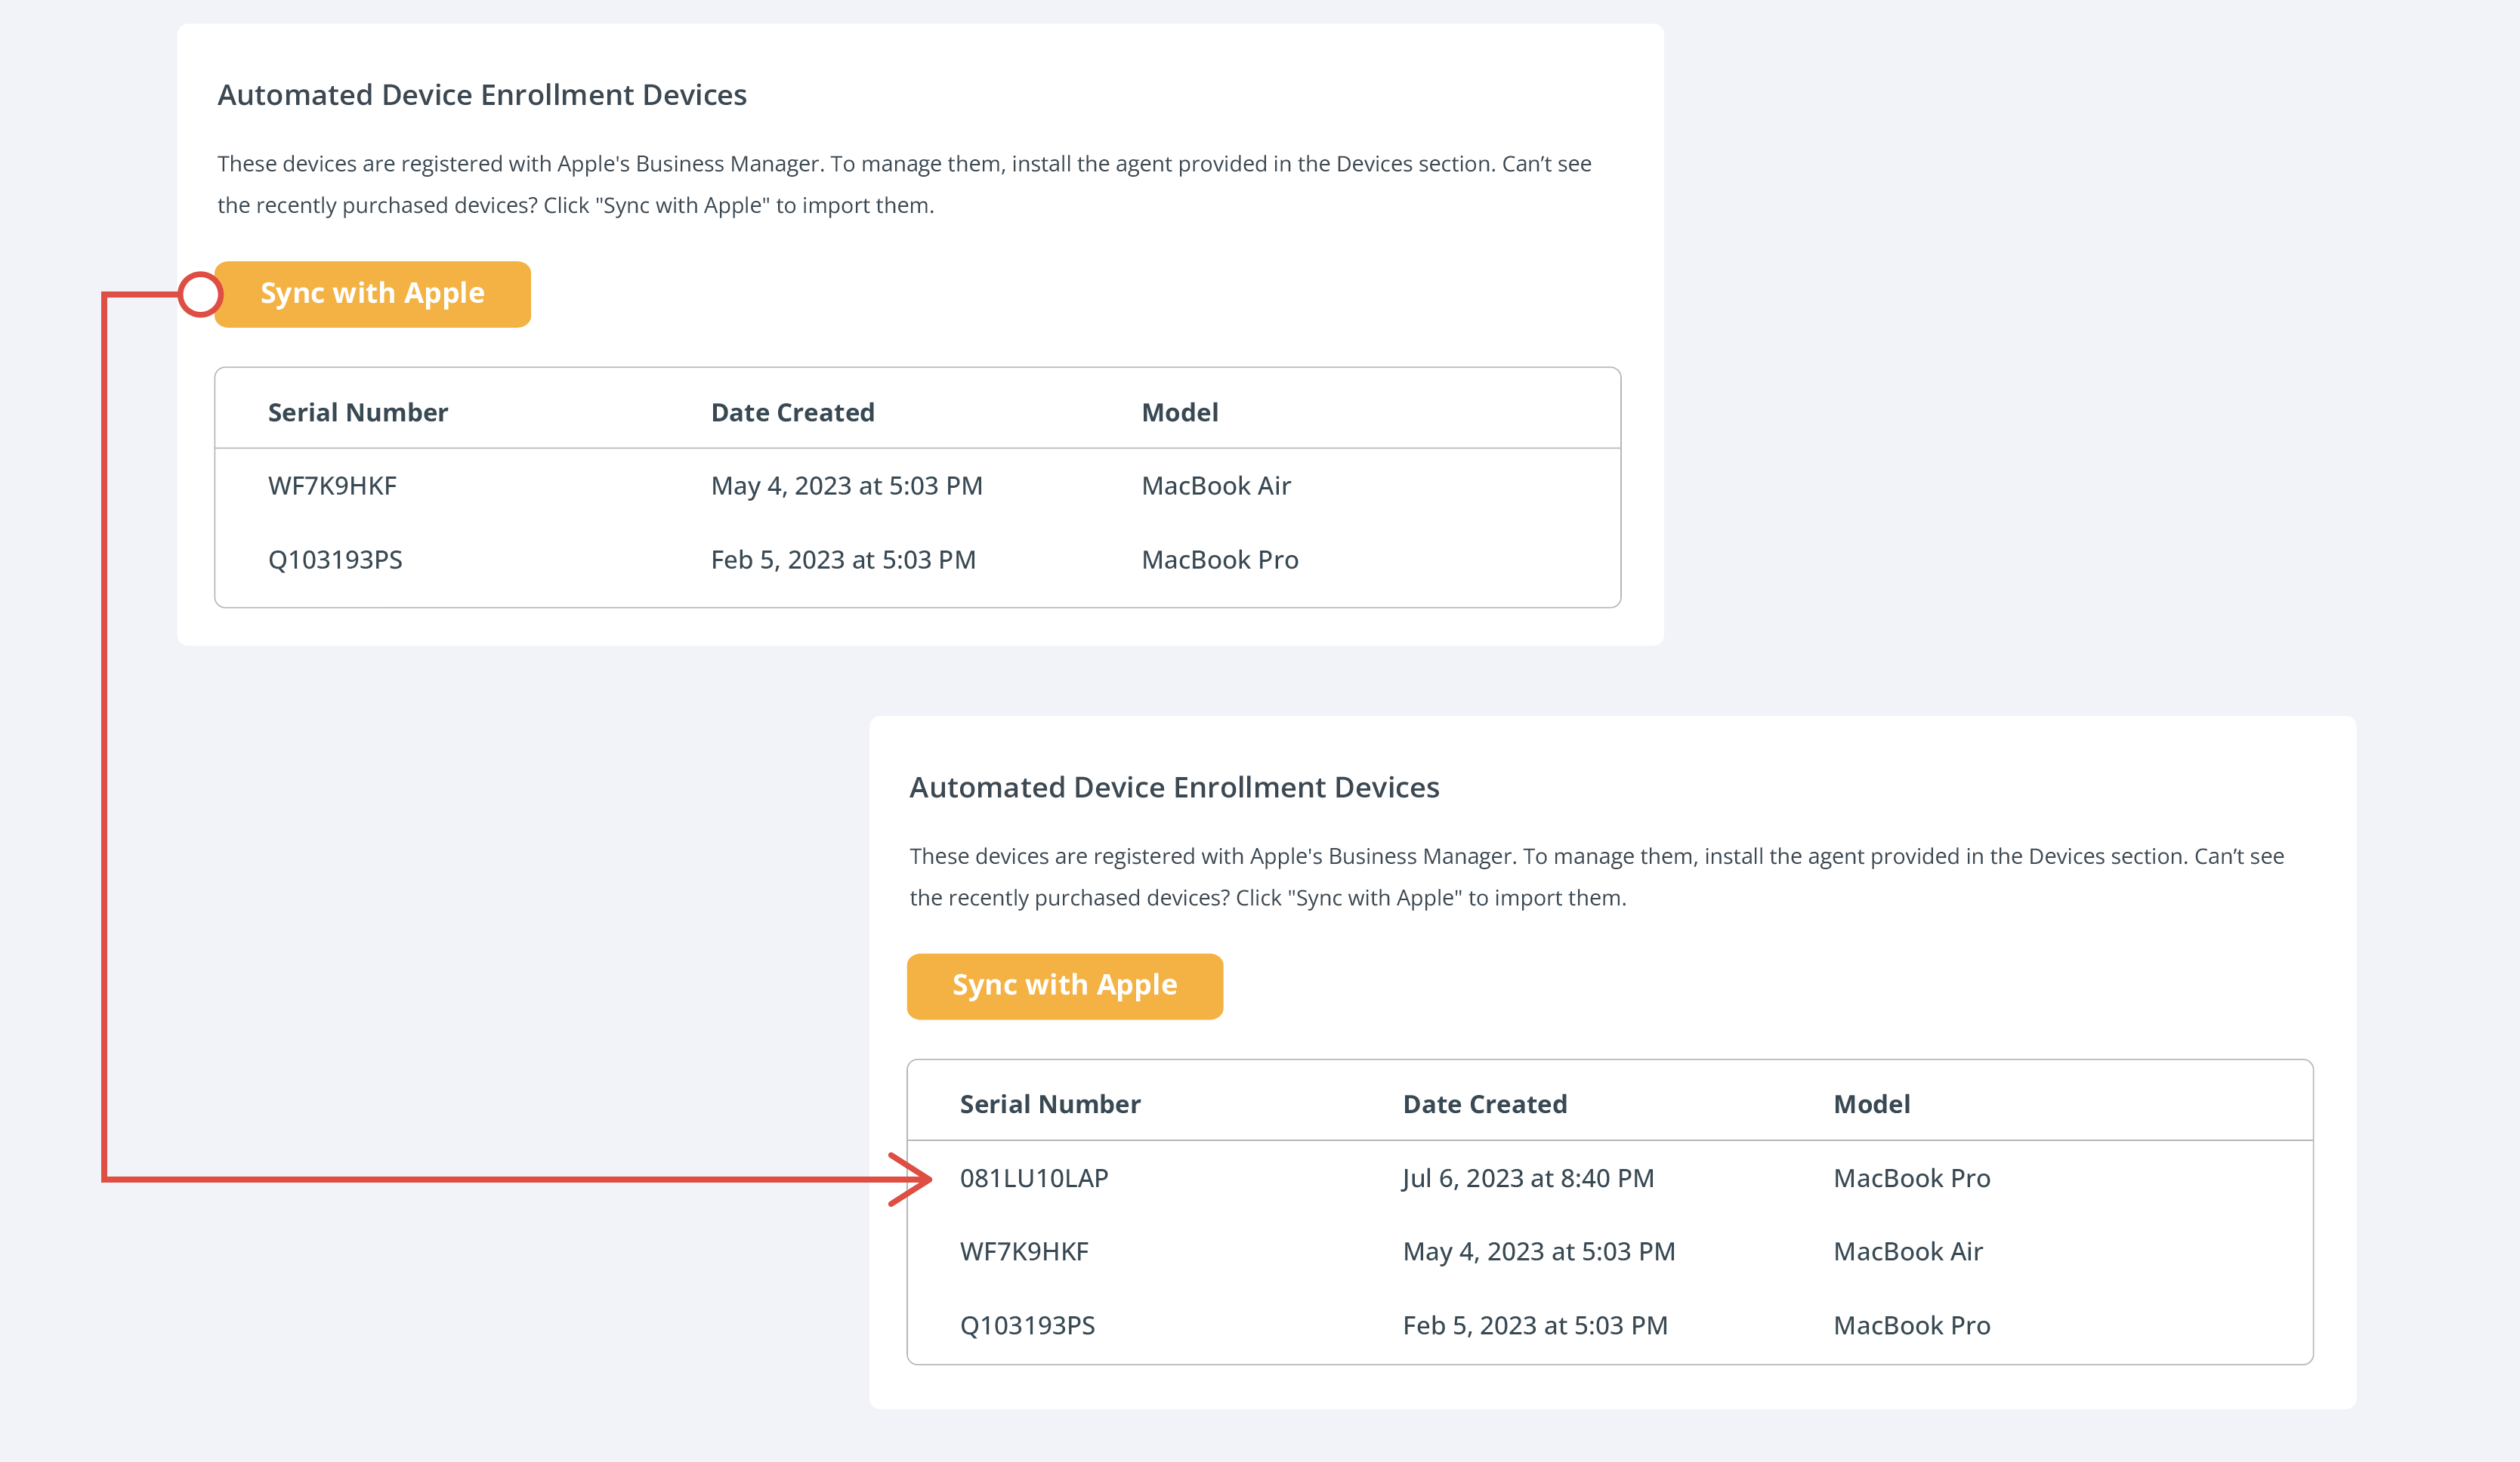
Sync devices manually
In the case that devices are not showing up, select Sync with Apple to manually sync the devices.
Adding Devices
On the Devices page, select Add a Device in the top right corner.
Adding a device involves installing/executing an agent or a command on the device. The following modals are designed to present download options, tokens, and required commands for each OS.
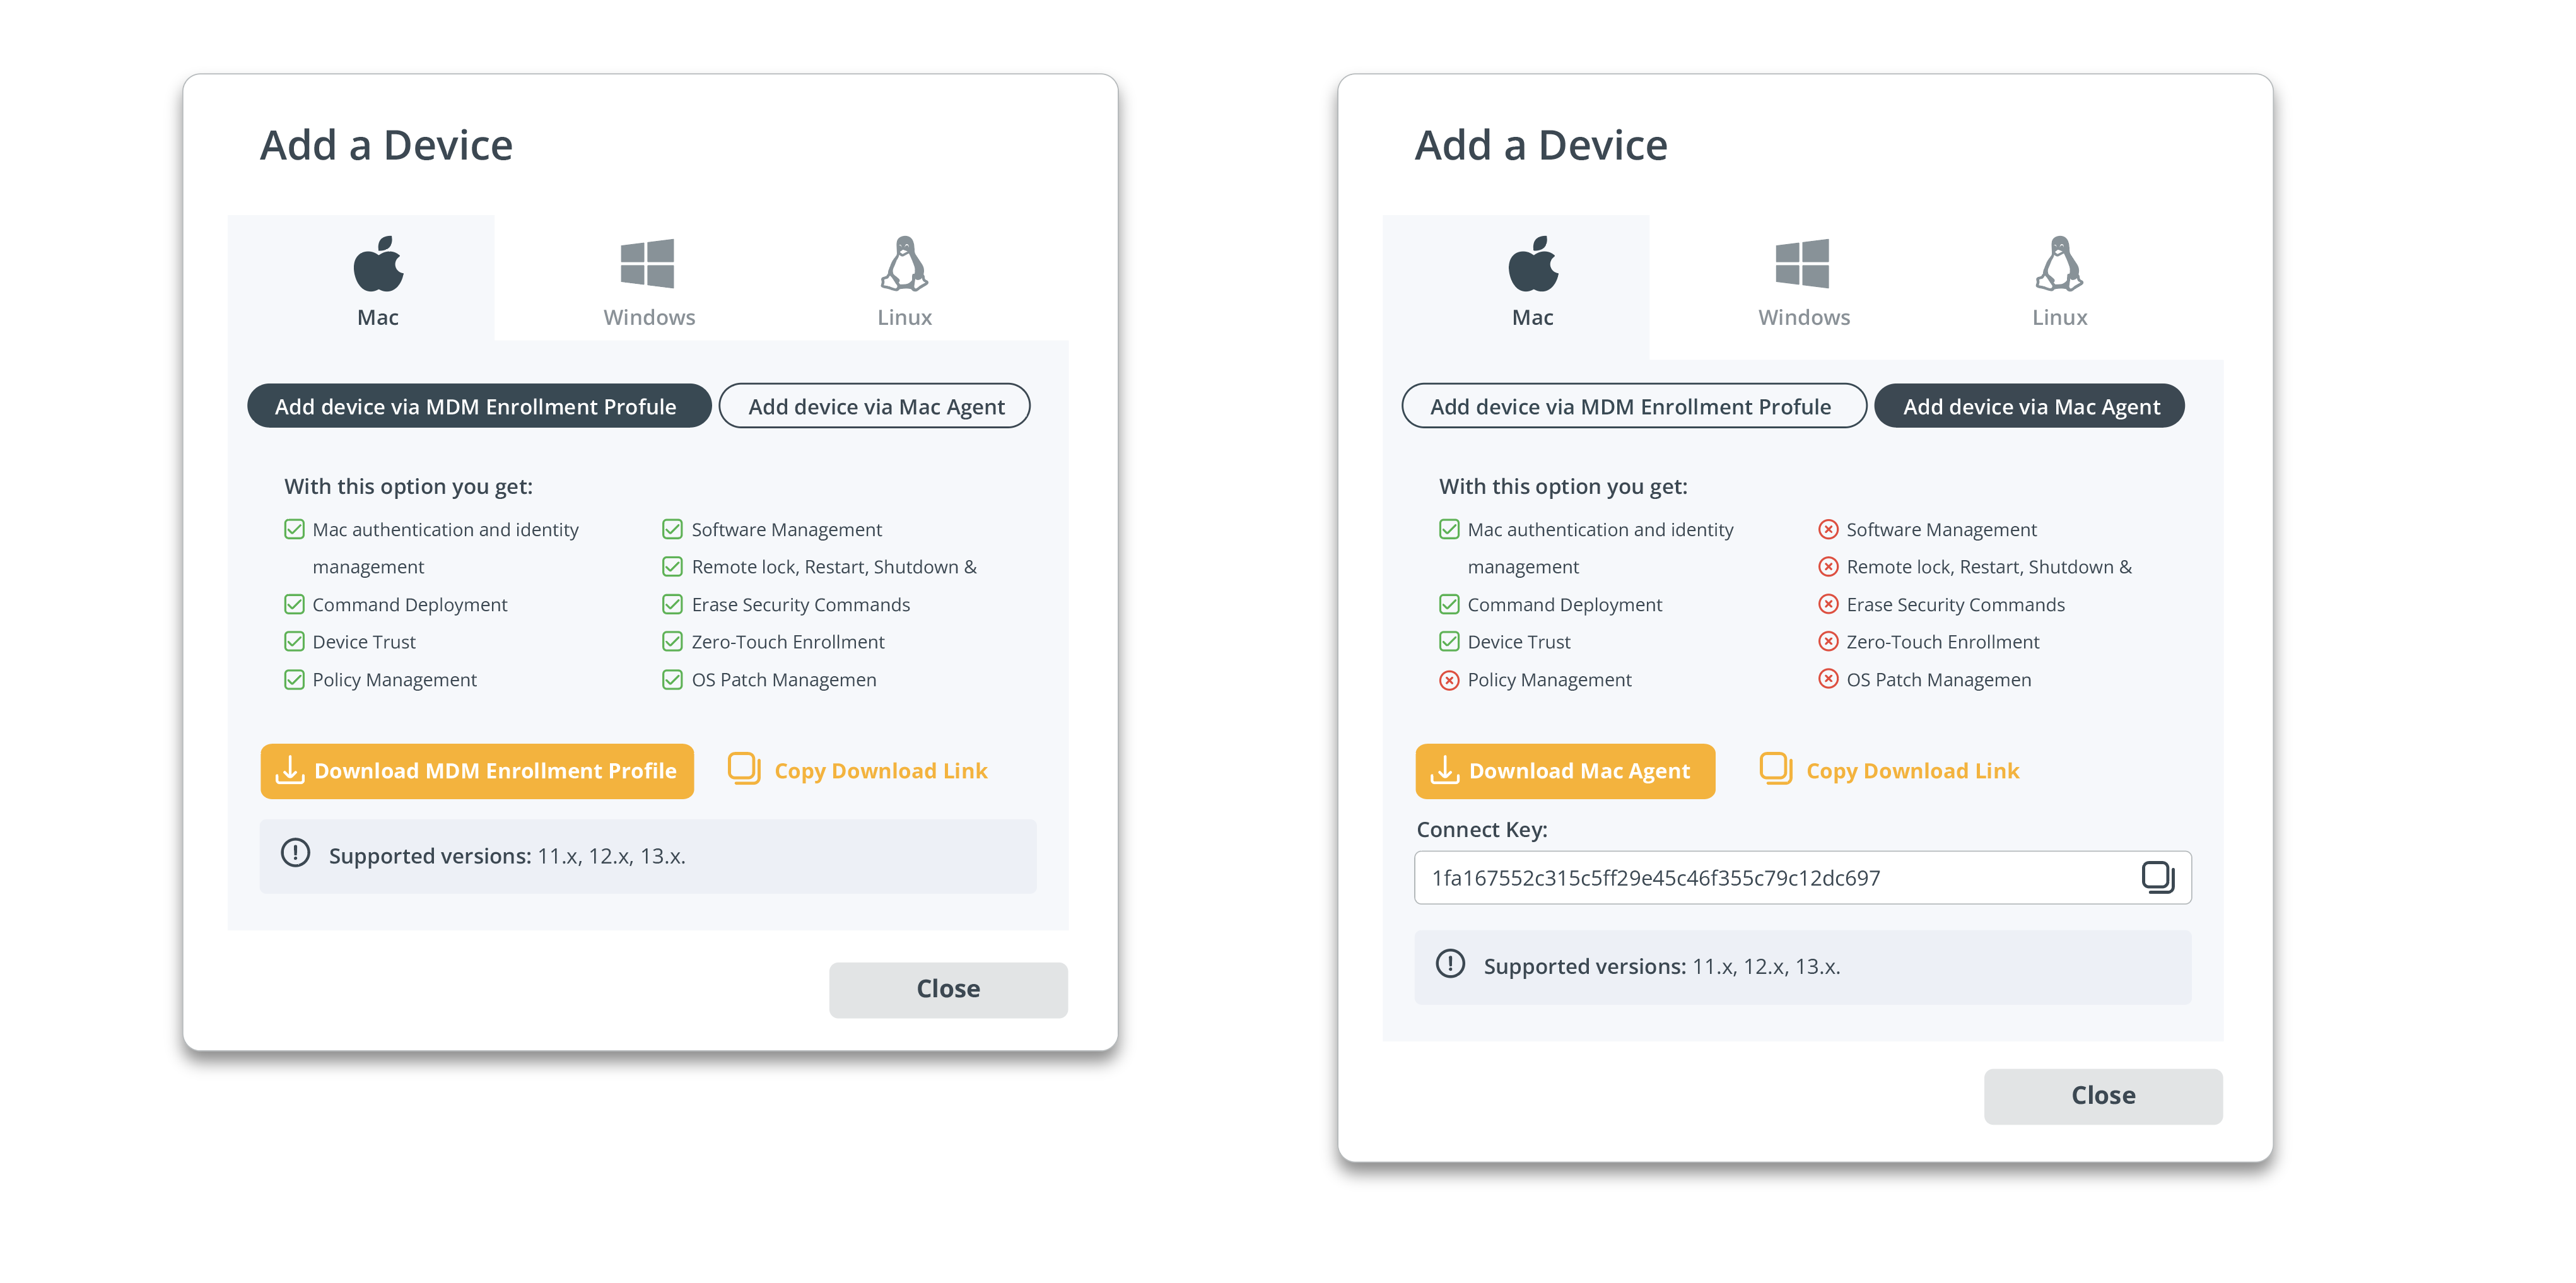
Mac
There are two ways to add a Mac device:
- Via MDM Enrollment Profile
- Via Mac Agent
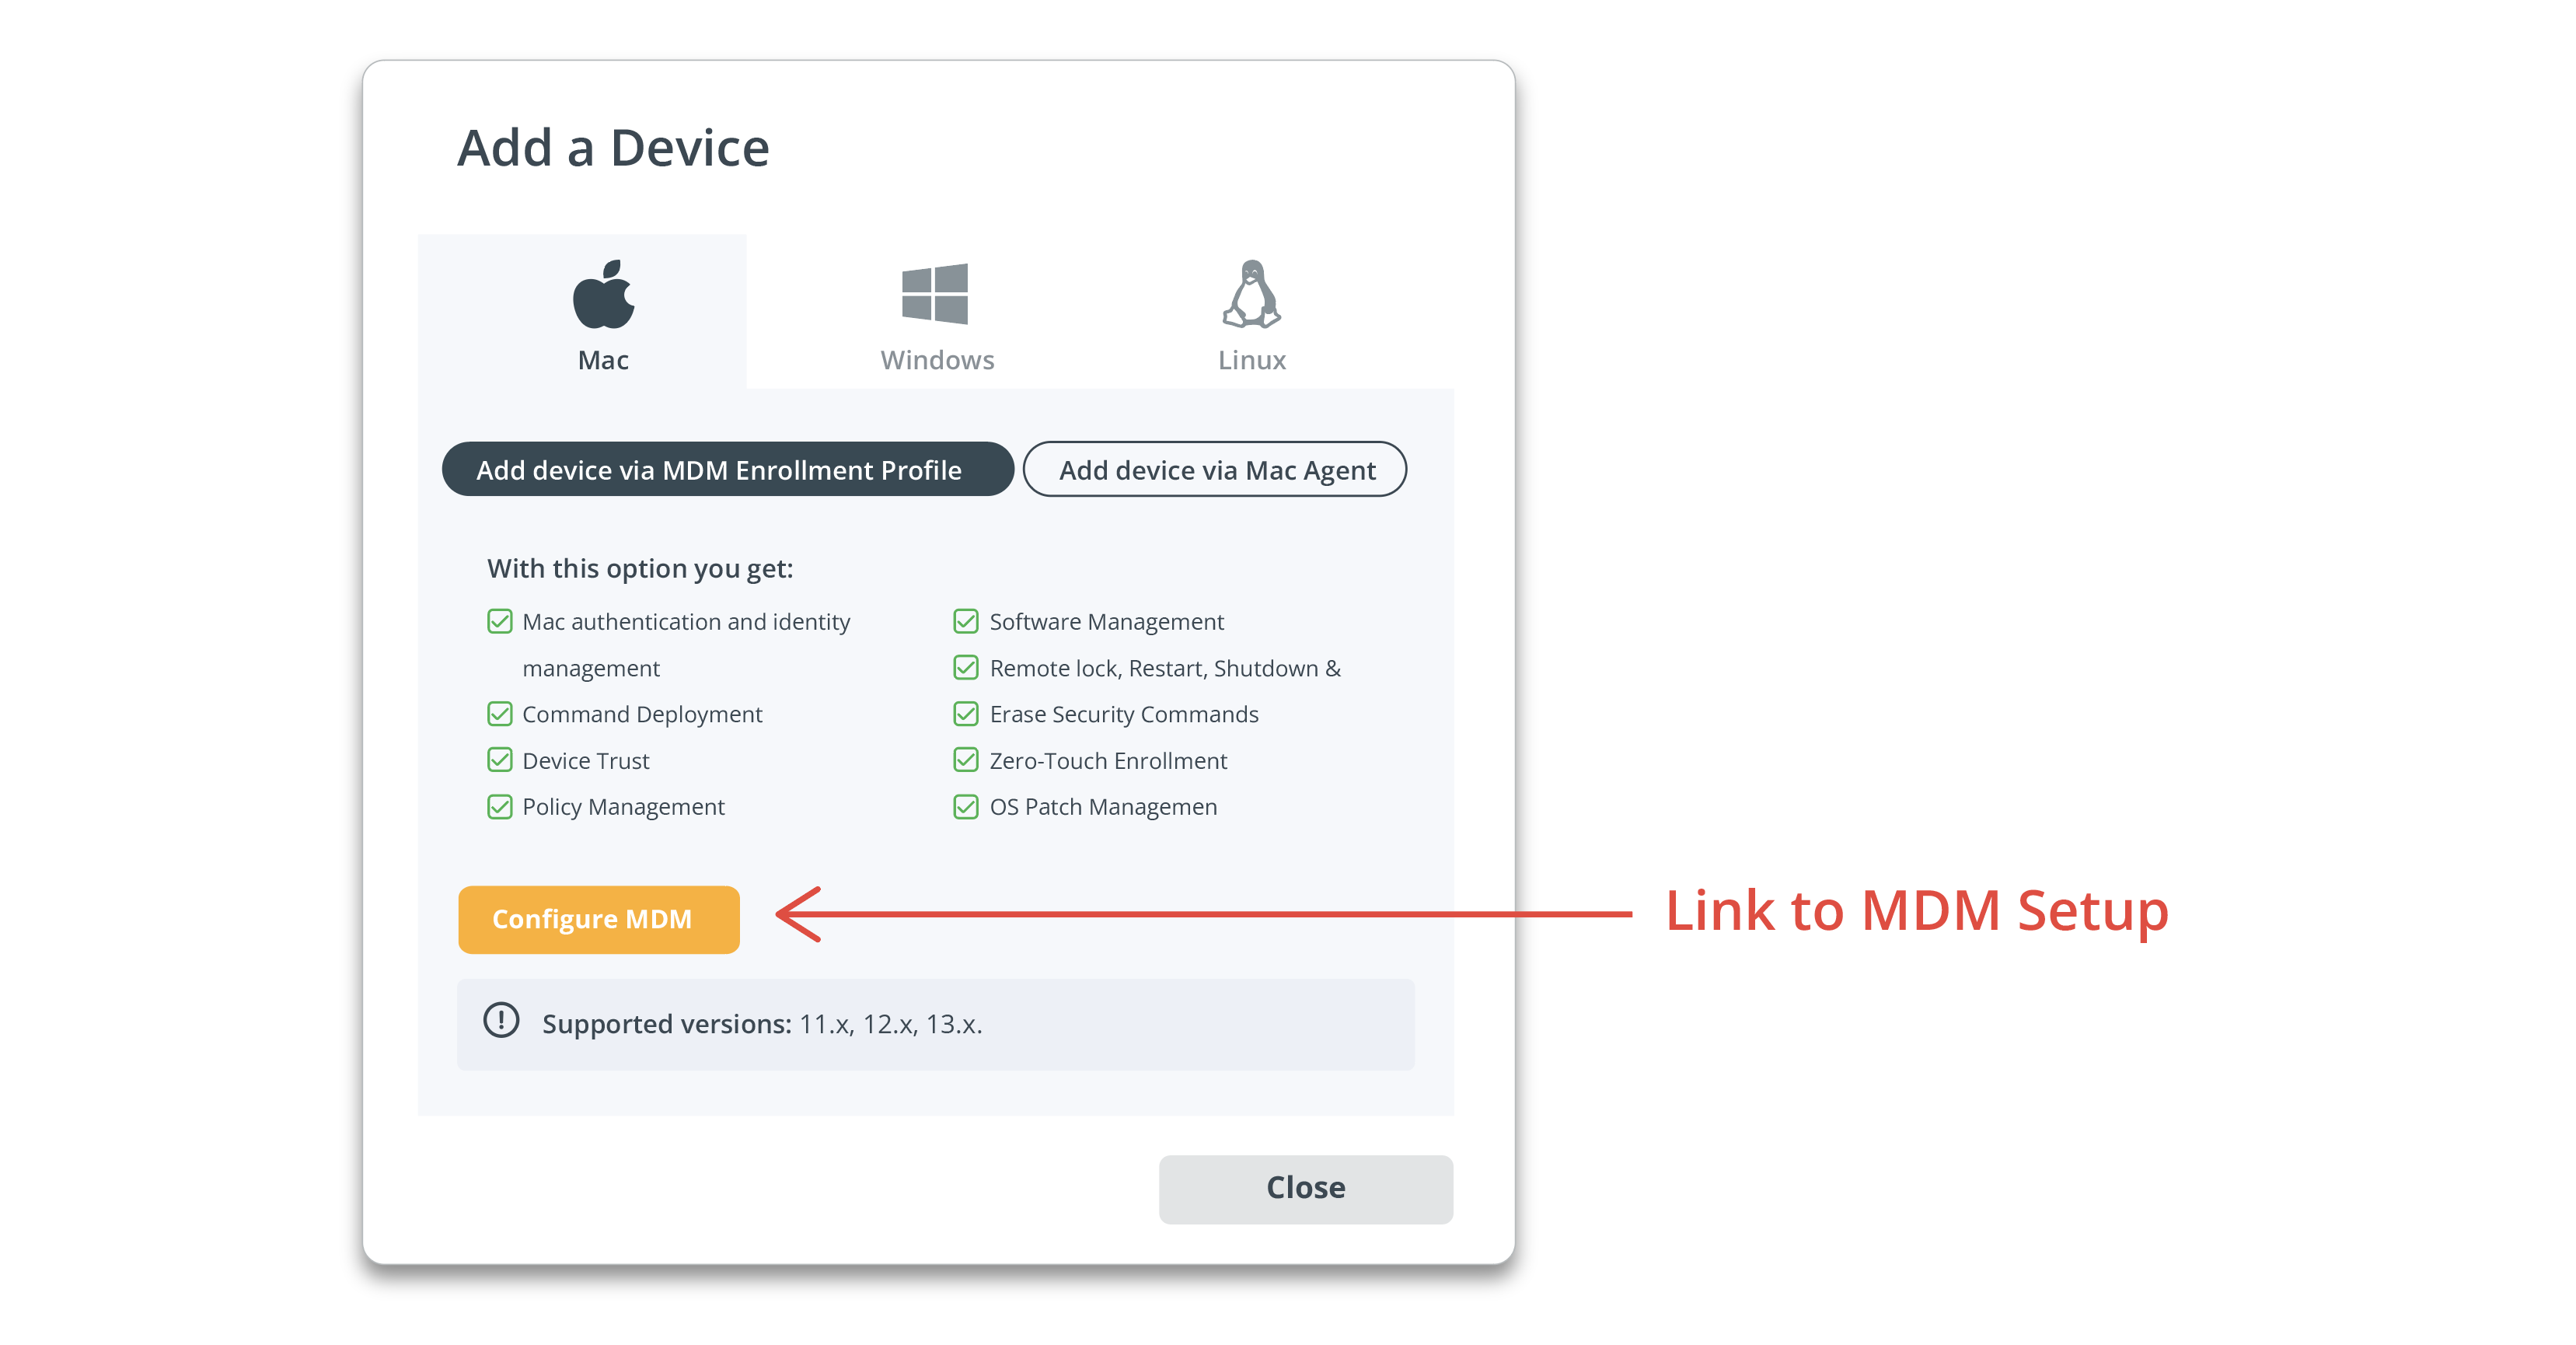
If the MDM is not set up, there will be a Configure MDM button to direct you to the MDM setup process.
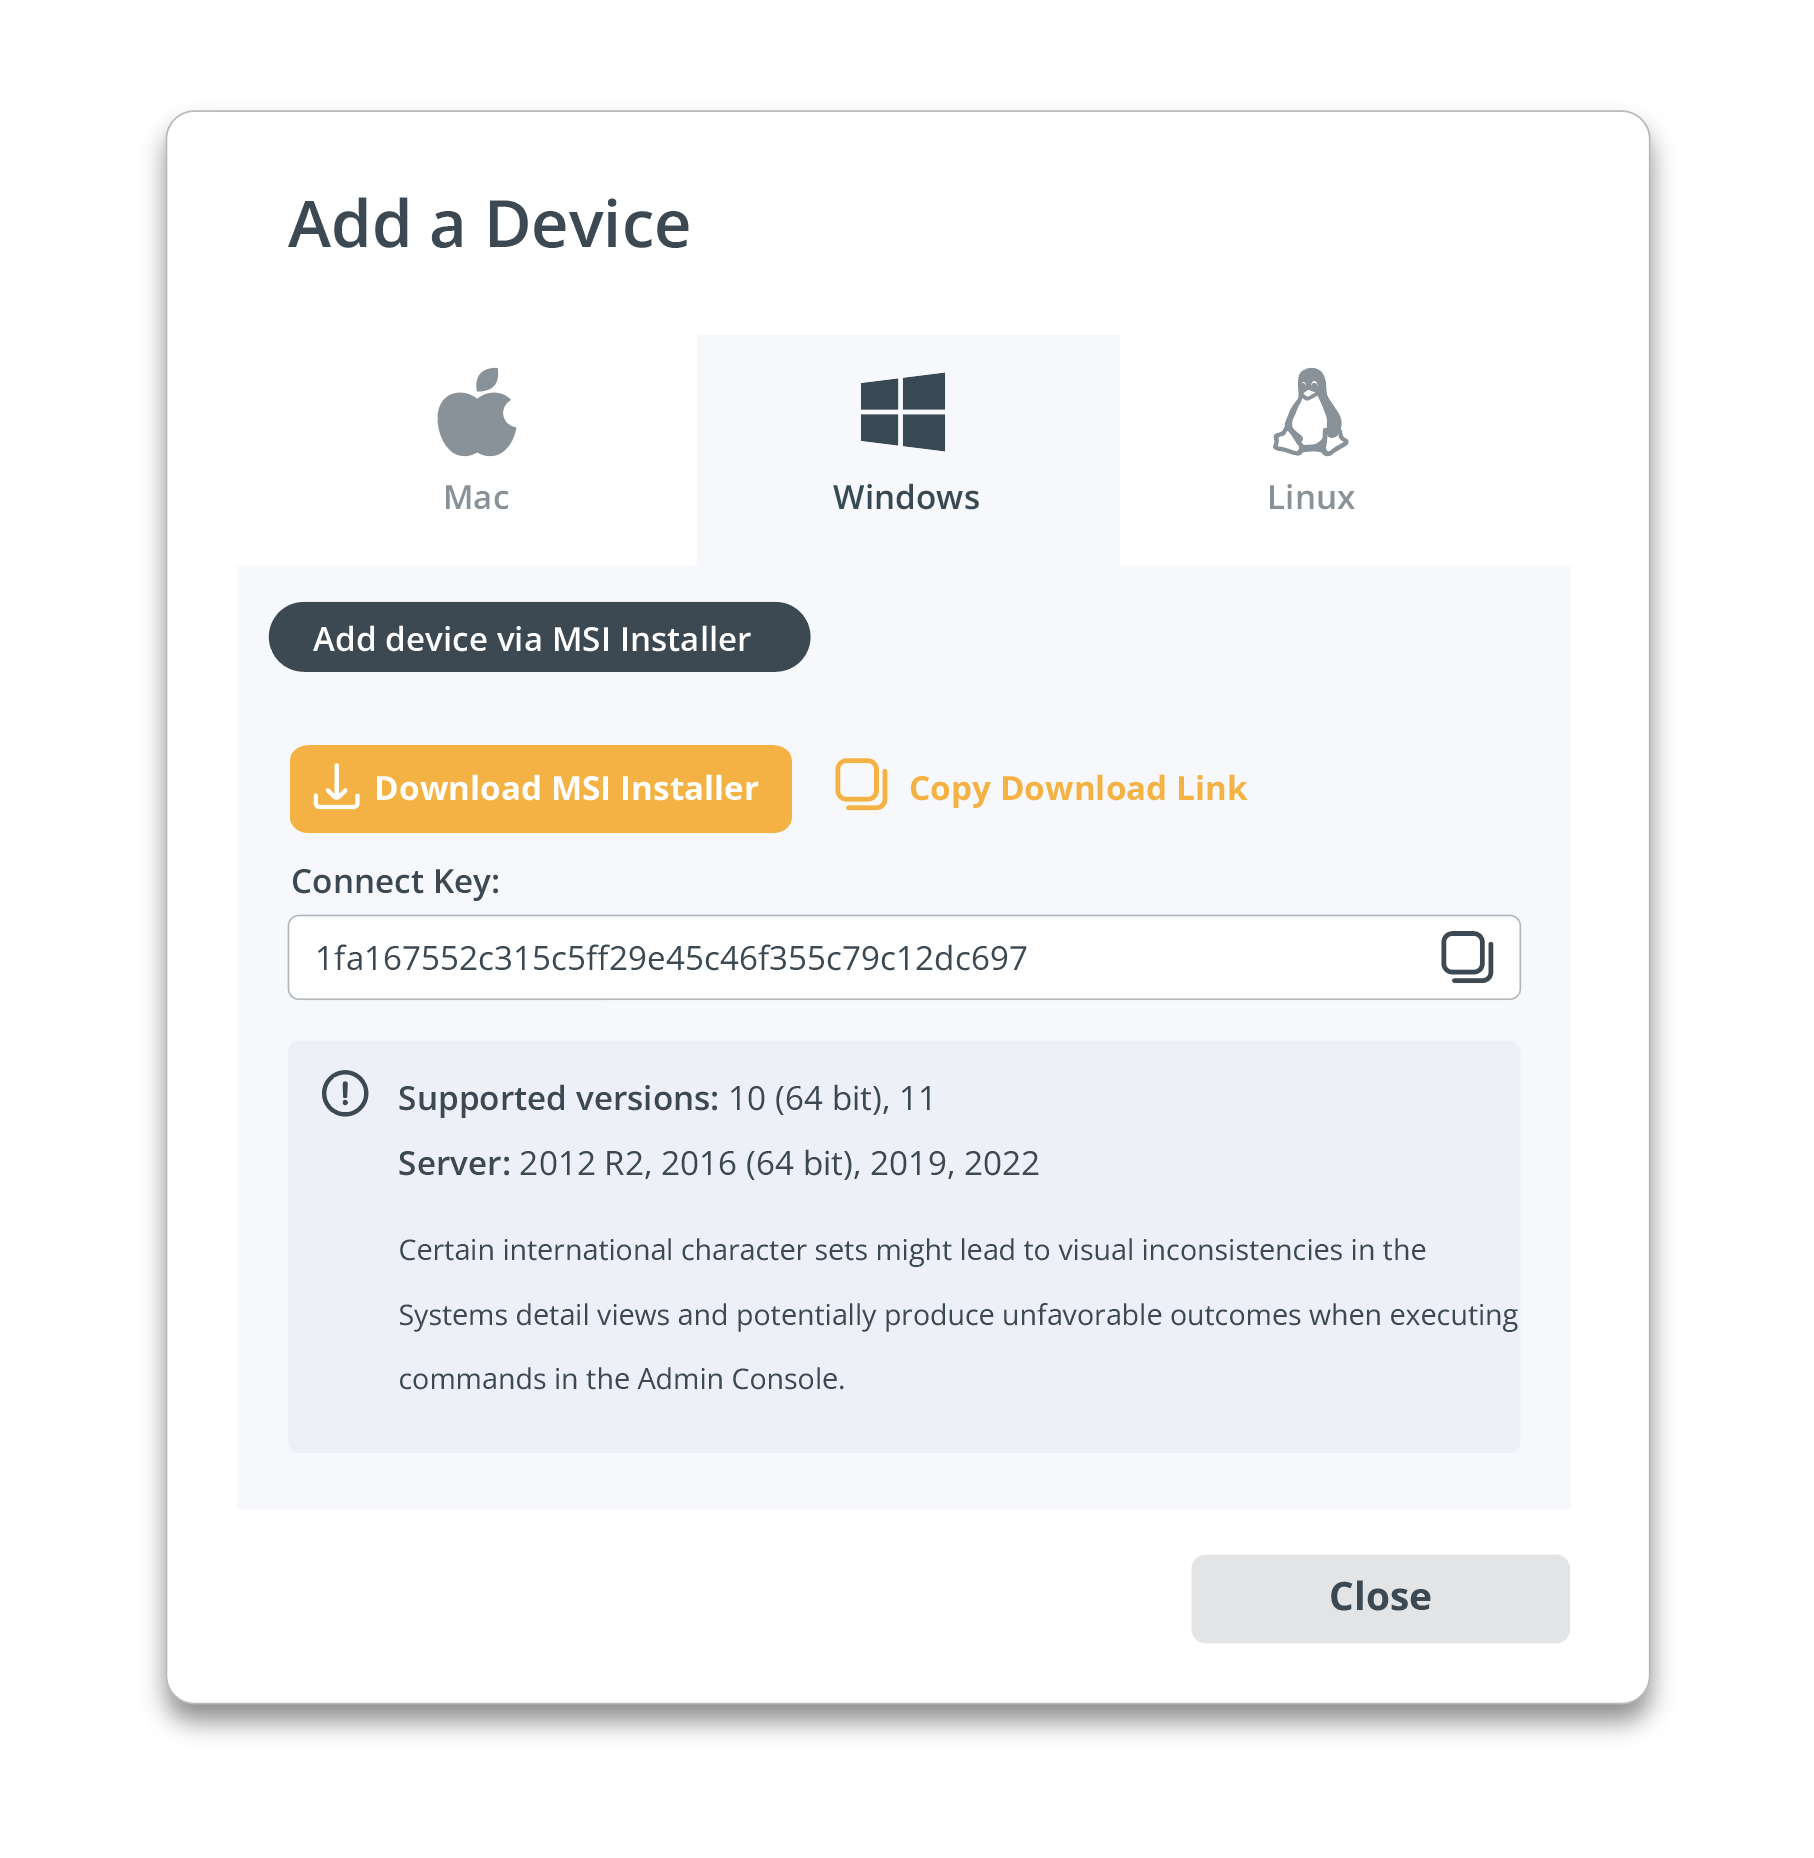
Windows
Windows devices are added via MSI installer.
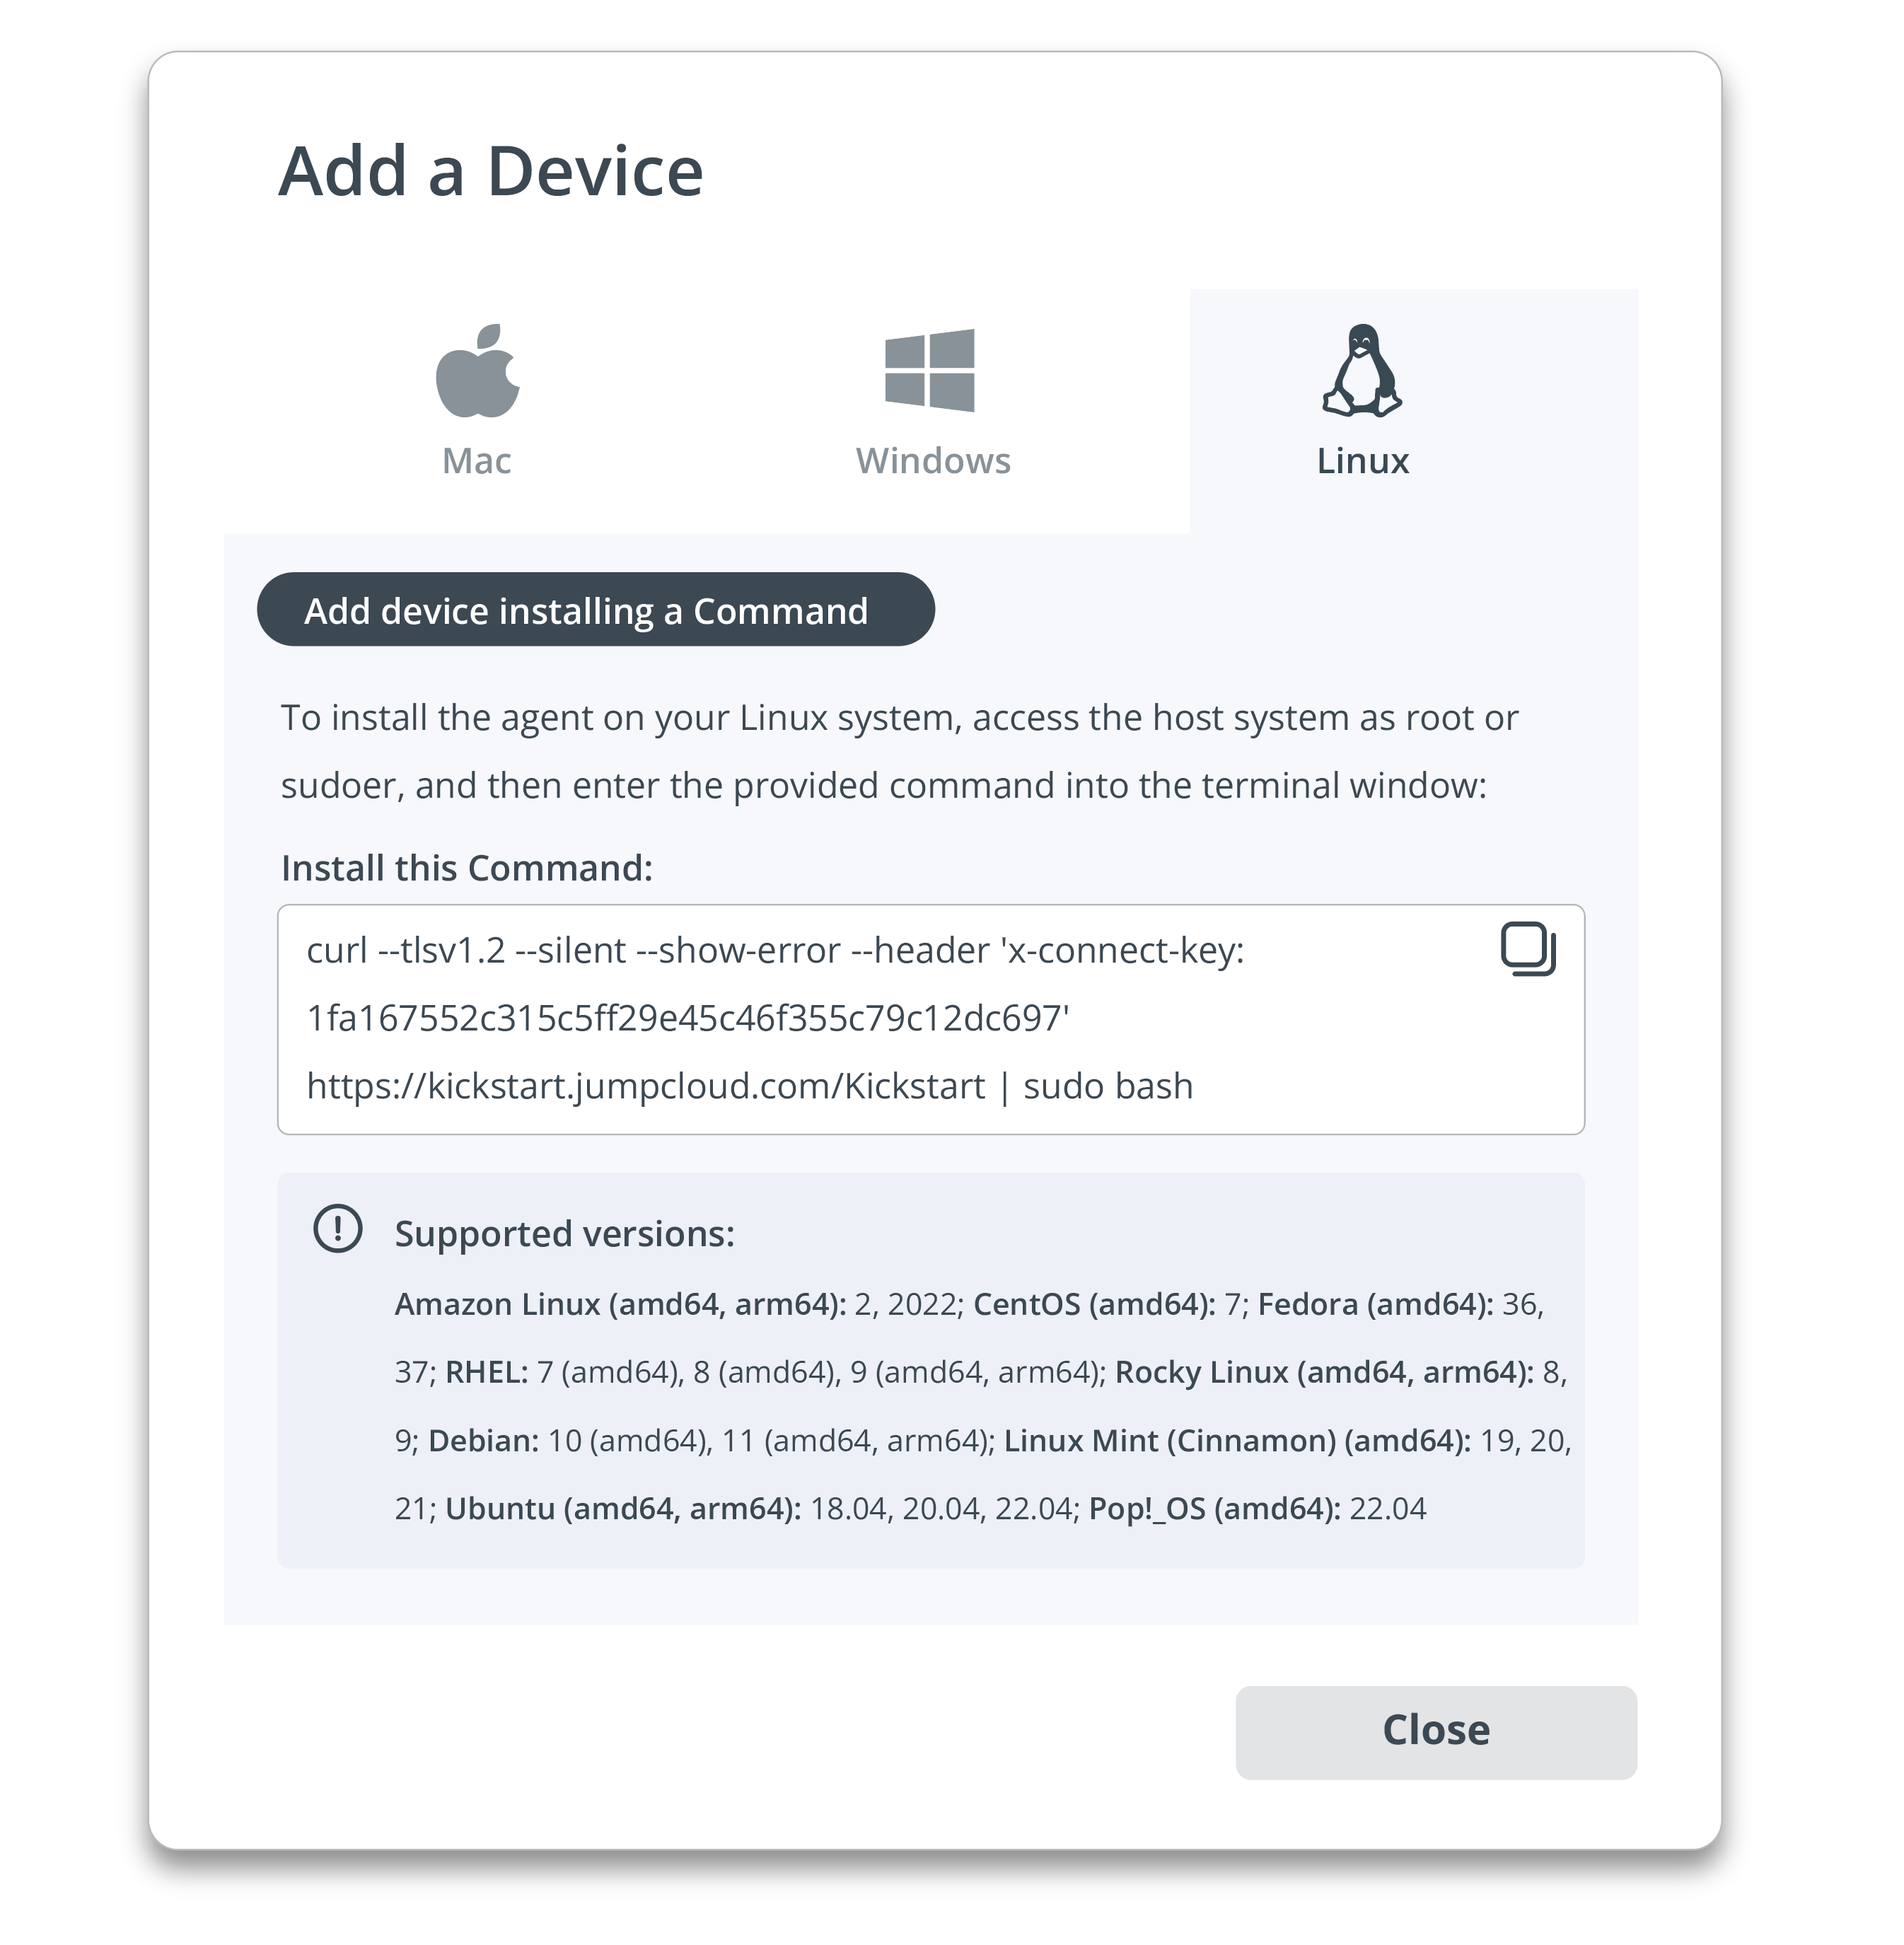
Linux
Linux devices are added via installing a Command.
Filters
Use filters for displaying specific devices on the page. The filter categories are Status (Active or Inactive), Device OS (Linux, Mac, or Windows), and MDM Status (Enrolled or Not Enrolled).
Device details
Selecting a device on the device page allows you to see specific details like hardware specs, operating system, management and network info, product status in GroWrk, and more.
Remote actions on devices
Certain steps for these actions differ for Mac and Windows devices.
Lock
When locking a Mac device, you are required to create a 6-digit PIN to save for unlocking the device later. Once the code of your choice is typed in, you will be able to lock the device.
Windows devices do not need a PIN and can be locked easily by confirming on the modal. The device will be unlocked the next time a user logs in with their credentials.
Restart
Both Mac and Windows devices can be remotely restarted by confirming the action through the modal. If the device is powered off and the status is inactive, the Restart action will be disabled.
Shut Down
Similar to remote restarting, both Mac and Windows devices are able to be remotely shut down by confirming through the modal. If the device is powered off and the status is inactive, the Shut Down action will be disabled.
Wipe
Remote wipe on Macs require creating a 6-digit PIN for unlocking devices to move to the Setup Assistant. The modal informs you that if they have a Mac equipped with Apple silicon processors or the Apple T2 Security Chip operating macOS 12 and later, the Erase All Contents and Settings process will begin, erasing the user data container.
Windows devices do not need a PIN for this step. You or the user administering the wipe is informed all data on the hardware will be deleted and cannot be restored. Once reinstallation of the Windows software is complete, the device will restart.