Freshservice
Learn how to integrate your Freshservice account to GroWrk to improve your IT workflow.
Connect your account
- In the Integrations Setup page, enter your Freshservice URL and API Key.
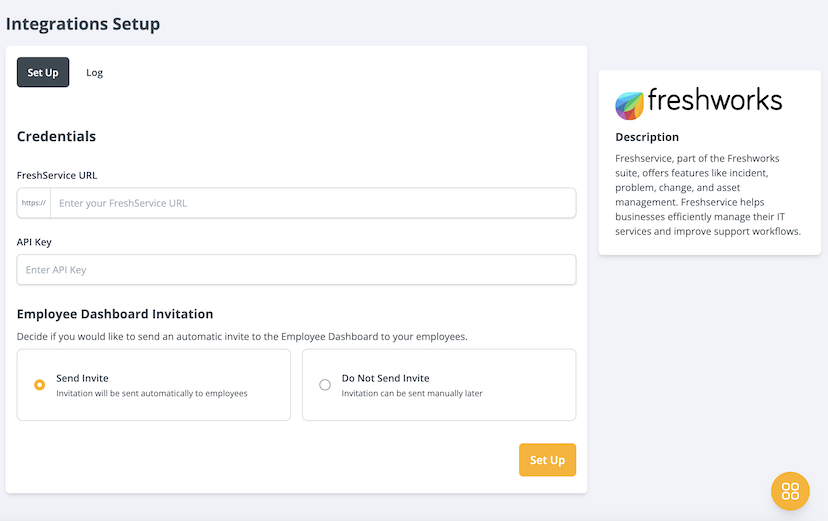
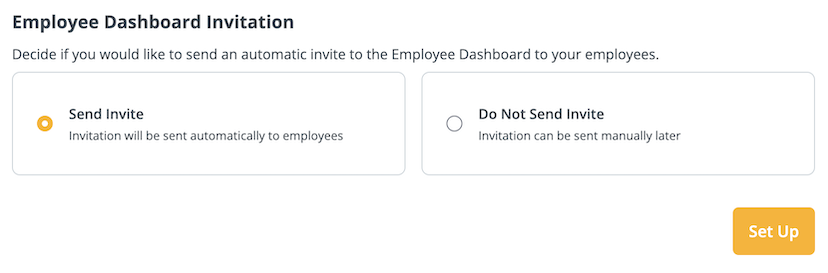
- Select whether to send an invitation to the Employee Dashboard to your employees who will be synced. Select Set Up.
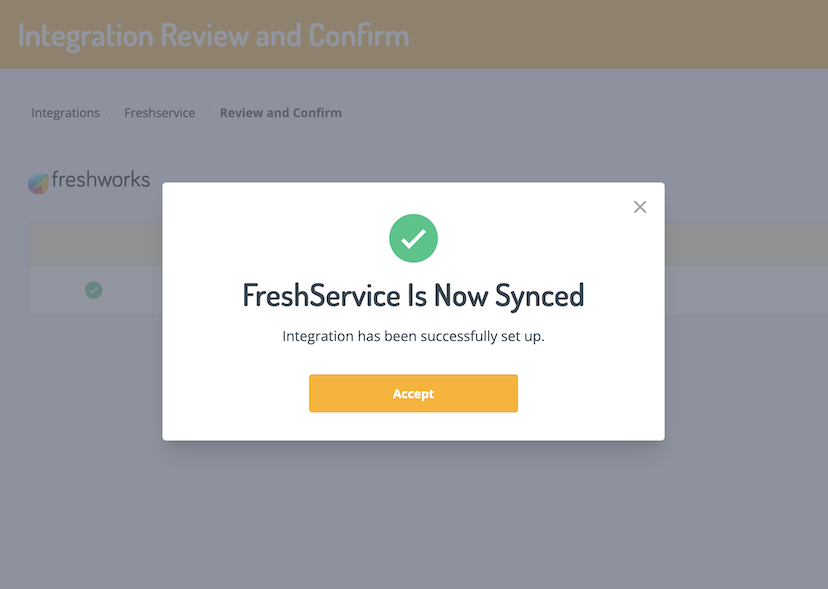
- You’ll be notified that the integration has been synced.
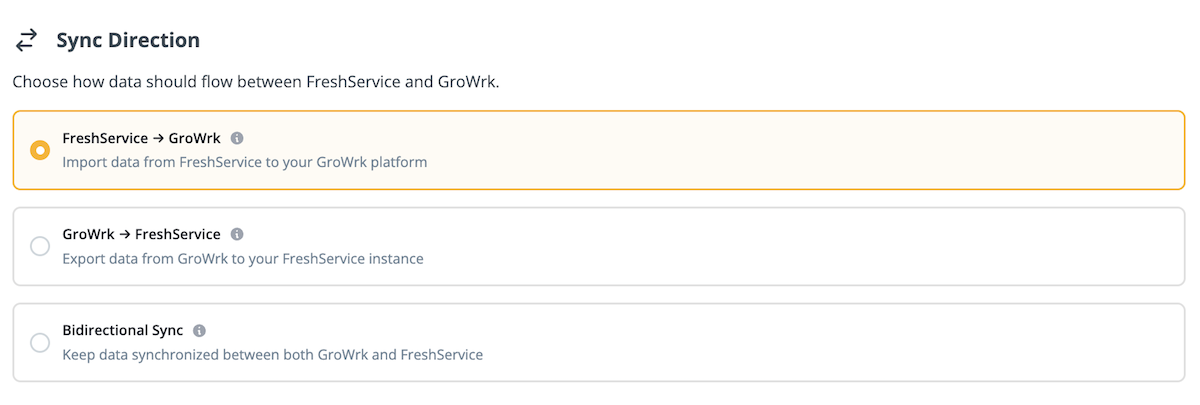
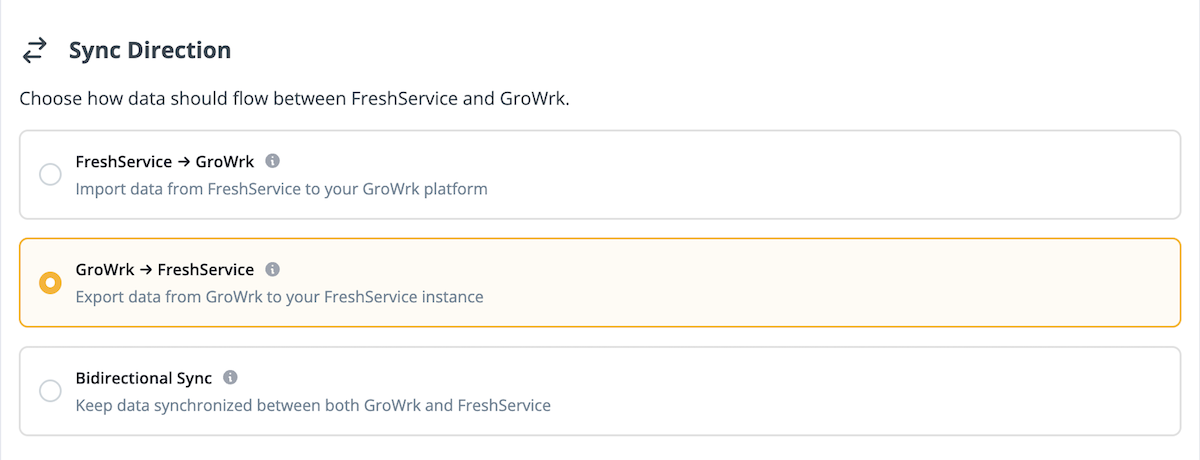
Choose from three sync options to control your data flow:
- Freshservice → GroWrk: Data is imported from Freshservice into GroWrk
- GroWrk → Freshservice: Data is exported from GroWrk to Freshservice
- Bidirectional Sync: Data flows in both directions between systems
Filters
If you select Freshservice → GroWrk or Bidirectional Sync, in the Filters tab, set your data filtering preferences. There are two groups of filters: for employee data and for product data. Customize and set filters for syncing your account data.
- In the Integrations Setup page, select the Filters tab.

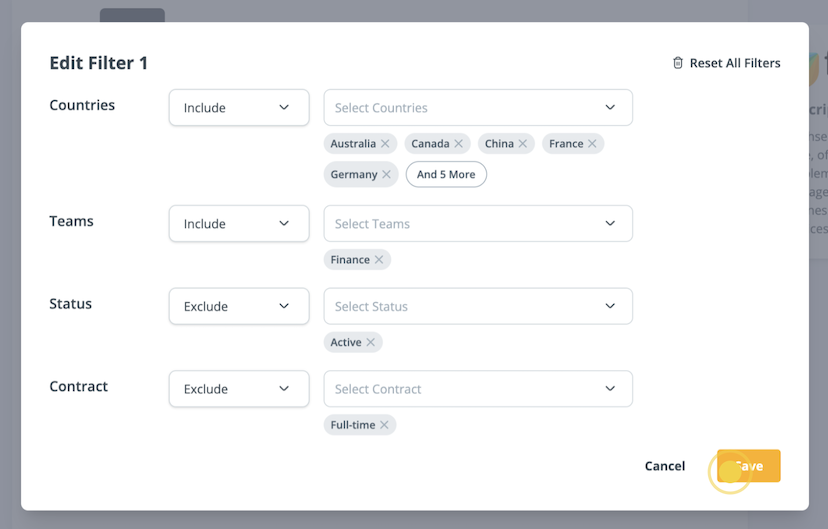
- To edit filters, select the edit icon.
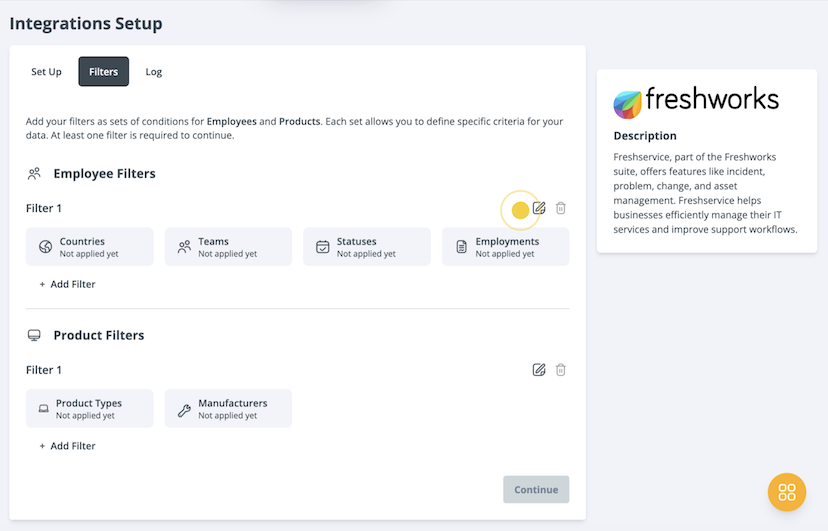
- Set up employee filters. Select the filter type (Include or Exclude) and make your filter selections. Select Save.
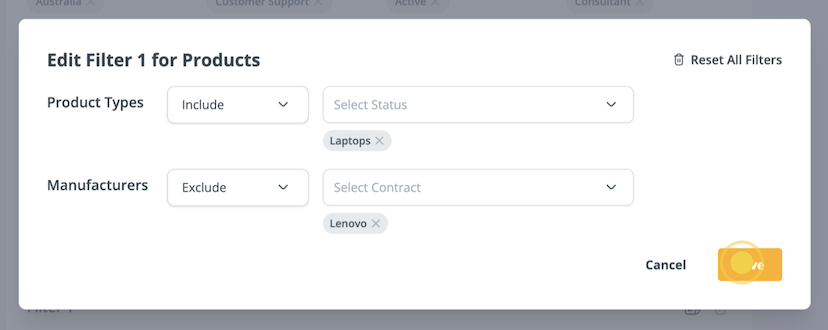
- Set up product filters. Select the filter type (Include or Exclude) and make your filter selections. Select Save.
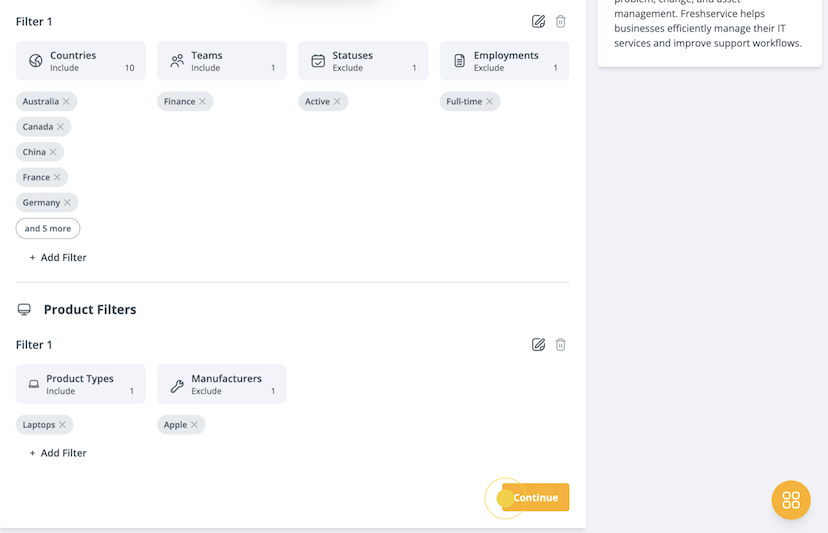
- Select Continue to save and apply the filters to your data.
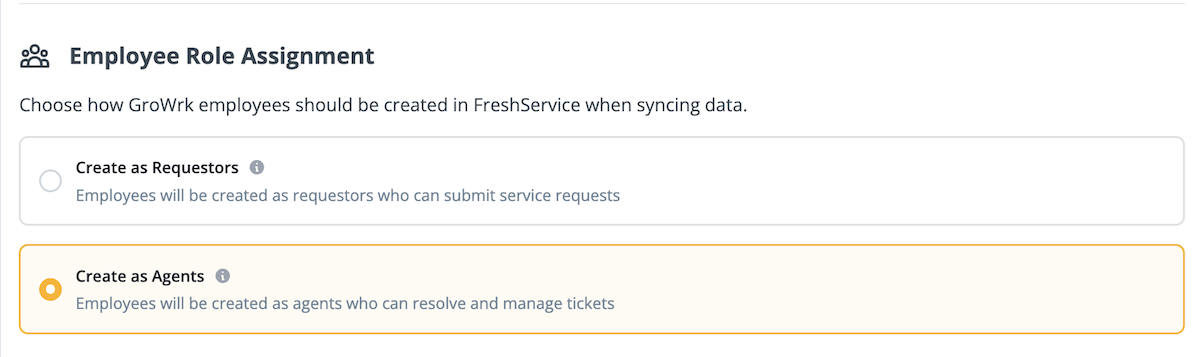
Employee Role Assignment
Select whether employees created in GroWrk should sync as Requestors or Agents in Freshservice.
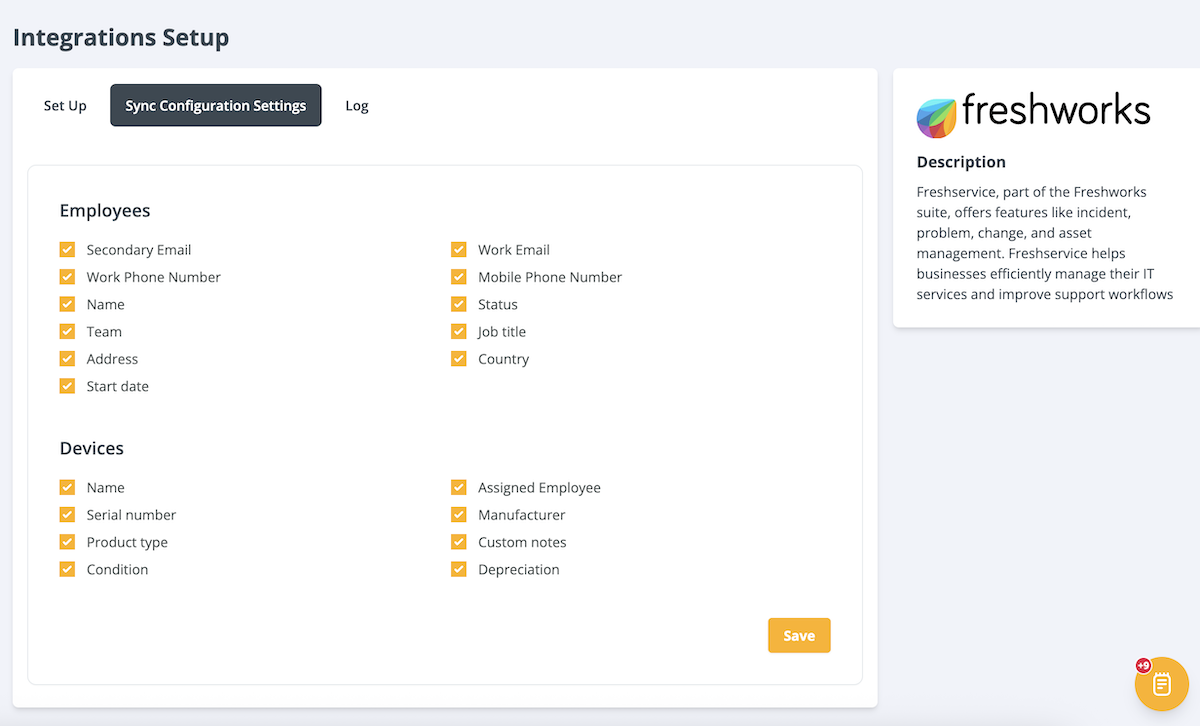
Synced Fields
If you select GroWrk → Freshservice or Bidirectional Sync, you will need to select fields in the Sync Configuration Settings tab.
- In the Integrations Setup page, select the Sync Configuration Settings tab.
- Select the fields for Employees and Devices that will be synced. Select Save.
- You will need to resync the integration to apply the changes. Select the Set Up tab. In the Resync section, select Update.
The following employee fields can be selected:
- Secondary Email
- Work phone number
- Name
- Team
- Address
- Start date
- Work email
- Mobile phone number
- Status
- Job title
- Country
Notes:
- The Country field syncs with the Location field in GroWrk.
- The Start Date field syncs with the Created At field in GroWrk.
The following device fields can be selected:
- Name
- Serial number
- Product type
- Condition
- Assigned employee
- Manufacturer
- Custom notes
- Depreciation
Devices will only be synced if they are assigned and have a serial number indicated.
Requestor API Configuration
In the Requestor API Configuration section, use the toggle to enable or disable syncing Requestor information.

Resync
The Freshservice integration automatically resyncs every 24 hours.