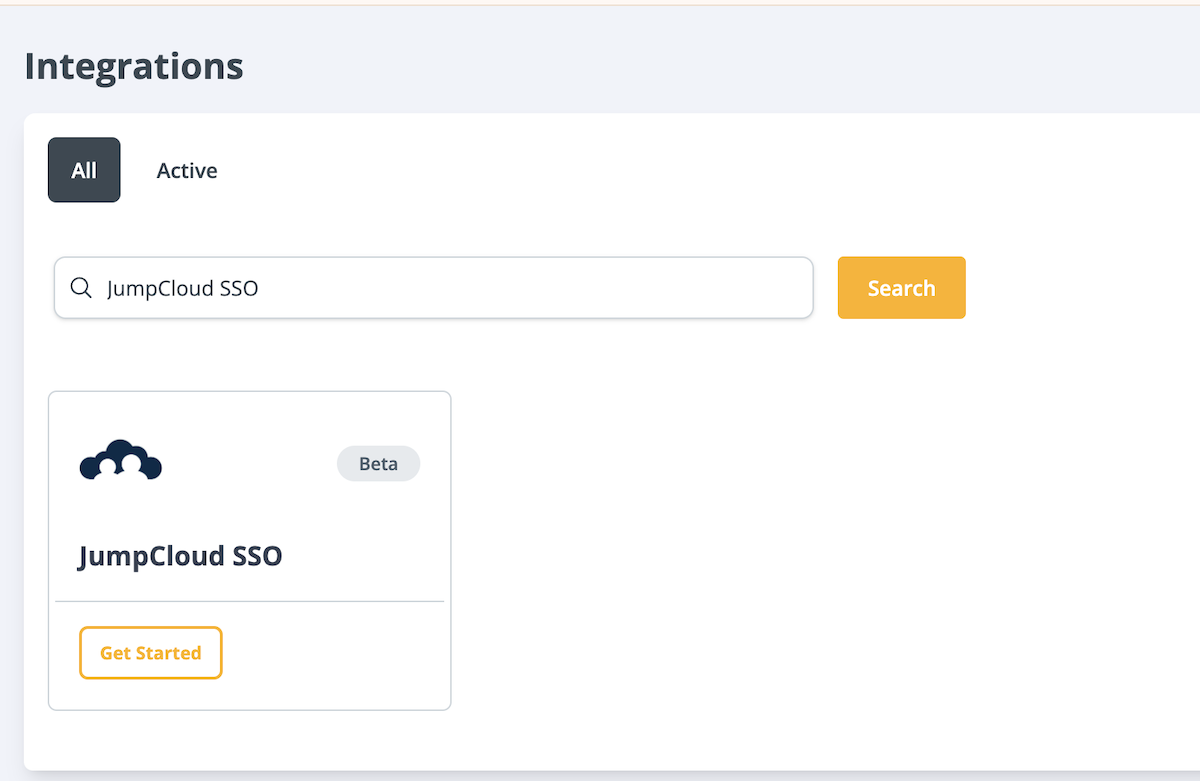
In the Integrations tab in your Dashboard, search for the JumpCloud SSO integration. Select Get Started.
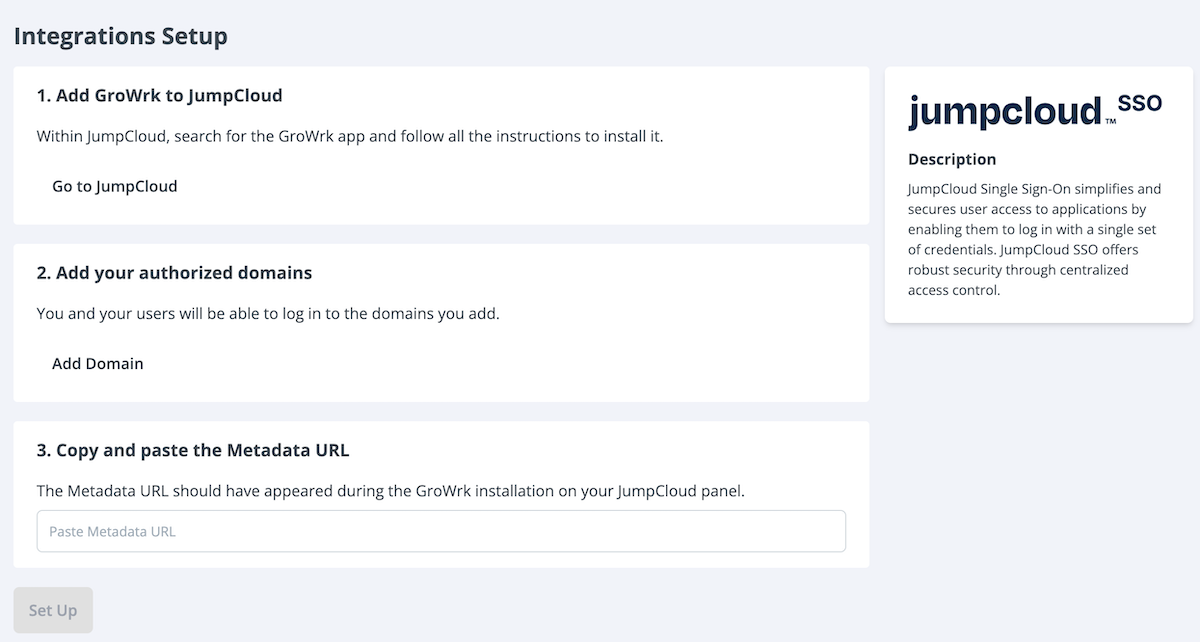
On the setup page, there are several steps to complete. Select Go to JumpCloud, and you’ll be redirected to JumpCloud’s website.
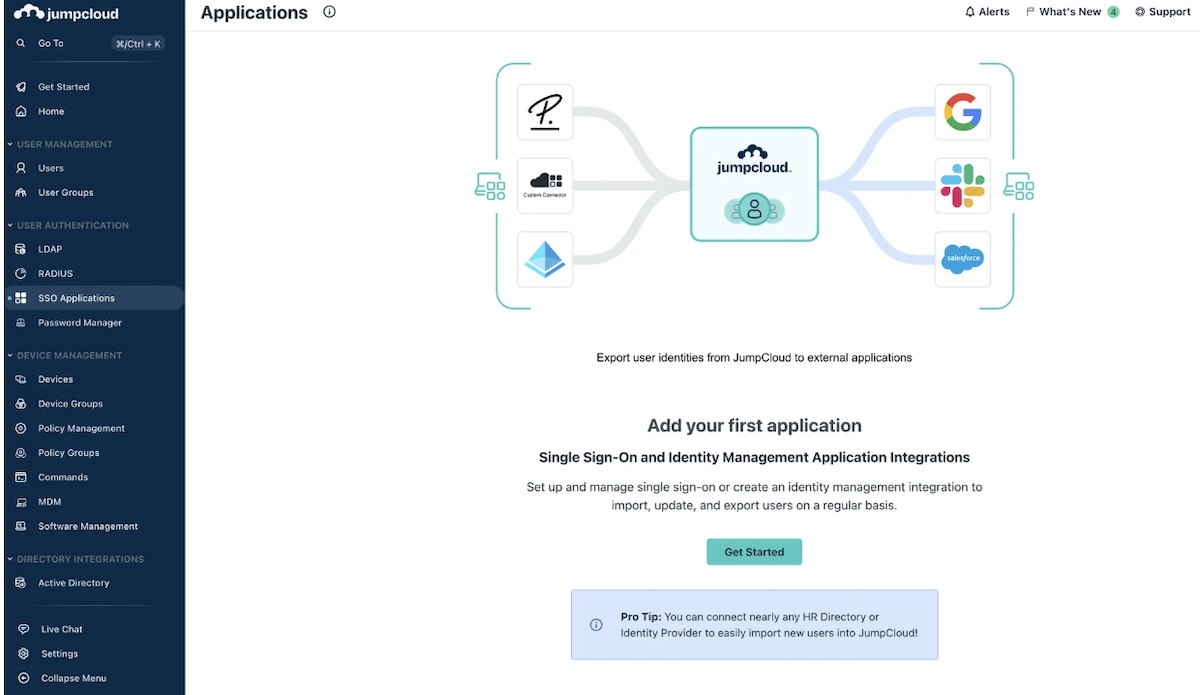
After logging in with your admin account, go to SSO Applications. Select Get Started.
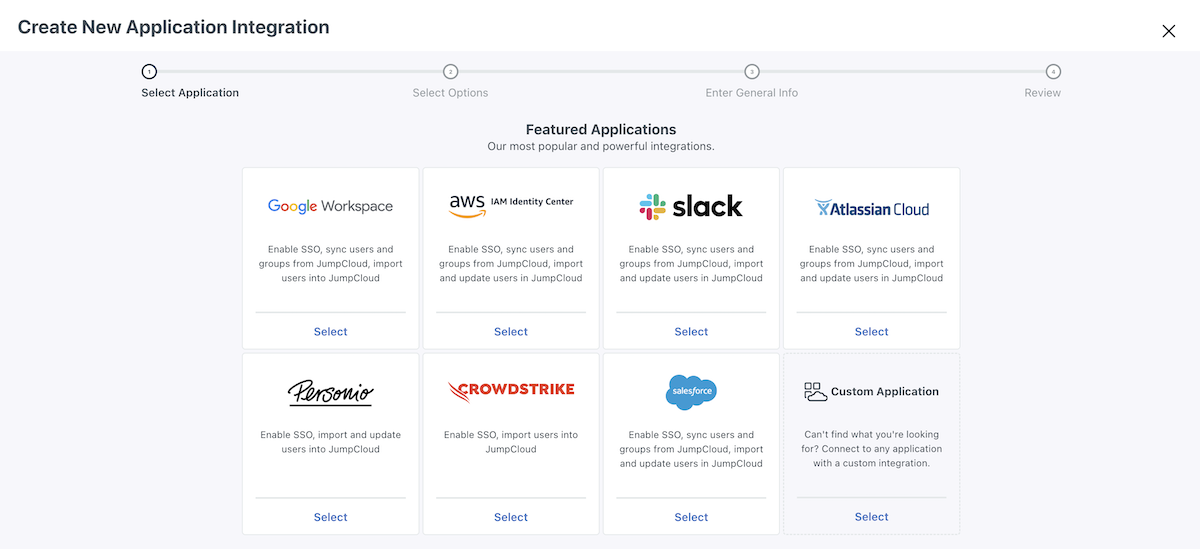
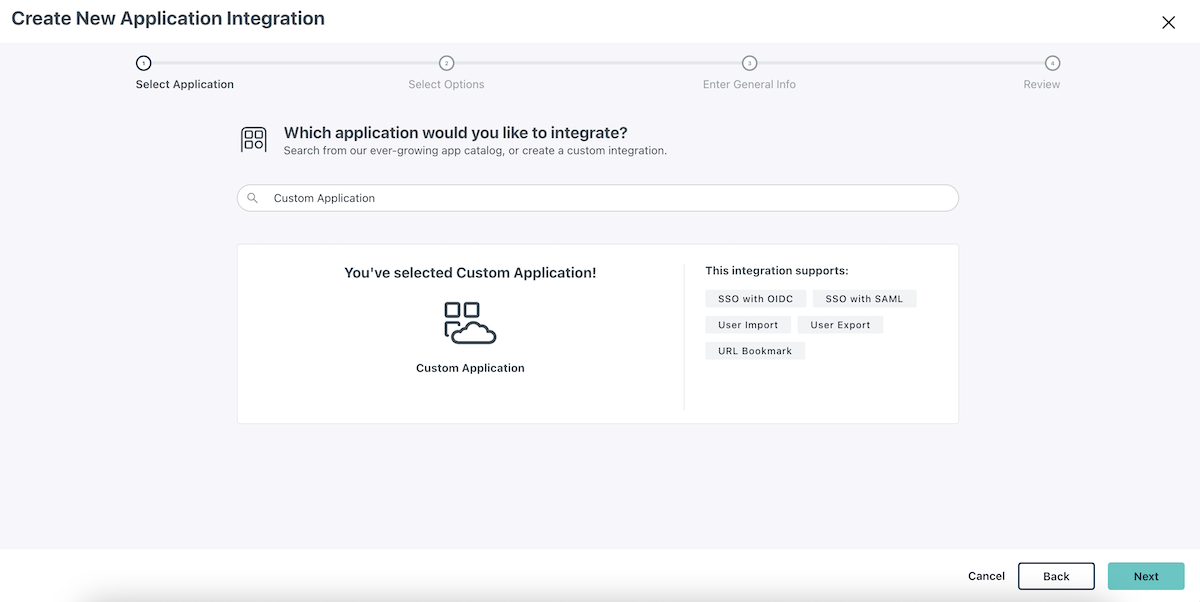
On the Create New Application Integration page, locate and select the Custom Application option on the bottom right.
Select Next.
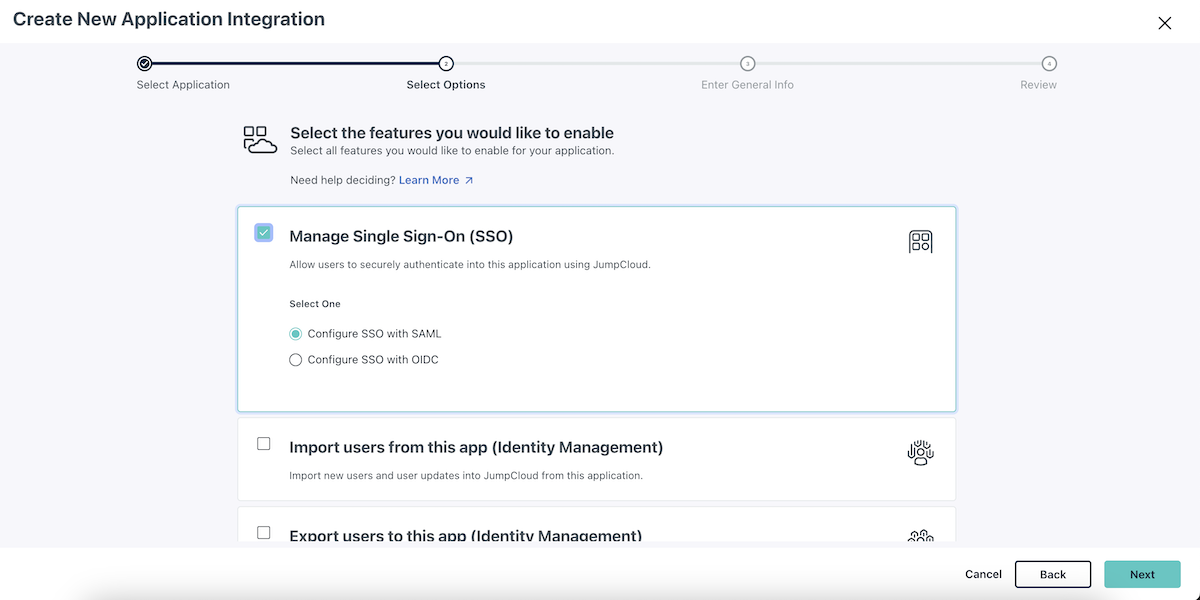
In the next step, select Manage Single Sign-On (SSO) then select Configure SSO with SAML. Select Next.
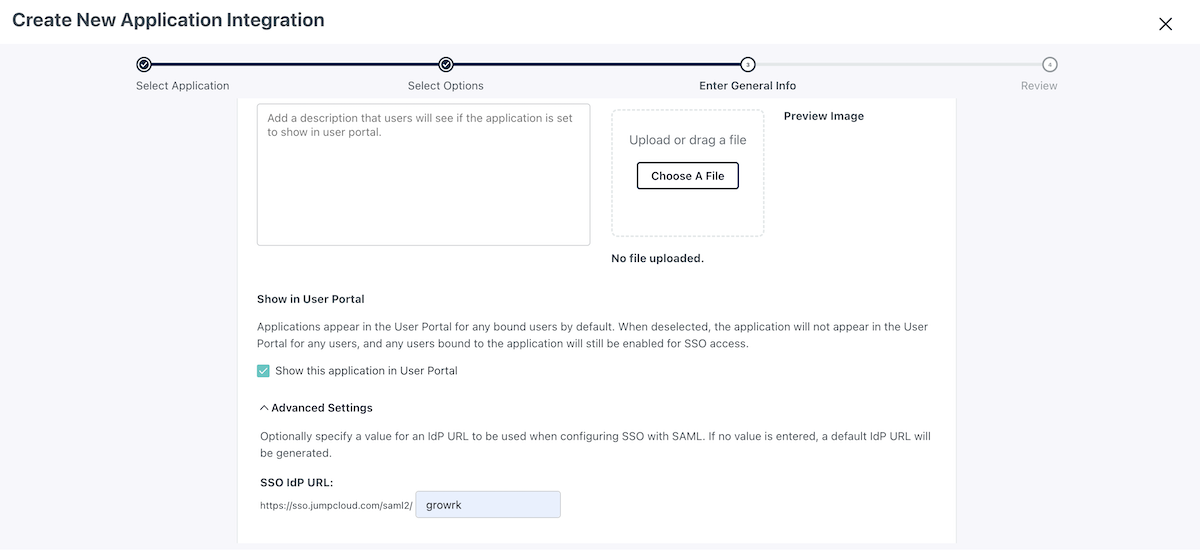
Set your general settings.
Set the display label to GroWrk
Upload a file to display a logo
Advanced Settings: Specify the value for an IdP URL to be used when configuring SSO with SAML as growrk
Select Save Application, then Configure Application
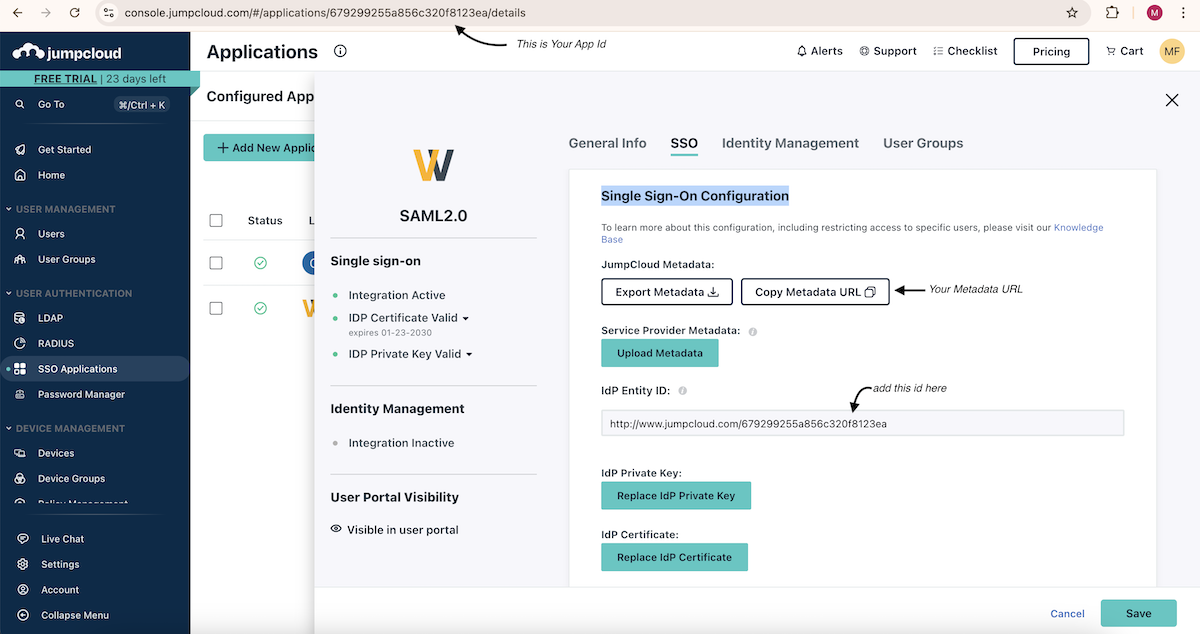
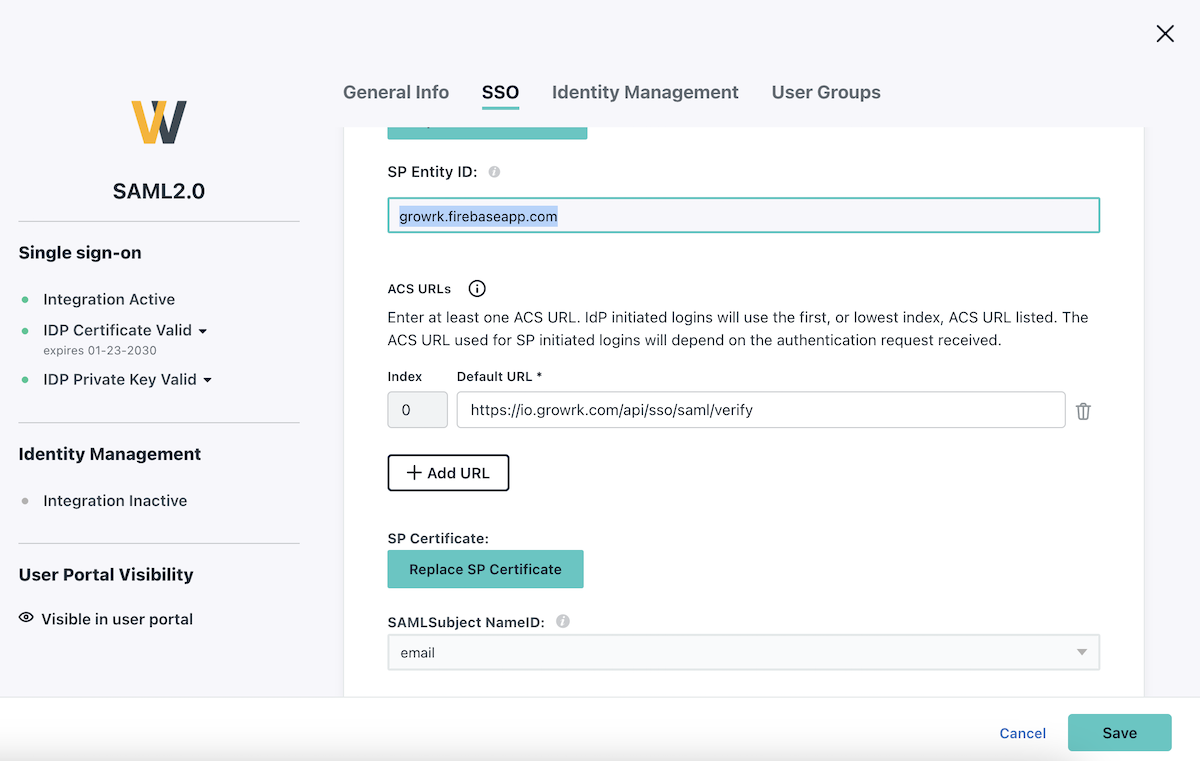
Set your Single Sign-On Configuration. You can also find your metadata here in this step, which will be needed later on.
IdP Entity ID is a globally unique identifier for an Identity Provider (IdP). In JumpCloud, it is a URL that starts with http://www.jumpcloud.com/, followed by a unique ID generated when you created the application.
Enter the following in the fields:
In the SP Entity ID field, enter growrk.firebaseapp.com.
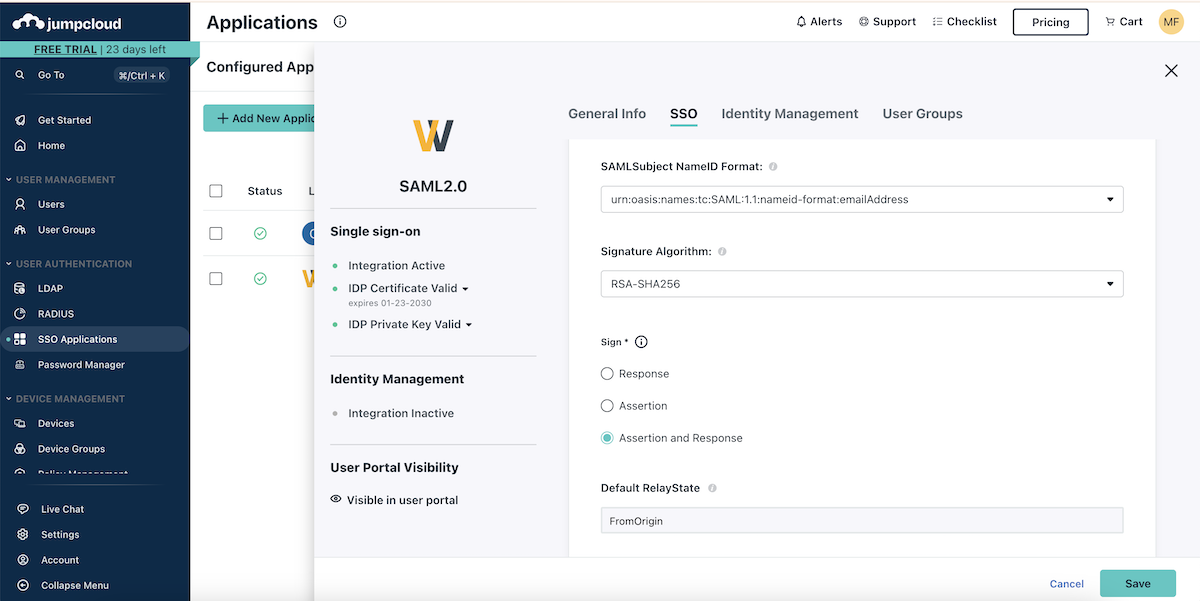
In the SAMLSubject NameID Format dropdown, select urn:oasis:names:tc:SAML:1.1:nameid-format:emailAddress
In the Signature Algorithm dropdown, select RSA-SHA256
For Sign, select Assertion and Response
In the Default RelayState field, enter FromOrigin
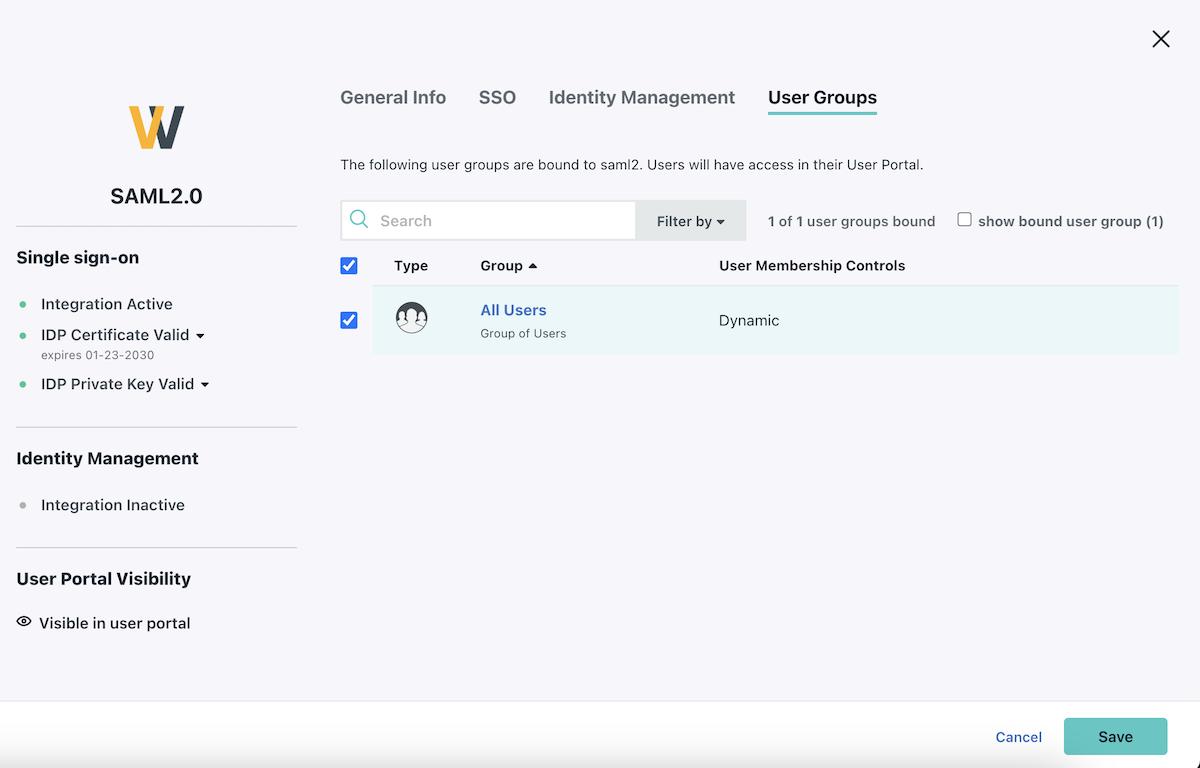
In the User Group tab, select the group of users that will have access. Select Save.
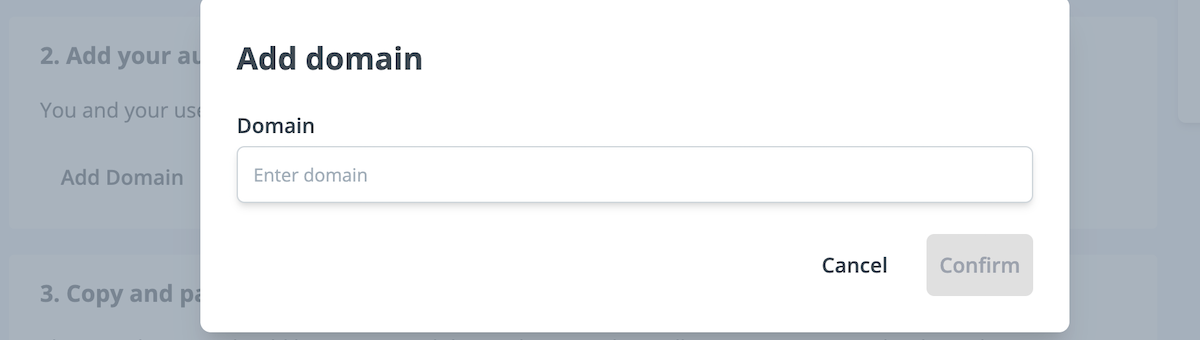
Back in your GroWrk Dashboard, add your authorized domains.
Paste the Metadata URL. This can be found in the JumpCloud admin account by going to SSO Applications > your Growrk APP > Copy Metadata URL. Select Set Up.
You’ll be notified that JumpCloud SSO has been set up.