Dayforce
Learn how to integrate your Dayforce account with GroWrk to improve your HR workflow.
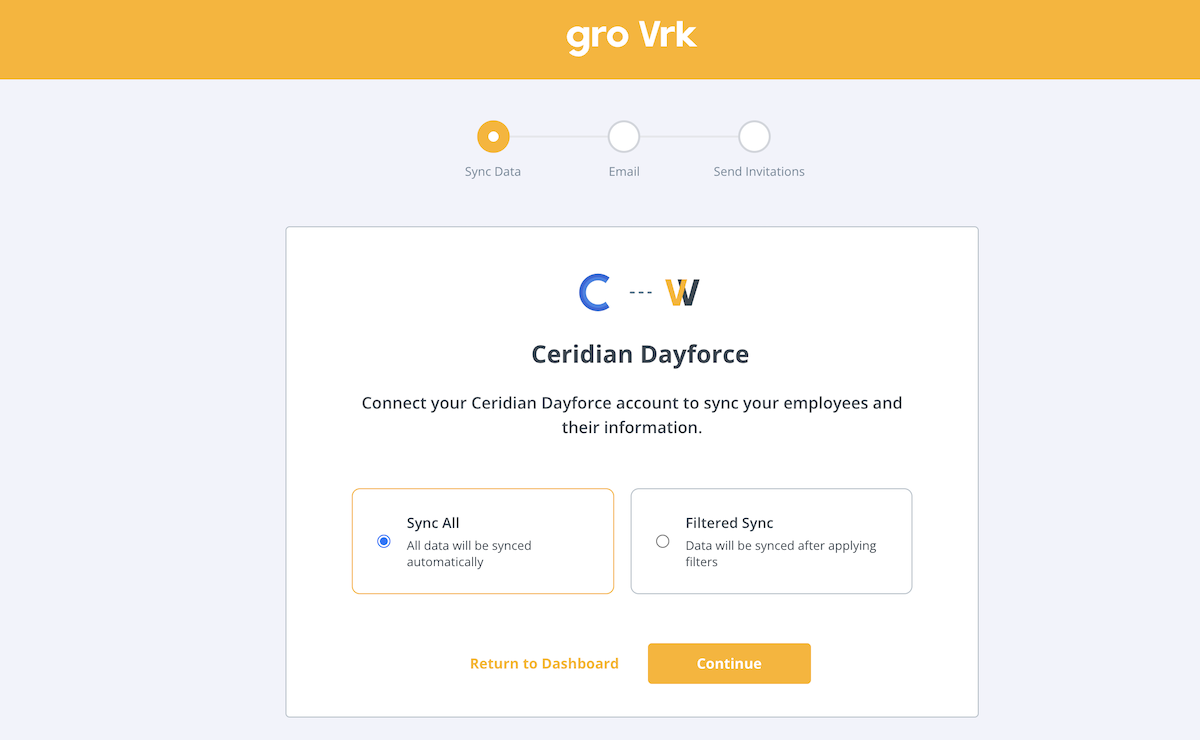
Connect your account
- In the Integrations Setup page for Ceridian Dayforce, select Connect.

- Choose whether to sync all your data or use filters to curate the data that is synced to your GroWrk account.
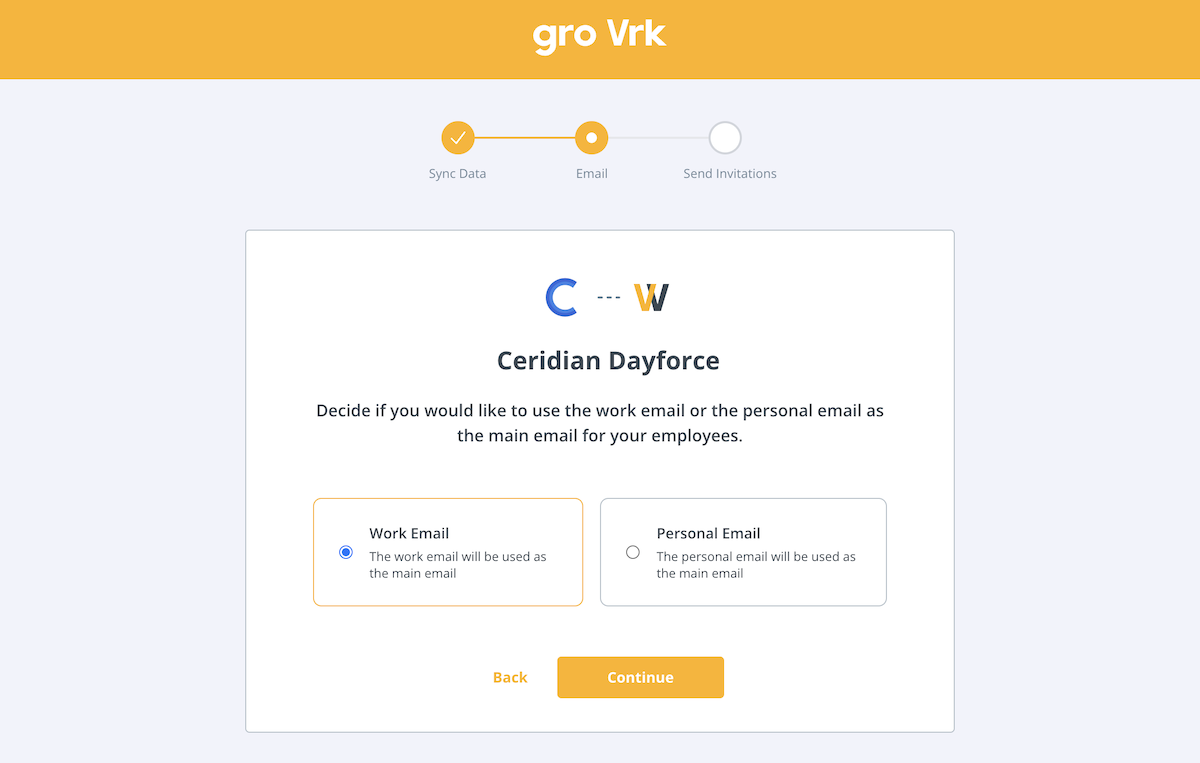
- Choose whether to use your employees’ work or personal emails as their main email. Select Continue.
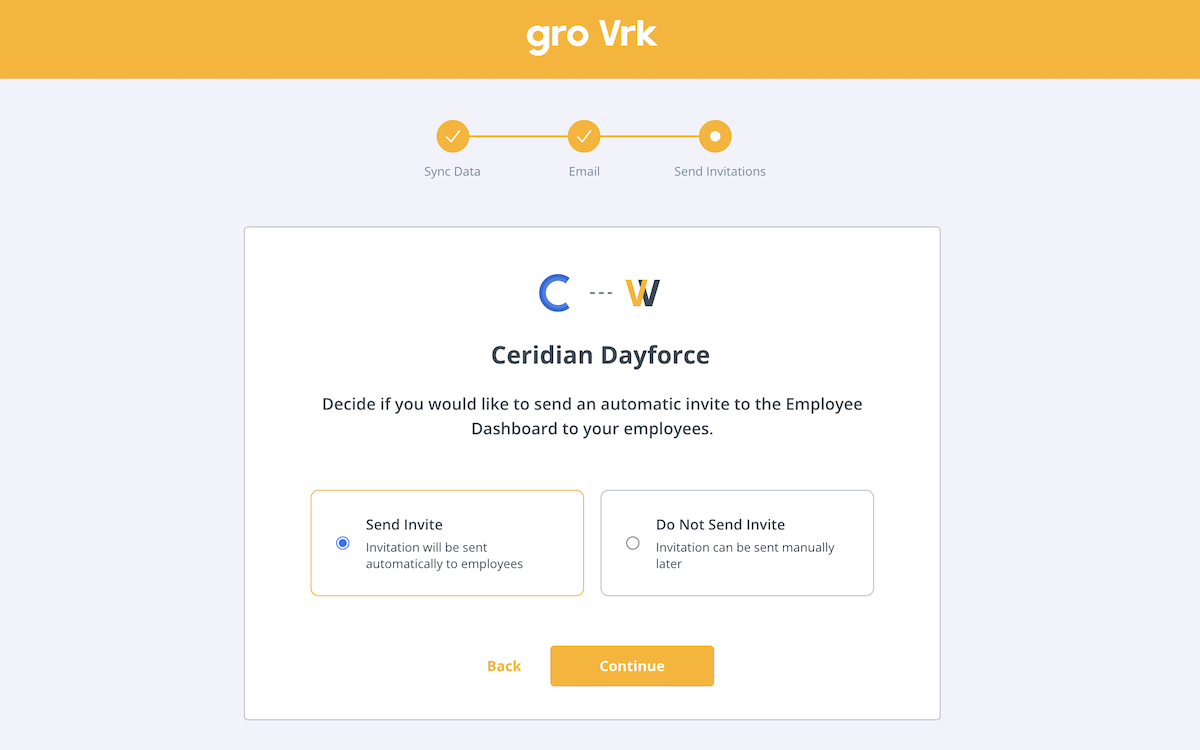
- Choose whether to send invitations to the Employee Dashboard for your employees to access product updates and confirm package deliveries.
- An administrator role is required to continue. Select I am an admin.

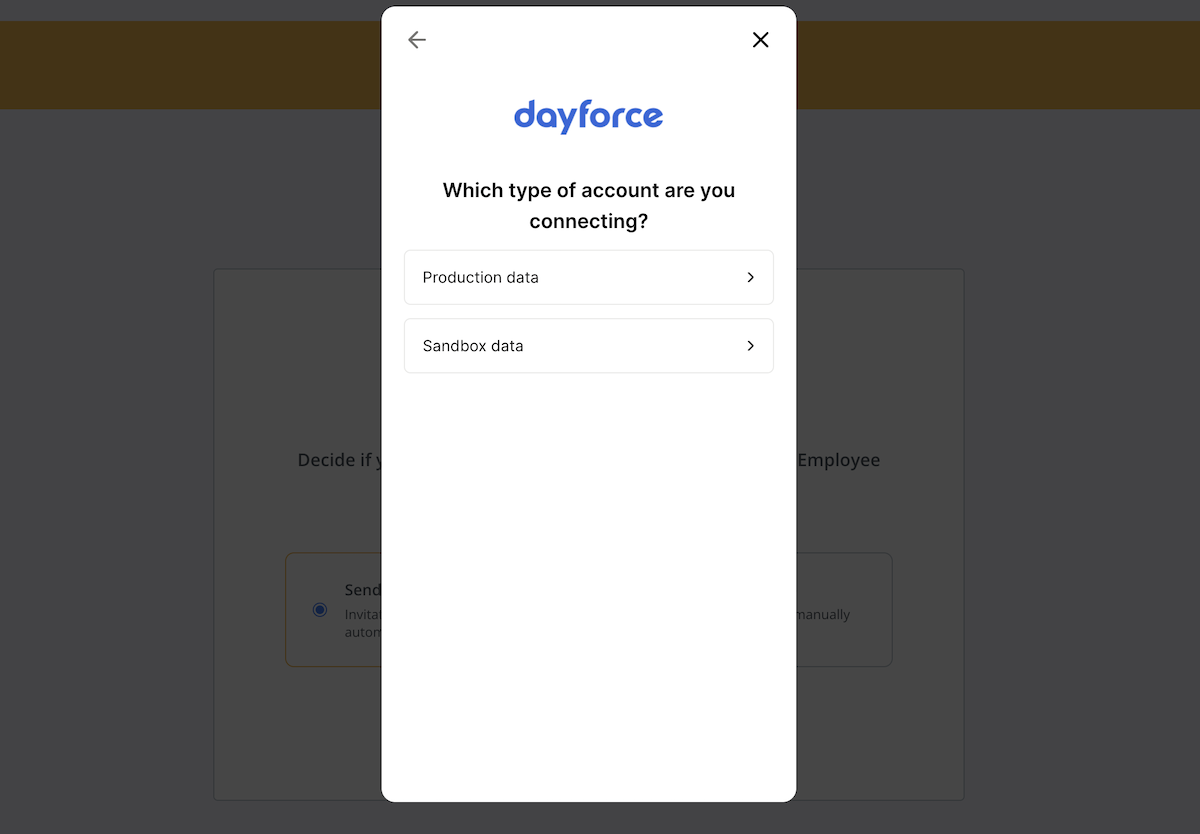
- Select whether the account you are connecting is a production or sandbox account.
- GroWrk will have access to the following pieces of data. Select Next.

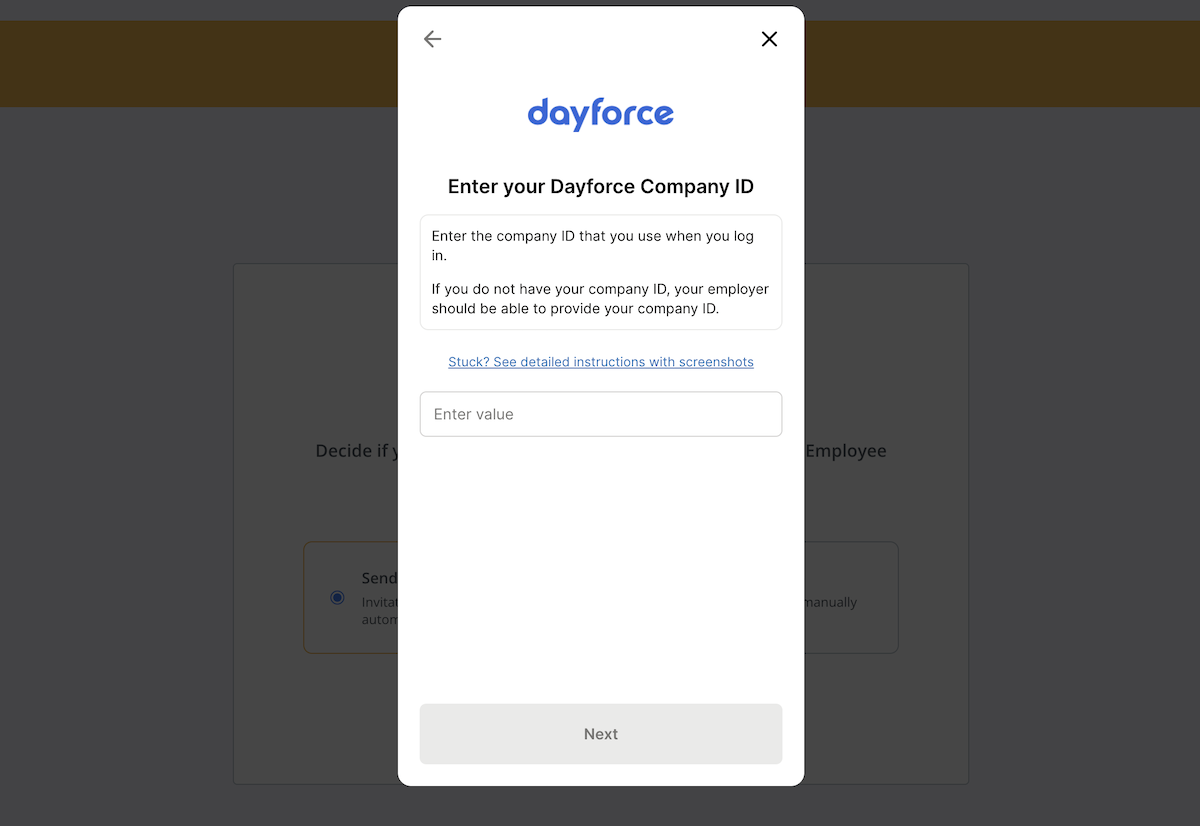
- Enter your Dayforce Company ID. To set up your Dayforce account before connecting, follow the instructions below.
Configure feature access
- From the menu button in the top left of your screen, select System Admin > Roles.

- Navigate to Features. Ensure HCM Anywhere and Web Services are checked.

- Expand Web Services and make sure that Read Data is checked. If you need to PATCH/POST data, you will need the associated checkboxes marked as well.

Configure authorizations
- Navigate to Authorizations.
- Select Can Read for the following (depending on your use case):
- Employee Contact Information
- Employee Contact Information - Business
- Employee Contact Information - Personal
- Employee Personal Information
- Employee Personal Information XrefCode
- Employee Status Information
- Employee Work Assignment – Primary Records
- Employee Work Assignment – Secondary Records
- User Information
Configure web services field level access
- Navigate to Web Services Field-level Access.
- Navigate to the RESTful Services > Human Resources > Employee

- Enable EffectiveStart, EffectiveEnd, and XRefCode.
- Follow these instructions below:
| If you need... | Action Required |
|---|---|
| Names | Enable FirstName, LastName |
| Employment Status | Right-click Employment Statuses and Employment Status Group and Select All |
| Location Information | Right-click Locations and Select All |
| Emails/Contact Info | Enable Contacts and Addresses (and all child nodes) under RESTful Services > Human Resources > Employee |
| Start Date | Enable StartDate |
| Groups | Enable RESTful Services > Configuration > Location (and all child nodes) AND RESTful Services > Human Resources > OrgUnitInfos |
Configure org-level access
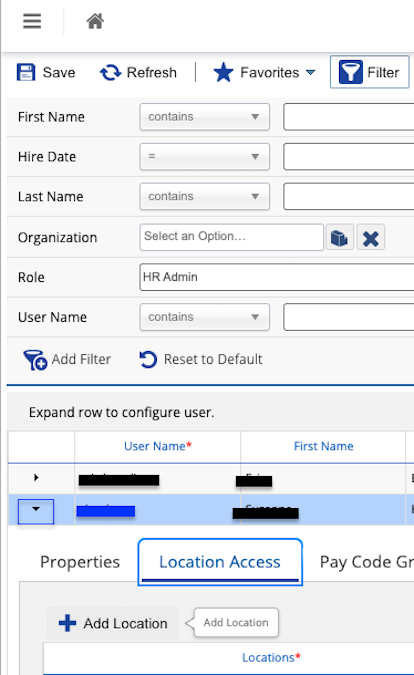
- Navigate to System Admin > User. Please note that the user authenticating must have "Can See Self" enabled.

- Expand the user by selecting the arrow as shown in the blue box below. Select Location Access, + Add Location, and add the Company Level Location.
Authenticate with your credentials in the linking flow
Back in GroWrk, enter your Company ID, User Name, and Password, then submit.
Add an IP network restriction
If you encounter a syncing error after connecting your account, follow these steps in Dayforce to troubleshoot:
- Go to System Admin > IP Network Restrictions (the admin role needs access to this feature).
- In the System section, select Dayforce Service. This is the restriction type that applies to “external applications interacting with Dayforce through web services”.
- Select Add in the lower panel where you define ranges, and create an Allow rule:
- Check Rule Enabled in the left column.
- Set a Lower IP Address Range and aUpper IP Address Range.
- For a single IP address (e.g. 3.214.125.237), put the same IP in both fields. Use the following IP addresses below:
- 44.194.126.11
- 44.194.4.0
- 3.232.227.174
- 3.214.125.237
- 54.158.121.71
- 44.193.163.62
- For a single IP address (e.g. 3.214.125.237), put the same IP in both fields. Use the following IP addresses below:
- Set Access to Allow
- Add description such as “GroWrk Integration”. (Optional)

Synced fields
The following fields are synced from Dayforce to GroWrk:
- First Name, Last Name (Syncs with Name)
- Groups (Syncs with Team)
- Home Location (Syncs with Employee Address)
- Mobile Phone Number (Syncs with Phone)
- Work Email (Syncs with Email)
- Personal Email
- Employment Type (Syncs with Employment)
- Start Date
Resync
The Dayforce integration automatically updates every hour. You may manually resync your data using the Update button found in the Set up tab on the integration page.